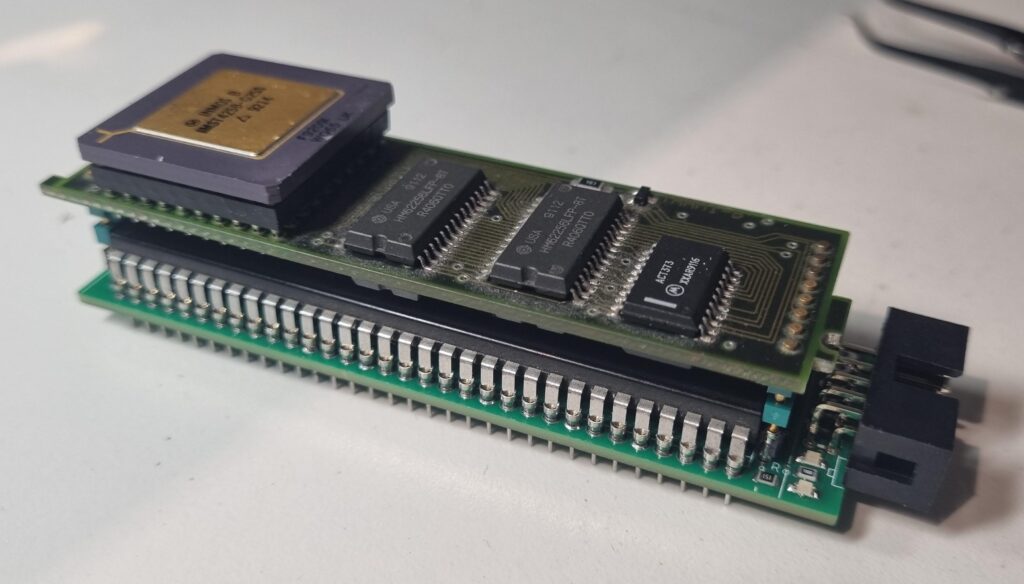
As promised in my blog entry nearly one year ago, here’s the (monster) post about this project.
Background
Boy, what a ride! This is definitely my most complex (and still ongoing finished) software reverse engineering stunt ever!!
When starting this venture I was a blue-eyed Mac user and just-for-fun programmer and never imagined to learn this much about those machines I loved since 1985… by the way of a very nice guy I was finally able to get an SE/30. Immediately I thought of accelerating the cutie.
This first post will give you an insight about the workflow, hardware and software used. Following posts will then guide you deep into the code…
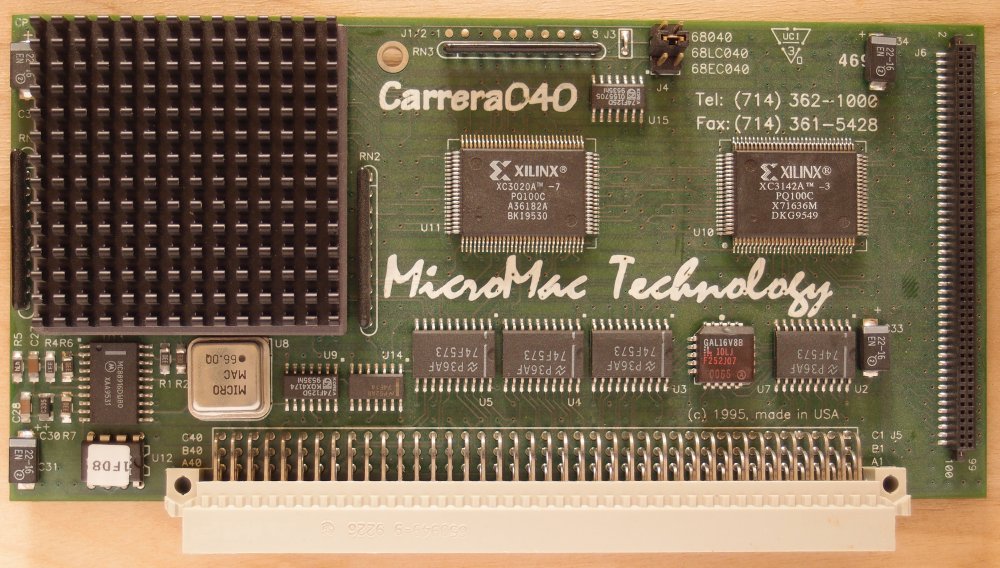
The MicroMac Carrera040
For many years I had a Carrera040 (or C040 for short) – a Motorola 68040 accelerator for Apple Macintoshes – in my locker which I bought in wise foresight without even owning a Mac to plug it in. The C040 I got was meant for usage in a Macintosh IIci, plugged into its L2 cache-slot. That said, using special adapters, the C040 could also be used in other 68030 Macs like the IIx, IIcx, IIsi, IIvi/vx and the LC/LC II.
Is the Carrera a Speedster?
What’s this question about? Well, you might also have come about notions of an accelerator called the ‘Mobius Speedster‘ which is pretty similar to the C040.
Well, it is and my wild assumption is that at one point MicroMac bought the design from Mobius. There’s even a leftover in the C040’s ReadMe:
“Applications that do not work with Quadra or Centris Macs are not likely to work on ‘040 accelerators, including the Carrera040. Generally, these incompatibilities are limited to the ‘040’s copy-back cache, or FAST mode on the Speedster.“
So when I had my glorious SE/30 sitting on my desk it immediately came to my mind to make this card running in it.
You have to know, that the SE/30 is a somewhat shrinked-down version of a Mac IIx which again is pretty close to the IIci – and there was an adapter in existence to use another popular IIci accelerator in an SE/30 (Daystar Turbo 040). But it’s very rare and there’s next to no chance to find one. Anyhow, it’s doable, so I was hooked.
I stumbled across a cry for help in the 68kmla forum, a user owning such an adapter and a C040 tried to get it running in his SE/30… to no avail. So while still not having the proper adapter (yet) I thought “why not start looking into the driver while waiting for the hardware?”.
So the journey started…
MacNosy – a users nightmare, a hackers heaven.
My natural reflex is to reach deep into my tool-bag, get out my favorite disassembler/hex-viewer and start digging through its output. But for System 7 my bag was empty. Is there any disassembler at all?
While the good thing is, that most software packages which cost plenty of $$$ back then are abandonware today, the bad thing is that many are undocumented and unsupported. After some research it became clear that MacNosy was and still is the best m68k MacOS disassembler around.
Boy, this disassembler is powerful! But it seems to be written by Steve Jasic for, well, Steve Jasic. I know that kind of tools – I’ve written some of those… and never showed it to anybody because it was, erm, special. Prepare yourself for “everything will be different than you’ll expect it”. Steve gave a sh!# about UI or keyboard conventions. Cope with it.
Luckily there’s a very good review and some sort of documentation can be found here.
Same but different – which is where?
Does ‘A5-world’ ring a bell to you? No? Don’t worry, it was the same for me, even I am using Macs for a long time.
Even it’s an 68k system, there are so many things done different than e.g. in Amiga OS or Ataris TOS – so you have to learn a lot.
Because it would absolutely bloat this post, I will link to external pages explaining the used term. So watch for the first mentioning, it’ll be a URL…
The provided Carrera040 “drivers” consist of an INIT/Extension (“Startup Carrera”) and a Control Panel (“Carrera 040 1.8”).
In the provided readme file there’s the line “With version 1.8 we have included an extension which ensures the Carrera040 code to load very early in the boot process.”
And indeed, the INIT code does not do much more than loading a specific resource from the control panels resource-fork.
So I concentrated on the control panel (CP for short). Using ResEdit, you’ll find the main detection and control-code in its resource fork called “SPDR’ (SPeedster DRiver, got it?).
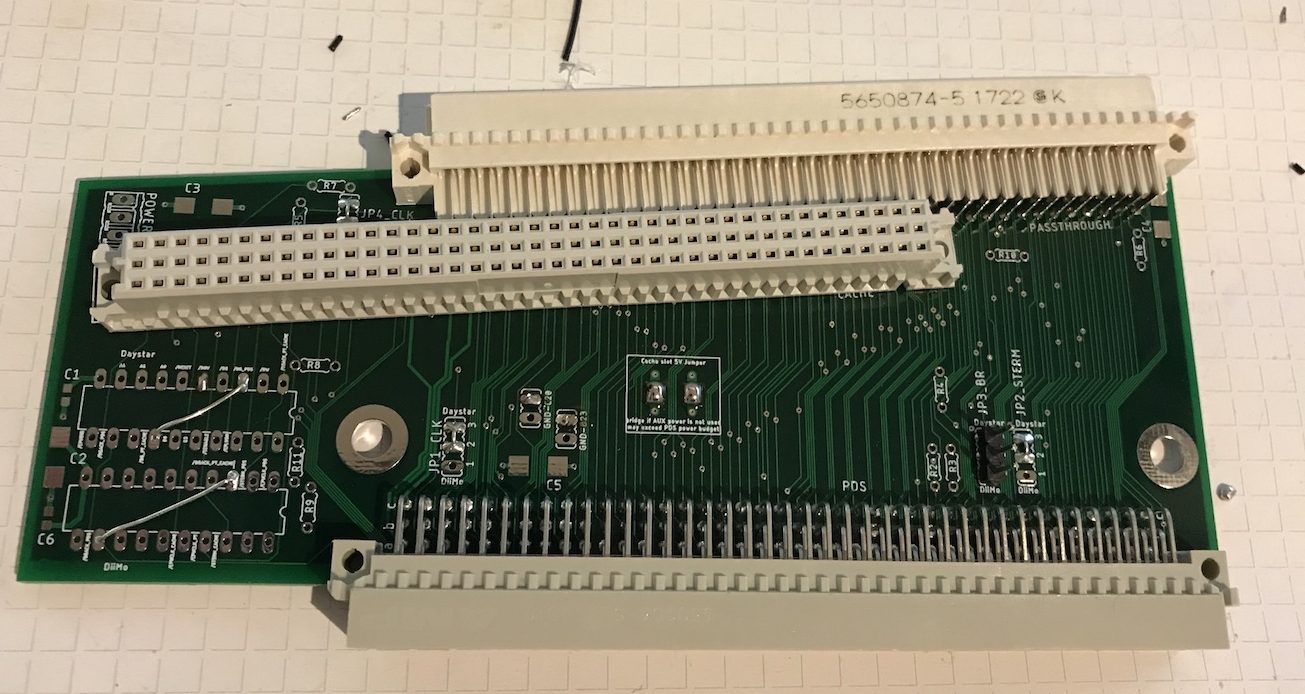
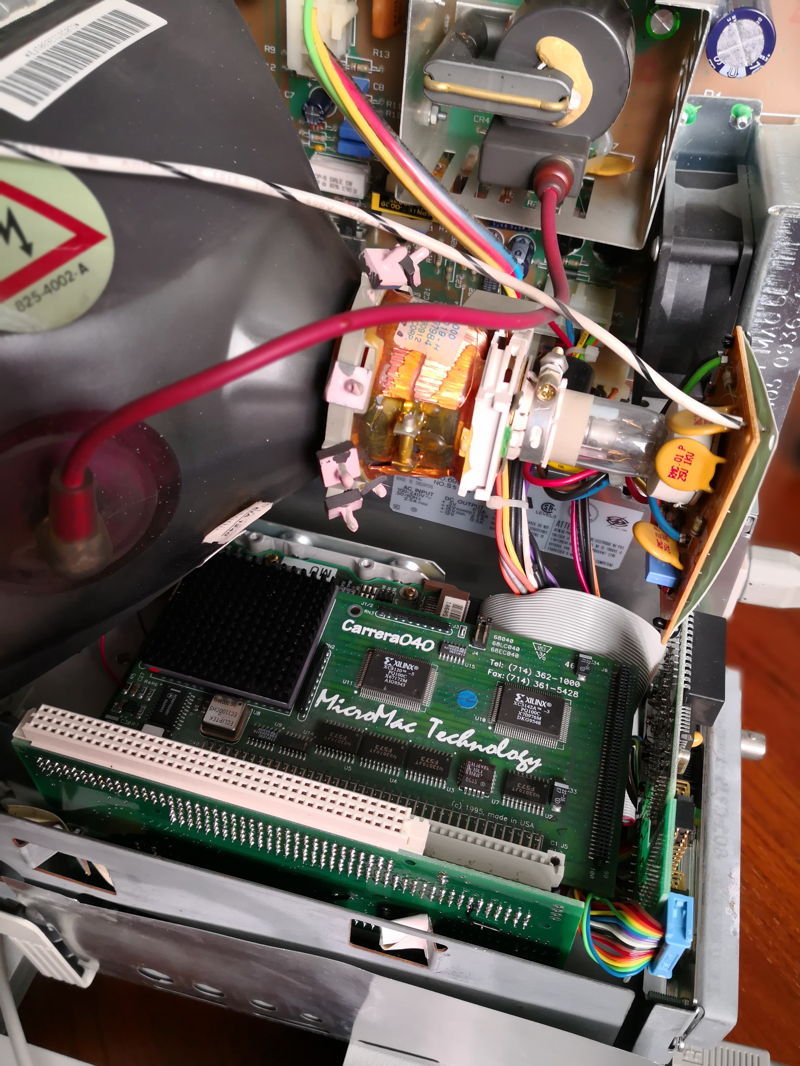
While working through the code, commenting whatever I immediately understood (which wasn’t much in the beginning), I stumbled over several things you should also have an idea about before reading the disassembly in the coming chapters – so here’s a growing reading list:
During all that code-gazing, head-scratching and learning-new-things-every-day great luck struck and I virtually-met ‘Bolle‘. A guy who created a clone of the mystical PDS-to-IIci-slot-adapter. Woohoo!
So after spending some Euros I was finally able to jump into the ‘the real thing’ and try my patches in-vivo, or watch the code being executed. Thanks again, Bolle!
The drill
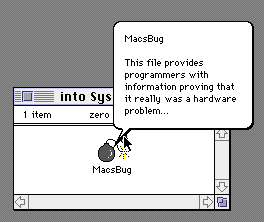
The weapon-of-choice for watching code run is definitely Macsbug, the official debugger from Motorola, heavily modified by Apple through all the years until MacOS 9.2.
Back in the days my contact with Macsbug was very brief. When a program ‘bombed’, I’ve entered “g” (for Go) and hoped the system will somewhat heal and keeps running…
Ok, now I had to be somewhat more serious – and my skills had improved over the last 20 years, so my routine turned into single-stepping and tracing through the code, skip certain instructions which might kill the code, watching all the registers and most important and watch how the Carrera “driver” behaves in an SE/30 vs. IIci.
I even created some macros (which have to saved into Macsbug own resource-fork!) and started an endless try-and-crash drill.
The working drill is tedious: You step through the instructions, while following your steps in the disassembled source, to the point where it crashes. Remember/note the point (address) where it crashed and try again.
This means you have to manually trace closer to “the edge” but try not to fall off the cliff. And when you did – and I did many times – rinse & repeat.
Sometimes you can ‘skip’ complete function calls containing hundreds of instructions (called ‘Trace’), sometimes you have to sit-through (i.e. single-step) a very, very, very long loop just to be sure it works 100%.
The next post/chapters will finally dive into the control panels code.
While it’s all about this specific ‘driver’ I’m sure it’ll help everybody who starts the adventure of understanding pretty low-level 68k Macintosh code.
That said, in Dec. 2019, continuously working with Bolle, we came to the conclusion it has to be a hardware problem and Bolle was able to prove this and most importantly found a way to fix it. There will be a 4th and final post concluding all of our findings.
The disassembled code of the Micromac Carrera 040 control panel is quite big: 6000+ lines of 68030/40 assembly…
While these posts might be entertaining and giving you an insight into classic MacOS driver code, they are also meant as a notebook to myself to get into the source quickly – especially after some weeks or months of distraction 😉
That said, I will not discuss each and every line of code. There are many parts which aren’t important (for now) or just not reached yet.
Still, it will take several parts/chapters to cover everything I worked on.
The complete code is available over here on GitHub and will updated every time I’m working on it.
Whenever I’m mentioning addresses I’m referring to this code on GitHub. NB: I will never use line-numbers as these might change during editing the source.
Also, when you’ll see a light-bulb 💡 somewhere, this is where I’m not sure and happy about enlightenment or comments from you 😉
This article is totally work-in-progress closed. E.g. every now and then my theories about what a certain code does changes, I learn new things and all the sudden whole blocks of code make sense… so this post will change/grow, too.Bolle did a lot of hardware research and in the end it became clear that the INIT/Driver has nothing to do with the non-function of the Carrera in an SE/30. After Bolle modified his adapter, the Carrera 040 is happily running in my ’30 now.But still, this series of posts is definitely worth reading, especially if you’re into reverse engineering 68k assembly code.
Approaching… difficulties.
What’s the main job of this code? From a 30000ft perspective the simple answer is “switching the Carrera040 on and off”, i.e. toggling between the hosts slower on-board 68030 and the insanely fast 68040 on the C040. At boot-time… as well as during the system is running (by user interaction).
Sounds pretty simple, huh? Lowering our flight altitude to 3000ft more things come into play:
Identify the hosting Macintosh. As mentioned in the previous chapter, the C040 was able to run in a Mac II, IIx, IIcx, IIvx, IIvi, IIvm, IIsi, IIci, LC and LCII… all of them different in many places. These differences have to be handled…
Down at 30ft we have to admit that there are differences between a 68030 and his younger brother 68040, mainly concerning caches, FPU and the MMU.
Finally hitting the ground, it’s becoming clear that it is everything but trivial to halt a running processor, save its complete context and start another (slightly different) processor with that. And back again…
Some given things before we start:
We will concentrate on the IIx “branch” as this machine is closest to the SE/30 like not-32bit-clean, memory-map, the GLUE chip, two real VIAs with the same register layout etc.
I learned from the code that the C040 is memory-mapped at 0x53000000 in some of the supported models, especially the IIx and IIci. This means 32bit addressing is a must (-> need “mode32” INIT or clean ROM)
I tried to comment as much as possible/understood inline (i.e in the code) – a good bit of 68k machine language knowledge is still required 😉
If something needs more explanation, I’ll try to provide this before the code quote or afterwards.
So this is the main routine (at 0x21FC):
main MOVEM.L A4-A6,-(A7)
MOVE.L D0,D7
MOVE.L #$31E,D0 ; need 798 bytes
_NewPtr ,CL_SY ; allocate requested amount of memory (D0) in system
; heap (returned in A0) and initialize to zeroes
TST D0 ; success?
BNE.S lae_6 ; nope, exit.
LEA data2,A1 ; else
MOVE.L A0,(A1) ; Init A5 world and save into data2
MOVEA.L A0,A5
MOVE #$A89F,D0 ; UnimplTrap
_GetTrapAddress ; (D0/trapNum:Word):A0\ProcPtr
MOVE.L A0,$29C(A5) ; save the trap addr into 2 places
MOVE.L A0,$2A0(A5) ; in the A5 world
BSR sysDetect ; Jump to Machine detection routine
BNE.S lae_6 ; success?
MOVE.L D7,D0
JSR 4(A6) ; We jump to the subroutine set in the detection routine
; for the second time, this time offset 4...
; i.e. we skip the 1st 'BRA' there
BNE.S lae_6 ; success?
BSR instFPSP ; Install Motos FPSP
BNE.S lae_6 ; success?
JSR 8(A6) ; That's the 3rd call in the handler call cascade (needs hack for MacsBug!)
BNE.S lae_6 ; success?
BSR proc32 ; works (get some RSC strings)
BSR proc43 ; install traps
BNE.S lae_6 ; success?
JSR 12(A6) ; That's the 4th call in the handler call cascade
BNE.S lae_6 ; success?
BSR proc41 ; works (atalk?)
BSR proc42 ; VIA stuff and such - BOOM
BSR proc29
MOVEM.L (A7)+,A4-A6
MOVEQ #0,D0
As you can see, there are 10 calls to subroutines- currently it crashes inside the 8th subroutine, currently called proc42… But let’s check these subroutines one by one.
sysDetect
This is the subroutine I had to “patch” to initially make the driver work with an SE/30. It starts at 0x2022 and does these things:
Check if the ‘Gestalt‘ trap is available at all (very good style!) else throw an error
If it is, read the machines Gestalt code into D0, throw an error if zero
Decide which ‘handler’ to choose given the Gestalt code.
Based on their Gestalt codes there are four groups of Macs defined in the following lines (0x204C – 0x20AC):
Mac II/IIx/IIcx — “dirty Macs”, not 32bit clean, no PDS
“Expansion I/O Space” from 0x51000000 to 0x5FFFFFFF
the C040 installs with an adapter right into the CPU socket in the II/IIx/IIcx
SE/30 is also “dirty”, need mode32 or IIsi ROM in slot
these machines also use the GLUE chip to emulate the VIA2 like the SE/30
Mac IIvx, IIvi, IIvm — special kind of PDS slot
there’s no mentioning of support on the MicroMac page
Mac IIsi, IIci
Kind of interesting because the si has the same PDS slot like the SE/30
Uses the RBV (Ram Based Video) controller which emulates the VIA2
Therefore totally different memory layout (VRAM at 0x00000000 mapped by the MMU etc.)
Mac LC, LCII, Color Classic
These share the same LC-PDS slot
If your Mac is one of those (or patched at 0x2058), you’ll branch into sys_check: (0x20BA) which will make sure you run at least System 6.0.5, have virtual memory switched off and jumps into the selected handler code (address saved in A6) at 0x20EA for the first time.
Here’s the code of what’s discussed above:
2022: sysDetect: MOVE.L #$A0AD,D0 ; Gestalt
2028: _GetTrapAddress newOS ; (D0/trapNum:Word):A0\ProcPtr
202A: MOVE.L A0,D2
202C: MOVE.L #$A89F,D0 ; UnimplTrap
2032: _GetTrapAddress newTool; (D0/trapNum:Word):A0\ProcPtr
2034: CMP.L A0,D2
2036: BEQ OS_bad
203A: MOVE.L #'mach',D0
2040: _Gestalt ; (A0/selector:OSType):D0\OSErr
2042: BNE bad_conf ; If we can't read it, fire general Error Msg
2046: MOVE.L A0,D0
2048: MOVE.L D0,2(A5)
; Check for several Mac models which are grouped into 3, each having its own handler routine.
; 1) Mac II/IIx/IIcx
; 2) IIvx, IIvi, IIvm
; 3) IIsi, IIci
; 4) LC, LCII, Color Classic
204C: LEA MacII_handler,A6 ; -- The dirty gang
2050: CMPI.L #6,D0 ; MacII
2056: BEQ.S sys_check
2058: CMPI.L #7,D0 ; MacIIx - we replace this by the SE/30 #9
205E: BEQ.S sys_check
2060: CMPI.L #8,D0 ; IIcx
2066: BEQ.S sys_check
2068: LEA V_handler,A6 ; -- The "V" Macs.
206C: CMPI.L #48,D0 ; IIvx
2072: BEQ.S sys_check
2074: CMPI.L #44,D0 ; IIvi
207A: BEQ.S sys_check
207C: CMPI.L #45,D0 ; IIvm
2082: BEQ.S sys_check
2084: LEA IIci_handler,A6 ; -- IIci and IIsi
; BOTH share the same "Expansion I/O Space" (0x5300 0000)
2088: CMPI.L #11,D0 ; IIci
208E: BEQ.S sys_check
2090: CMPI.L #18,D0 ; IIsi
2096: BEQ.S sys_check
2098: LEA LC_handler,A6 ; -- The LC-PDS family
209C: CMPI.L #19,D0 ; LC
20A2: BEQ.S sys_check
20A4: CMPI.L #37,D0 ; LCII
20AA: BEQ.S sys_check
20AC: CMPI.L #49,D0 ; Color Classic
20B2: BEQ.S sys_check
; Any other Model/Gestalt will bring up an error alert-box
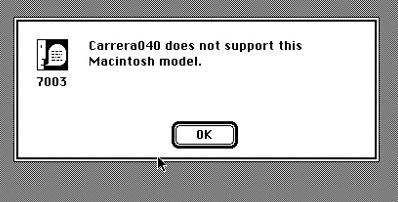
20B4: MOVE #$1B5B,D0 ; "Carrera040 does not support this Macintosh model."
20B8: BRA.S RET_err ; -> "TST D0 & RTS"
; We found a supported model, so keep on going checking for the OS version...
20BA: sys_check: MOVE.L #'sysv',D0 ; Check OS version
20C0: _Gestalt ; (A0/selector:OSType):D0\OSErr
20C2: BNE.S bad_conf ; If we can't read it, fire general Error Msg
20C4: MOVE.L A0,D0
20C6: CMPI #$605,D0 ; System 6.0.5
20CA: BGE.S OS_ok ; or greater
20CC: OS_bad: MOVE #$1B5C,D0 ; "Carrera040 does not work with this version of the operating system."
20D0: BRA.S RET_err ;
20D2: OS_ok: MOVE.L #'vm ',D0 ; Check for enabled Virtual Memory
20D8: _Gestalt ; (A0/selector:OSType):D0\OSErr
20DA: BNE.S bad_conf ; If we can't read it, fire general Error Msg
20DC: MOVE.L A0,D0
20DE: BTST #0,D0
20E2: BEQ.S VM_ok
20E4: MOVE #$1B5D,D0 ; "Carrera040 does not work with Virtual Memory turned on.
; Please turn off Virtual Memory in the Memory control panel and restart your Mac."
20E8: BRA.S RET_err
20EA: VM_ok: JSR (A6) ; This is the actual HANDLER CALL, been set in $204C-$2098
20EC: BNE.S RET_err
20EE: MOVE.B 34(A5),D0 ; 34(A5) seems to contanin the Jumper settings at the lowest 3 bits and only three of them are valid:
20F2: CMPI.B #7,D0 ; 7 -> 111
20F6: BEQ.S RET_ok
20F8: CMPI.B #6,D0 ; 6 -> 110
20FC: BEQ.S RET_ok
20FE: CMPI.B #5,D0 ; and 5 -> 101
2102: BEQ.S RET_ok
2104: MOVE #$1B5E,D0 ; "Carrera040 does not recognize the jumper settings on the Speedster card.
; Please check the settings against the manual.
2108: BRA.S RET_err
210A: RET_ok: MOVEQ #0,D0 ; clear D0 (no errors)
210C:RET_err: TST D0 ; Set the Z-Flag (D0 contains Err-Code) and
210E: RTS ; return from Subroutine
2110:bad_conf:MOVE #$1B5A,D0 ; "Carrera040 does not support your system configuration."
2114: BRA RET_err
Yes, there’s also stuff after the call to the handler, but let’s check that handler first.
As said in the beginning, I chose to take the “IIx route”. The MacII_handler code is actually just another vector jump-table which will later be used with offsets:
414E: MacII_handler: BRA MacII_1st ; From II, IIx & IIcx
4152: BRA MacII_2nd
4156: BRA MacII_3rd
415A: BRA MacII_4th
As you can see, even in such simple and short subroutines are some things I just don’t get? For example why is the effective address of data105 written to 0x8? Is that replacing the Error Handler in the VBR?
Anyhow, I think I got the overall meaning of the rest of it. What happens is this:
After switching into 32bit mode (_SwapMMUMode) it reads a longword from 0x53000000. As initially mentioned, the C040 is mapped to this address. There are 2 identical functions to read from there, that’s why this one here called read_5300k2.
It looks like reading is sufficient because the result (returned in D7) is immediately overwritten by a pop. Also that BNE after two moves is beyond me (0x3D40)… OTOH the rest of the code is pretty clear: It’s ‘populating’ the A5-world with subroutines I’d call 53-commands. These commands write a specific byte sequence to 0x53000000, obviously communicating with the C040. For better understanding I’ve named them e.g. 53_cmd_5.3.5.1 meaning writing 5, then 3, then 5 and finally 1 to this address.
At the end, 0x5300k is read again, this time the result is masked to the last bit and written to 34(A5) – this represents the C040 jumper-settings by the way. Return from Subroutine…
Back in sys_check: this jumper-setting will be checked immediately for three valid settings: 111, 110 or 101 representing the supported CPU types (68040,68LC040,68EC040). If the setting is ok we’re done with sysDetect:and return to main:.
2nd handler
Located at 0x3D94 this is kind of a ’50/50 subroutine’. One half is totally obvious (check RAM, ROM and addressing mode) and the other half is all greek to me… e.g. what is all that PUSHing about? There’s not a single POP inside this routine (or subroutines call from within). Here’s a wild guess of mine:
It looks like 1 to 4 ‘RAM range triplets’ being pushed onto the stack and after that gestaltPhysicalRAMSize (#’ram ‘) is called, for example:
But the gestaltPhysicalRAMSize call does not take parameters and simply returns the amount of available RAM.
The good thing is, this sub-routine works flawlessly on the SE/30 and we can move on…
instFPSP
instFPSP is the next call in line. I’m not going to discuss this code in detail because it actually doesn’t do much. Still there are many inline comments in this routine if you like to know more. Here’s the background:
The FPU in the 68040 was made incapable of IEEE transcendental functions, which had been supported by both the 68881 and 68882 and were used by the popular fractal generating software of the time and little else. The Motorola floating point support package (FPSP) emulated these instructions in software under interrupt. As this was an exception handler, heavy use of the transcendental functions caused severe performance penalties.
TLDR; Check for FPU(type) and load the FPSP code from the resource-fork into RAM. Done. Return to main:.
Next up is the 3rd handler, MacII_3rd: (0x3F94) in our case. Actually it’s called with JSR 8(A6), but that’s an 8 byte offset to the ‘base-address’ of any handler. Clever stuff, huh (Google for ‘pointer-table’)?
This subroutine contains serious magic and was a real hard nut to crack. Especially because it tricked me into believing that I’ve found the ‘crashsite’… which, to spoil the tension, isn’t.
It just kept on killing Macsbug, because it’s so low-level.
What this routine does is replacing the Vector Base Register (VBR) which ‘lives’ at address 0x00000000. Evil stuff.
After disabling interrupts and switching to 32bit-mode a field with 6 long-words (data107) will be populated with data generated in other routines.
For now I can only guess what these entries are (Values from my SE/30 given in brackets). We’ll discuss all that further down.
0x3FC6 to 0x3FD8 calculates the size of the chunk of code starting at data106 (0x4008) to the beginning of MacII_4th (i.e. the end of Mac_3rd), which is 180 bytes.
Using this length, the routine first saves the current VBR onto the stack using the system call _BlockMove.
Then the original VBR (+some more) will be replaced by the new version beginning at data106. (Killing Macsbug – more on that later)
BSR 53_cmd_1x is been called. This brings the Carrera040 into life most likely using the just copied VBR (This is discussed in much detail further down).
Now the contents of the stack (= copy of the original VBR) will be copied back into its place, this time using a classic DBRA loop (0x3FF4). My guess, no Toolbox call possible at the moment.
Adjust the stack, back to 16bit mode, restore Registers and return-from-subroutiene. Done.
Here’s the code doing all this:
3F94:MacII_3rd: MOVE SR,-(A7) ; 3rd call from MacII handler
3F96: ORI #$700,SR ; Set bit 9-11 of SR (disable Interrupts)
3F9A: MOVEM.L D0-D2/A0-A2,-(A7)
3F9E: MOVEQ #1,D0
3FA0: _SwapMMUMode
3FA2: PUSH.B D0
3FA4: SUBA.L A2,A2 ; faster movea.l #0,a2
3FA6: LEA data107,A0 ; Filling the data into the 6x32 field
3FAA: MOVE.L 96(A5),D0
3FAE: MOVE.L D0,(A0)+ ; SE30: 9FE00
3FB0: LEA data69,A1
3FB4: MOVE.L A1,(A0)+ ; SE30: 9D6E2 (User/Supervisor Rootpointer?)
3FB6: MOVE.L $64(A5),(A0)+ ; 807FC040
3FBA: MOVE.L $6C(A5),(A0)+ ; 807FC040
3FBE: MOVE.L $68(A5),(A0)+ ; 00000000
3FC2: MOVE.L $70(A5),(A0)+ ; 00000000
3FC6: LEA MacII_4th,A0
3FCA: MOVE.L A0,D2
3FCC: LEA data106,A0
3FD0: SUB.L A0,D2 ; 'distance' from data106 to MacII_4th
3FD2: SUBA.L D2,A7
3FD4: MOVEA.L A2,A0
3FD6: MOVEA.L A7,A1
; save the current VBR to the stack
3FD8: MOVE.L D2,D0
; A0 = SE30: 00000000 (src) - IIci: $FBB08000
; A1 = SE30: 027ff34c (dest) - IIci: $3BF9FC6
; D0 = B4 (count) - SAME on the IIci!
3FDA: _BlockMove ; (A0/srcPtr,A1/destPtr:Ptr; D0/byteCount:Size)
; write my own VBR...
; This copies 180 bytes into 0x000000000 replacing the original VBR.
; ... and kills Macsbug if not circumvented properly.
3FDC: LEA data106,A0
3FE0: MOVEA.L A2,A1
3FE2: MOVE.L D2,D0
; A0 = 9F900 (src) - IIci 10C4EA (data88)
; A1 = 00000 (dest) - IIci FBB08000
; D0 = B4 (count) - IIci same
3FE4: _BlockMove ; (A0/srcPtr,A1/destPtr:Ptr; D0/byteCount:Size)
3FE6: BSR 53_cmd_1x ; Bring the C040 to life
3FEA: MOVEA.L A7,A0 ; SP to A0
3FEC: MOVEA.L A2,A1 ; SE30: 00000000
3FEE: MOVE.L D2,D0 ; the code length (B4 again)
3FF0: BRA.S lae_163
3FF2: lae_162 MOVE.B (A0)+,(A1)+ ; Write the VBR back from the stack
3FF4: lae_163 DBRA D0,lae_162
3FF8: ADDA.L D2,A7 ; adjust the stack
3FFA: POP.B D0
3FFC: _SwapMMUMode
3FFE: MOVEM.L (A7)+,D0-D2/A0-A2
4002: MOVE (A7)+,SR
4004: MOVEQ #0,D0
4006: RTS
; Start of VBR replacement- and 040-Code being copied to 0x0 the by line 0x3FE4
; /if/ theses are the Vectors 0-17, then their meaning would be:
4008: data106: DC.L #$00001000 ; Reset initial Stack Pointer
400C: DC.L #$00000050 ; Reset initial Program Counter
; - ALL of these Vectors point to addr 4050 (offset 0x48) -
4010: DC.L #$00000048 ; Buserror
4014: DC.L #$00000048 ; Adress Error
4018: DC.L #$00000048 ; Illegal Instruction
401C: DC.L #$00000048 ; Zero Divide
4020: DC.L #$00000048 ; CHK, CHK2 instruction
4024: DC.L #$00000048 ; cpTRAPcc, TRAPcc, TRAPV instruction
4028: DC.L #$00000048 ; Privilige Violation
402C: DC.L #$00000048 ; Trace
4030: DC.L #$00000048 ; LINE 1010 Emulation
4034: DC.L #$00000048 ; LINE 1111 Emulation
; THESE are definitely no vectors, they are dynamically written by the code above
; and to be used to setup the 040 MMU registers.
4038: data107: DC.L #$0009FE00 ;
403C: DC.L #$0009D6E2;
4040: DC.L #$807FC040 ;
4044: DC.L #$807FC040 ; SE30:
4048: DC.L #$00000000 ; SE30: 00000000
404C: DC.L #$00000000 ; SE30: 00000000
4050: CLR.L $53000000 ; Poke 0 to $53000000
4056: BRA lae_164 ; This points to itself... I'm lost at the moment.
4058: LEA data107,A0 ; SE30: 9F900
405C: MOVE.L (A0)+,D1 ; SE30: 0009FE00 (User/Supervisor Rootpointer)
405E: MOVEA.L (A0)+,A1 ; 0009D6E2
4060: MOVE.L (A0)+,D4 ; 807FC040
4062: MOVE.L (A0)+,D5 ; 807FC040
4064: MOVE.L (A0)+,D6 ; 00000000
4066: MOVE.L (A0)+,D7 ; 00000000
4068: MOVE.L #$C000,D0
406E$ MOVEC D0,ITT0 ; Set Instruction Transparent Translation
4072$ MOVEC D0,DTT0 ; Set Data Transparent Translation
4076$ MOVEC D1,SRP ; Set Supervisor Rootpointer
407A$ MOVEC D1,URP ; Set User Rootpointer
407E: MOVE.L #$C000,D0
4084$ PFLUSHA ; Invalidates all entries in the address translation cache
4086$ MOVEC D0,TC
408A: LEA data108,A0
408E: ADDA.L #$53002000,A0 ; (=0x530A1900)
4094: JMP (A0) ; JuMP to data108 code (below) in C040 RAM range?
4096: data108: MOVEQ #0,D0
4098$ MOVEC D0,ITT0
409C$ MOVEC D0,DTT0
40A0$ MOVEC D4,ITT0
40A4$ MOVEC D5,DTT0
40A8$ MOVEC D6,ITT1
40AC$ MOVEC D7,DTT1
40B0$ CINVA BC
40B2: NOP
40B4: MOVEQ #0,D0
40B6$ MOVEC D0,CACR
40BA: JMP (A1) ; 0009D6E2
; END 040 Code being copied to somewhere by line 3FE4
40BC: MacII_4th: MOVEM.L D1-D7/A0-A4,-(A7) ; 4th subroutine called my MacII_handler
[...]
The Vector Base Register
I wasn’t precise when I initially said “replacing the VBR”. What actually happens is that this routine uses what I’d call an interim-VBR for the moment it initializes the 68040 on the C040. You’ve probably saw the link referring to what the VBR is in the 1st post of this series, but let me go a bit more into detail.
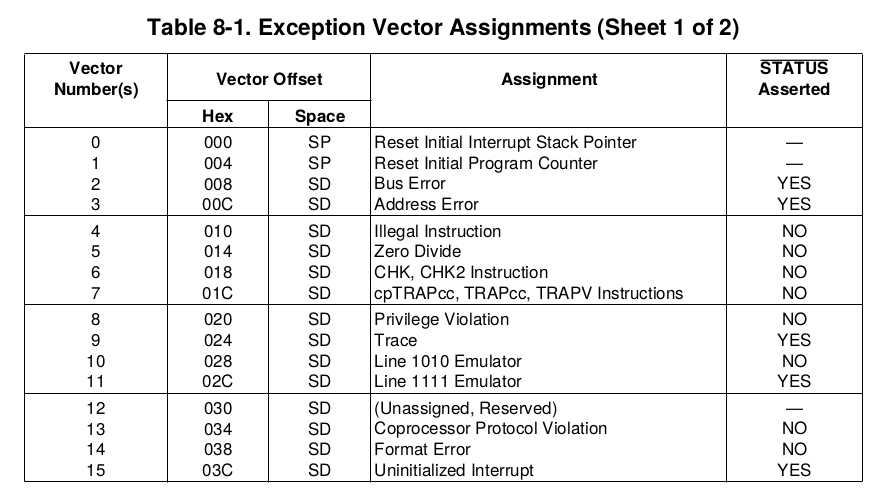
The VBR is a list of addresses (aka vectors) the CPU refers to in case of an exception – and this is true for every 68k system out there, e.g. Mac, SUN, NeXT, Amiga or Atari. Some of them might do some relocation using their MMU, but even the virtual address will be 0x00000000 and the order is the same. There are 16 basic vectors as listed here:
If for example a divide-by-zero happens, the CPU would call a handler which address is stored in 0x14. Pretty simple.
So let’s have a look what MacII_3rd left in the VBR (and below that) when the ‘interim VBR’ is in place:
0000: data106: DC.L #$00001000 ; Reset initial Stack Pointer
0004: DC.L #$00000050 ; Reset initial Program Counter
; - ALL of these Vectors point to addr 0x48 -
0008: DC.L #$00000048 ; Buserror
000C: DC.L #$00000048 ; Adress Error
0010: DC.L #$00000048 ; Illegal Instruction
0014: DC.L #$00000048 ; Zero Divide
0018: DC.L #$00000048 ; CHK, CHK2 instruction
001C: DC.L #$00000048 ; cpTRAPcc, TRAPcc, TRAPV instruction
0020: DC.L #$00000048 ; Privilige Violation
0024: DC.L #$00000048 ; Trace
0028: DC.L #$00000048 ; LINE 1010 Emulation
002C: DC.L #$00000048 ; LINE 1111 Emulation
; - THESE are definitely no vectors, they are dynamically written by the
; code above and to be used to setup the 040 MMU registers.
0030: data107: DC.L #$00000000 ; SE30: 0009FE00 (12)
0034: DC.L #$00000000 ; SE30: 0009D6E2 (13)
0038: DC.L #$00000000 ; SE30: 807FC040 (14)
003C: DC.L #$00000000 ; SE30: 807FC040 (15)
0040: DC.L #$00000000 ; SE30: 00000000
0044: DC.L #$00000000 ; SE30: 00000000
0048: CLR.L $53000000 ; Poke 0 to $53000000 ; C040 off
004C: blocker3 BRA blocker3 ; Points to itself... probably a "blocker"
0050: LEA data107,A0 ; initial Program Counter (SE30: 9F900)
0054: MOVE.L (A0)+,D1 ; SE30: 0009FE00 (User/Supervisor Rootpointer)
0058: MOVEA.L (A0)+,A1 ; 0009D6E2
005C: MOVE.L (A0)+,D4 ; 807FC040
0060: MOVE.L (A0)+,D5 ; 807FC040
0064: MOVE.L (A0)+,D6 ; 00000000
0068: MOVE.L (A0)+,D7 ; 00000000
006C: MOVE.L #$C000,D0
0070: MOVEC D0,ITT0 ; Set Instruction Transparent Translation
0074: MOVEC D0,DTT0 ; Set Data Transparent Translation
0078: MOVEC D1,SRP ; Set Supervisor Rootpointer
007C: MOVEC D1,URP ; Set User Rootpointer
0080: MOVE.L #$C000,D0
0084: PFLUSHA ; Invalidates all entries in the address translation cache
0088: MOVEC D0,TC
008C: LEA data108,A0
0090: ADDA.L #$53002000,A0 ; (=0x530A1900)
0094: JMP (A0) ; JuMP to data108 code (below) in C040 RAM range?
009C: data108: MOVEQ #0,D0
00A0: MOVEC D0,ITT0 ; 0
00A4: MOVEC D0,DTT0 ; 0
00A8: MOVEC D4,ITT0 ; 807FC040
00AC: MOVEC D5,DTT0 ; 807FC040
00B0: MOVEC D6,ITT1 ; 00000000
00B4: MOVEC D7,DTT1 ; 00000000
00B8: CINVA BC
00BC: NOP
00C0: MOVEQ #0,D0
00C4: MOVEC D0,CACR
00C8: JMP (A1) ; 0009D6E2
Farewell, old friend
At this point, my SE/30 always froze and I thought this must be the point where to find incompatibilities between the IIci and SE/30.
But after understanding, what’s really going on, it was clear that overwriting the TRAP exception (Nr.7), Macsbug was simply kicked out of the game as this exception is triggered after every step/trace you do in a debugger…
So to get beyond this point, I had to modify the program counter to skip the point where TRAP is copied-over… which is done inside the Toolbox’ _BlockMove call. So I had to single-step into that and find the right call/time to do a ‘pc=pc+2’ 😉 (Good thing you can define a macro for that).
Okayyyyy. After that’s been written, 53_cmd_1x is called, presumably telling the C040 to come to life.
And keen as it is, it’ll look up the “Reset initial Program Counter” (VBR: 0xC) and starts executing code from 0x50. Any other occurring exception will call the ‘handler’ at 0x48, simply switching the C004 off and sit in an endless loop (0x4C) – probably making the 68030 to take over again.
EmEmYou!
Given everything’s fine, the code at 0x50 will start reading the previously populated data from data107 into several registers.
Then some serious 68040 MMU table setup happens – so this is some kind of ‘040 initialization routine… and the ‘040 is actually running. Woohoo!
Time for some special register explanation:
As we all know, the 68040 has two in-build 4k caches and an MMU. The latter can be programmed how and what to cache. This is defined in 4 registers of which only 2 are of interest here: ITT0 and DTT0, the Instruction and Data Transparent Translation registers, both sharing the same bit-fields following this pattern:
BBBBBBBBMMMMMMMMESS000UU0CC00W00
B – Logical Address Base – compared with address bits A31-A24. Addresses that match in this comparison are transparently translated
M – Logical Address Mask – setting a bit in this field causes corresponding bit in Base field to be ignored
E – Enable Bit – 1 – translation enabled; 0 – disabled
S – Supervisor Mode – 00 – match only in user mode 01 – match only in supervisor mode 1x – ignore mode when matching
a bit less than 2GB transparently translated (2032MB)
translation enabled
Supervisor Mode: ignore mode when matching
Cache mode: Noncacheable, Serialized
Write permitted
So let’s have a look at the code again:
At 0x70/0x74 the MMU is set to 0xC000, i.e. Enable translation, apply for user & supervisor mode, write-though cache, for logical address space 0x80000000-0x00ffffff (2GB minus the bottom 16MB).
Then Supervisor & User Rootpointer are set to 0x9FE00, then the address translation cache is flushed to finally set the Translation Control register to Enable & 8K page size (0x88)… up to here this was pretty much ‘by the book’ of how to set-up MMU tables.
Having its MMU all set, the 68040 now gets something to chew on:
The address of data108 is added to 0x53002000 and jumped to!
💡 Does 0x53002000 equal 0x00000000 for the C040?
Let’s assume the C040 executes the code at data108 for now. That is:
Clear the ITT/DTT registers
Set the MMU to 0x807FC040 (see decoding example above)
invalidate caches and wait’a’NOP to have that happened
then disable all caches
and jump to where A1 points to. In my SE/30 that’s 0x9D6E2, previously loaded from data107 in 0x58
Writing all this from the top of my head, I’m not 100% sure where this address is pointing to. I must be somewhat back into MacII_3rd (0x3FEA), because this is where the program execution resumes (Need to check this with Macsbug and will update).
For now, I’m tempted to call MacII_3rd something like ‘C040_MMU_setup‘… but I’d love to have this confirmed 💡 by somebody who knows more than me 😉
Next up will be continuing working further through the main: procedure again… so move over here.
Ahh, back in cosy main: – looks much easier now after that crazy MMU stuff in the previous part, right?
The next subroutine called is proc32. In the complete source code (reminder: Available at GitHub) I commented that with “works (get some RSC strings)“… and well, that sums it up pretty good. proc32 loads (i.e. creates handles) from the resource-fork, e.g. the icons used in the menu-bar and several error-messages like “This application must run on the 68030 processor, please quit all other 68040 applications and re-run this application.“. That’s it. Boring…
That boredom instantly changes when we get to the next subroutine proc43located at 0x29DA…
I did it my way…
One fascinating thing about classic Mac OS is how easy it is to patch system calls, aka Toolbox traps. For example in the previous post we came about _BlockMove, which is a Toolbox call to copy an amount of RAM from A to B.
For example you have just read this article about a faster BlockMove method, you’re totally free to patch (read: replace) _BlockMove with your speedier version and automatically use this throughout your application – or even system-wide, if you’ve created an INIT… [If you want to know allabout it… here’s a book for you]
And that’s what proc43heavily does. Because it’s a long subroutine (230 lines) so I will give you just one example – the inline comments should do…
2BE2: MOVE #$A02E,D0 ; BlockMove
2BE6: _GetTrapAddress newOS ; (D0/trapNum:Word):A0\ProcPtr
2BE8: MOVE.L A0,$270(A5) ; oldBlockmove
2BEC: LEA data42,A0 ; myBlockMove
2BF0: TST.B MMU32bit ; loMem global "current address mode"
2BF4: BNE.S lae_70 ; skip if 32bit clean machine else
2BF6: LEA data43,A0 ; use a different entry for dirty machines
2BFA: lae_70 MOVE.L A0,$274(A5) ; save routine pointer to $274(A5)
2BFE: LEA data41,A0 ; DC.L 0000 0000
2C02: MOVE.L $270(A5),(A0) ; save oldBlockmove vector into there
2C06: MOVE.L #$A02E,D0 ; BlockMove
2C0C: LEA data40,A0 ; aaaand replace it by myBlockmove
2C10: _SetTrapAddress newOS; (A0/trapAddr:ProcPtr; D0/trapNum:Word)
This is the sum up what else being done:
Save all debugger vectors into A5-world locations (suspicious. I sense Macsbug killing…)
Load the PACK4 resource, that’s the Floating Point emulation package (aka SANE) if no FPU found
Check & read several system Gestalt codes into A5-world (0x2AAC-0x2B44)
Patch several Toolbox traps
SwapMMUMode replaced by data19
VM_Displatch by data22
Pack4 by data10
Pack5 by data11
BlockMove by data40
jClearCache by myClearCache
GetNextEvent by myGetNextEvent
GetResource by myGetResource
SCSIdispatch by mySCSIdispatch
DrawMenuBar by myDrawMB
LoadSeg by data31
UnLoadSeg by data32
HWPriv by data33
vStdExit by data34
So far, so many. Then there’s some RAM copying going on, of which I’m currently not quite sure what it is good for (0x2CAC-0x2CD8) 💡 .
Finally, the myShutdown routine is installed into the Shutdown Manager, i.e. it will executed before the Mac is powered down/restarting (it simply switches the host back to its own 68030). After that, RTS into main…
“There and back again…”
Barely back in main, a JSR 12(A6) warps us into MacII_4th, the last of the four handlers every supported system has.
This loads specific data from the FPSP into RAM (namely IDs 0x12C and 0x12D).
Finally a special floppy driver is installed (myFloppyDrvr @ 0x954) which IMHO just differs from the original in handling the ‘040 caches correctly. That was that and back to main…
The next sub-routine in line is chkATalkVer. I can rightfully name that routine because it’s short and crystal clear: Figure out if AppleTalk is installed, and if true, return its version in D0 (and also write it into A5-world). C’est ca…
This is the end…
It’s getting ugly (for now)… proc42 will be called – the last subroutine in main before my SE/30 crashes and burns 😥
The first few lines (0x28F4-0x293C) are comparably harmless. They are working around a bug in System 7.1 which was corrected in 2/17/92 according to some dark sources (“Corrected value of timeSCSIDB from 0DA6 to 0B24”).
After that, proc38 (0x293C) is called which again calls proc39 and something’s done with the TimeManager, not really sure what’s exactly going on, but it feels like a timing-benchmark heavily using InsTime, PrimeTime and RmvTime Toolbox calls.
[hold yer breath] Then we’re getting closer to the flat line… The stack is filled with these parameters:
P.S: I changed course (again) and started to investigate more into the C040’s hardware. The more I understand of the INIT/CP workings the more I can’t fight the idea that it really might be a hardware timing issue.
This is my first ever project I did for one of my favorite computers, the ATARI Mega-ST. Like told in one of my blog posts, the ATARI ST was my 2nd greatest love ❤ (after the C64) and being part of a very cool company back in the days I only have fond and happy memories of it.
After all the years of fiddling with nearly every machine on the market, it’s like coming home by just looking at its system font or hearing it’s specific bell-sound (even the ever-annoying key-click sound it makes by default).
And now it’s time to do something cool with it… adding, what I’ve missed back then: Color and -of course- Transputers 😉
TLDR;
Ok, so you’re in a hurry or suffer from severe ADHD?
This is a graphics card for the ATARI Mega ST internal bus including a Transputer interface.
What’s that about the strange naming?! Well, this card is a hybrid of a classic STGA ISA graphics-card adapter and a Transputer interface for the Mega-ST bus.
Mega-ST, high-res graphics and Transputers? Mhh, does this ring a bell? Yes, component-wise this is exactly the configuration of an ATARI ATW800, the famous and rare ATARI Transputer Workstation (for which I designed a Farmcard, just in case you own an ATW).
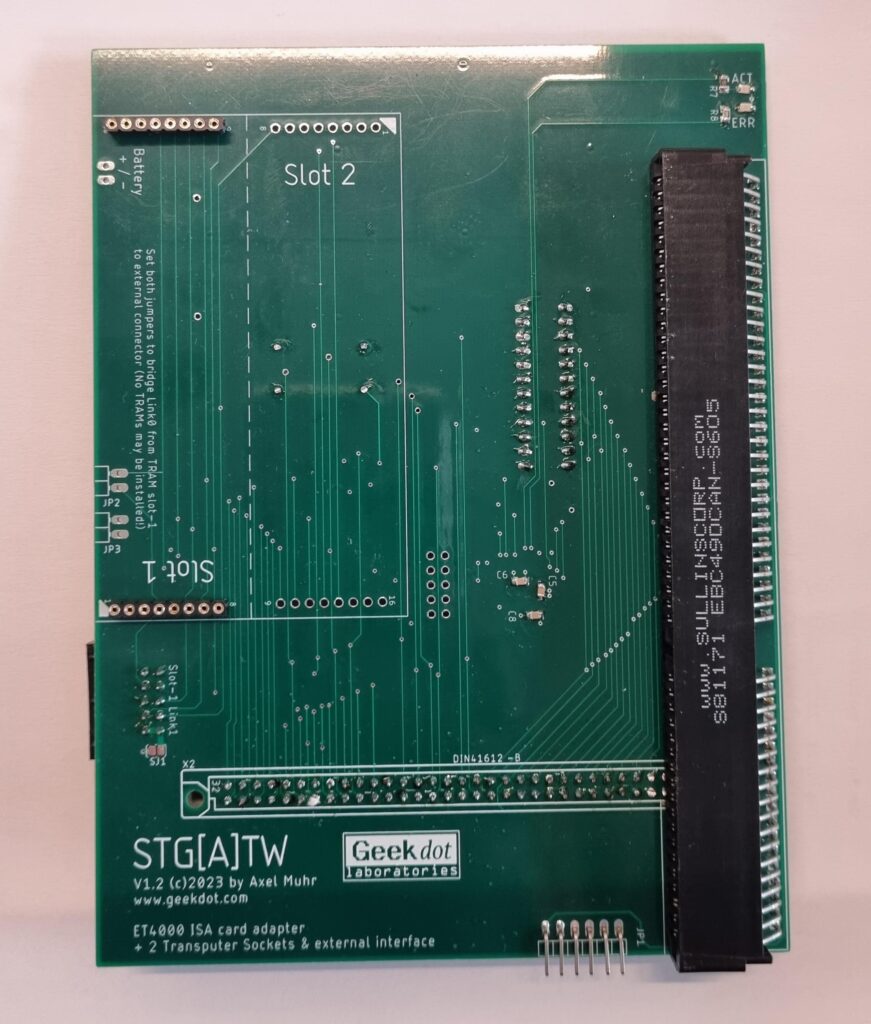
So adding the two, it’s an STGA-ATW or STG[A]TW for short… and it looks like this:
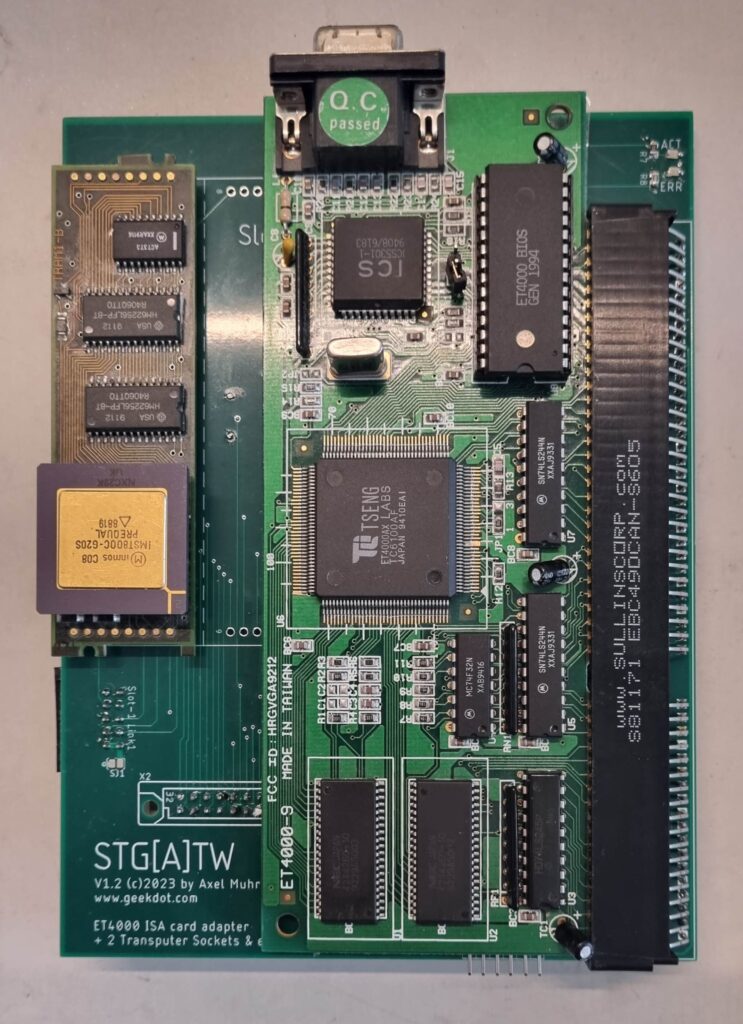
Looking at the top you’ll spot the 90° angled ISA Slot at the right edge, giving (selected) ET4000 graphic cards a home.
To the left there are two Transputer TRAM slots making it possible to use two size-1 or a single size-2 TRAM.
Obviously, an ISA card and the TRAMs would collide, so you have to choose… or you’re a lucky owner of a low-profile ET4000. Then you could use your VGA card plus one TRAM like this:
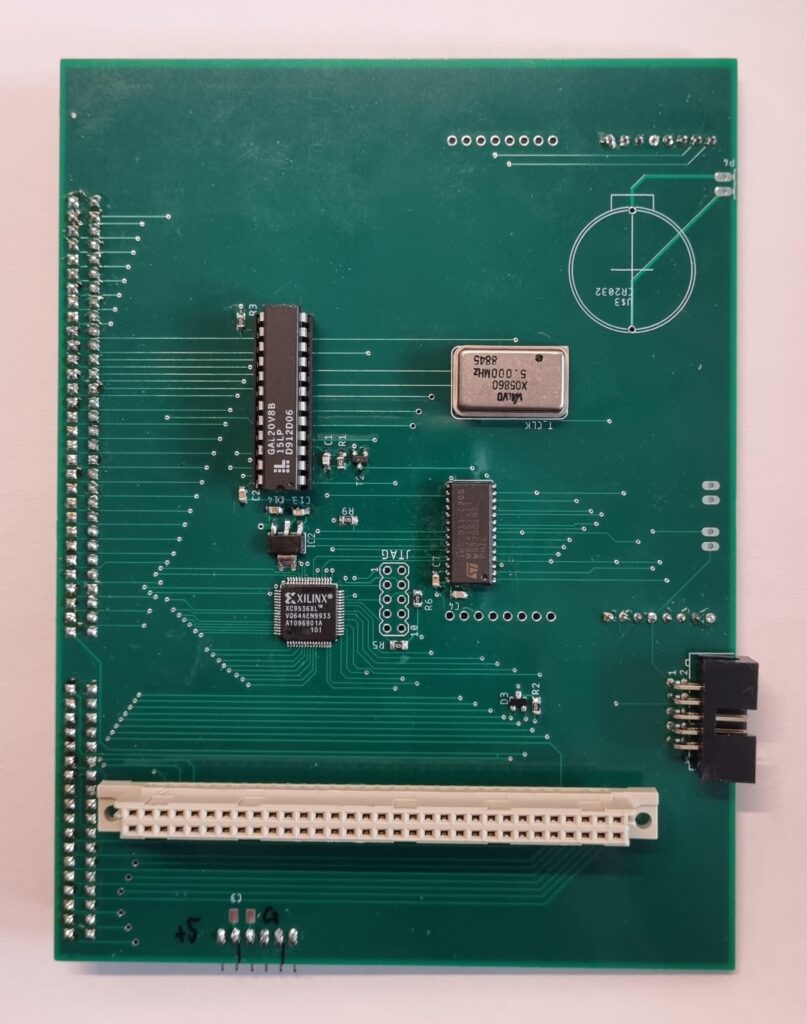
But even if your ET4000 card is covering the whole STG[A]TW don’t despair! Looking at the backside you can spot the external Transputer link connector (on the right edge):
Using this you can connect to e.g. an external Transputer(-farm) of any size… for example something like my 64 CPU Final Cube 🔥
Looking further around the backside you can spot a preparation for a CR2032 coin-shape battery holder. That is meant to replace the two AA batteries used in the original case-lid because depending on the TRAMs used, it might be necessary to remove the battery compartment (yes, you’d need to cut it out 😰) .
Talking about power… at the bottom you can see the external power connector which supply is mandatory – you need to connect at least 5V and ground, optionally 12V if your ET4000 needs that.
That said, I highly recommend to make sure your Mega ST’s PSU is powerful enough – best would be to replace it by e.g. a Maxwell RD-50A.
Why?!
I knew you’d ask. Well in case you haven’t noticed yet, I’m a total Transputer nut. It’s a fabulous, genius CPU and design. The more you dig into it, the more you’ll love it.
Back then I adored the ATW800 and always wanted to own one. But it was insanely expensive and -to be honest – wasn’t a real member auf the ST/TT-family anyhow.
This is because the Mega-ST1 inside the ATW was mainly used as a bootup machine for the Transputer and after that was up and running, everything the ST did was file- and user-I/O (Mouse, Keyboard, RS232).
In my humble opinion, the STG[A]TW is (somewhat) the way how ATARI should have done it back then. Instead of creating an ‘island solution’ they should have used the existing install-base and offer an expansion to it. Plug in the missing parts (graphics & Transputer) and keep the TOS/GEM eco-system in charge.
Users could keep running their applications and use the extra ‘ooomph’ to speed them up. Think of all the accelerators Apple Macintosh users had available to speed up PhotoShop filters or have it do the heavy number crunching of science applications etc.
Even all data has to travel over the bus to the Transputer and back, this is still faster than the 8MHz 68000.
Given that in 1990 about 350 ATW800 were produced and sold at 5000-7000 GBP which equaled to about 13700 DM or 8000$ (that’s about 11400 GBP, 13700 EUR or the same in US$ today),
I bet the number of a “ATW for the poor” would have been much higher.
So, again, why? Well to have Mandelbrot fractals calculated fastand in colo(u)r, of course!
Fast means ~60sec, even using slow GEM routines. Using the same algorithm and iteration depth, the ST’s 8MHz 68000 took nearly 3 hours to calculate the same fractal.
Here’s a quick peek how ‘fast’ looks like:
Evolution – a quick excursion
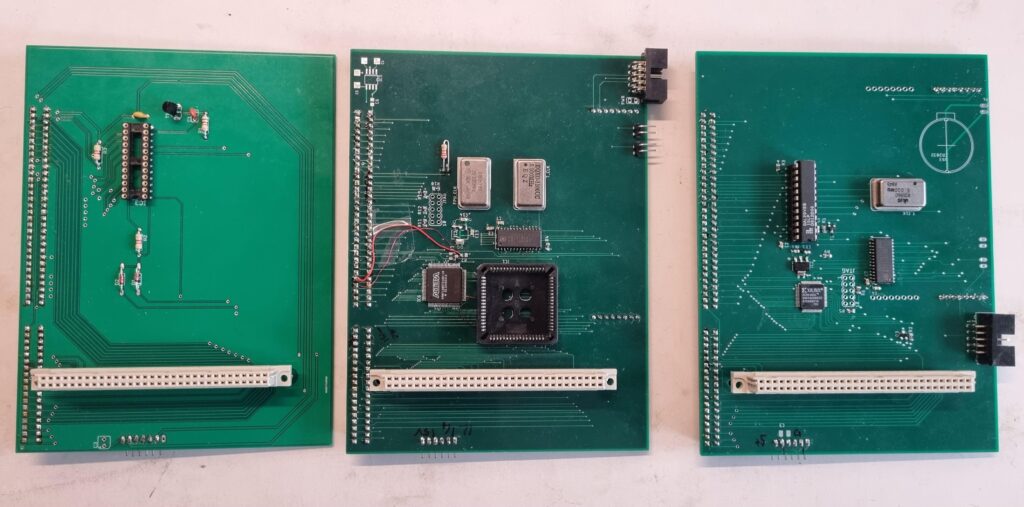
If you’re into hardware development you might wonder why there’s a very vintage GAL and a semi-vintage CPLD used in this design.
Here’s my explanation and shameful justification 😉
From the very simple and basic design of the STGA I took the usual nerdy feature-creep road to hell 🙄
My initial design naturally included the GALs logic into one big CPLD. And having all address-lines available on this, that design also included (on top of the ISA and Transputer interface) a 68882 FPU, an IDE interface and a ROM decoder… everything worked fine BUT all ‘modern’ ET4000 cards didn’t.
I stared at logic-analyzer traces for weeks and weeks and compared them to the original STGA they were absolutely identical. But whatever I did, I wasn’t able to get ET4k cards with a Rev. TC6100AF chip working.
In the end I decided to keep the STGA part as-is, including the external AND-ing of /LDS & /UDS and inverting of /DTACK and put the Transputer handing into a smaller (and cheaper) CPLD.
Thus the FPU, IDE and ROM decoding was off the table and to be honest, there are other solutions which do that job better anyhow.
So there you have it: Colorful high-res GEM combined with the mighty Transputer power… but I understand, that those low-profile ET4k cards are getting rarer and rarer and not everybody has an external Transputer farm to connect to.
So I made another card or better a so-called CPU relocator…
The TRAM-Relocator
Most (Mega) ST users out there already have one or more expansions to their system, mostly plugging into or onto the CPU creating a ‘stack’ of PCBs.
Because the STGA (as well as the STG[A]TW) overlaps over the Mega STs CPU socket you might want relocate the CPU a bit away from the Mega-Bus socket. Simple relocators simply move it a bit towards the front of the case. But that still results in having a stack of multiple extensions. For example here’s a Storm ST (Alt-RAM) on top of a Cloudy (4x ROM) plugged into a Lightning ST (IDE & USB):
This can get tricky in some crowded Mega ST cases…
I really liked the ‘Bus I/O port design’ of the Exxos’ STF Remake Project having multiple sockets next to each other.
And if you have your original TOS ROMs removed (and replaced by e.g. a Cloudy) there’s actually some space to roll out 4 of them having the Relocator sitting flush on the Mega-ST mainboard (make sure the backside of the Relocator is completely isolated!):
4 Sockets and a cool TRAM socket 😁
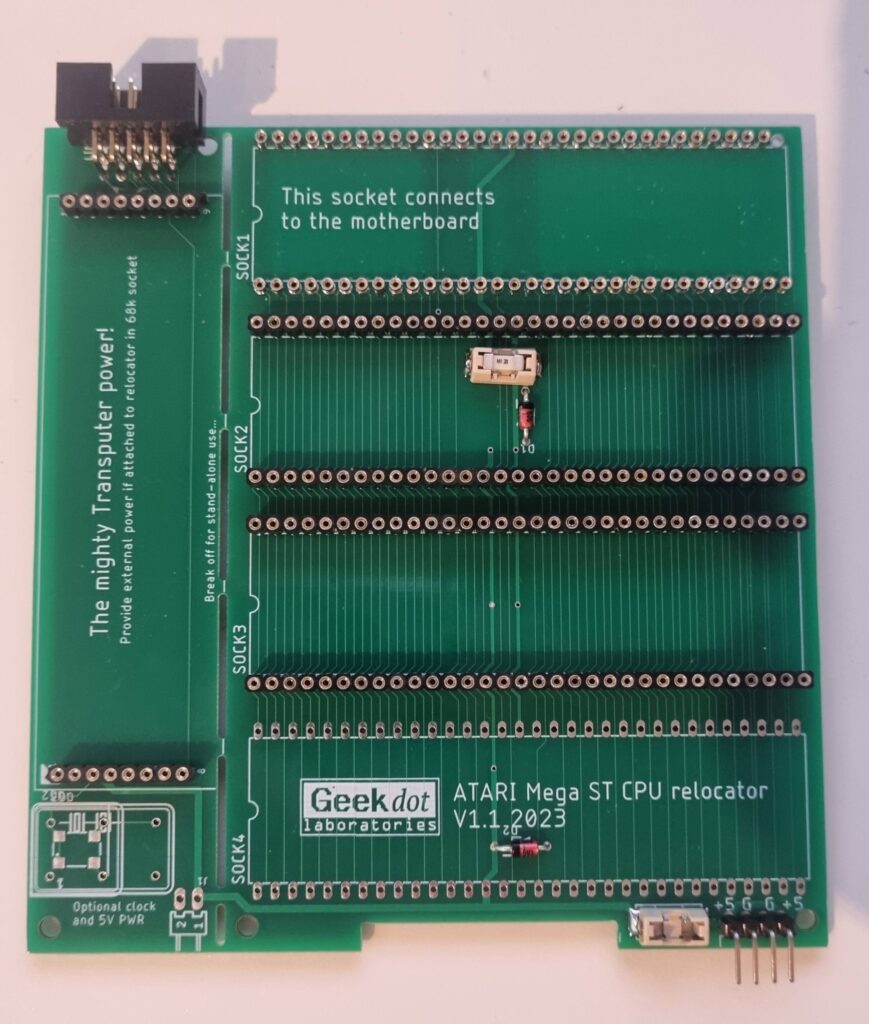
Like clearly written on the PCB, SOCK1 goes into the (to-be-retrofitted) CPU Socket and using ‘hollow pins’, it can take a CPU itself.
SOCK2-4 are available to extensions of your choice – all 3 of them are protected against power-surges by a fuse and a diode.
This design decision has been made due to my own painful experience loosing everything which had been plugged into the CPU socket… and the Blitter 😥
In the lower right corner are pins for an additional external power connector, also protected. That might be necessary depending what you’re plugging into those sockets.
Finally, the left edge is a Transputer TRAM socket which can be connected to the STG[A]TW by a 10pin flat-cable providing link signals and a 5MHz clock signal.
That way, you can use the STG[A]TW with an internal Transputer even your ET4000 card is big as a baking-tray.
It is highly recommended to use external power when doing so. The poor 68000 power-pins won’t be enough for it.
If needed, the whole TRAM part can be snapped-off from the Relocator to, uhm, relocate the TRAM elsewhere in- or outside the case or use it stand-alone. For that matter itself features an optional connector for power as well as a place to solder a required 5MHz oscillator and 2 mounting holes.
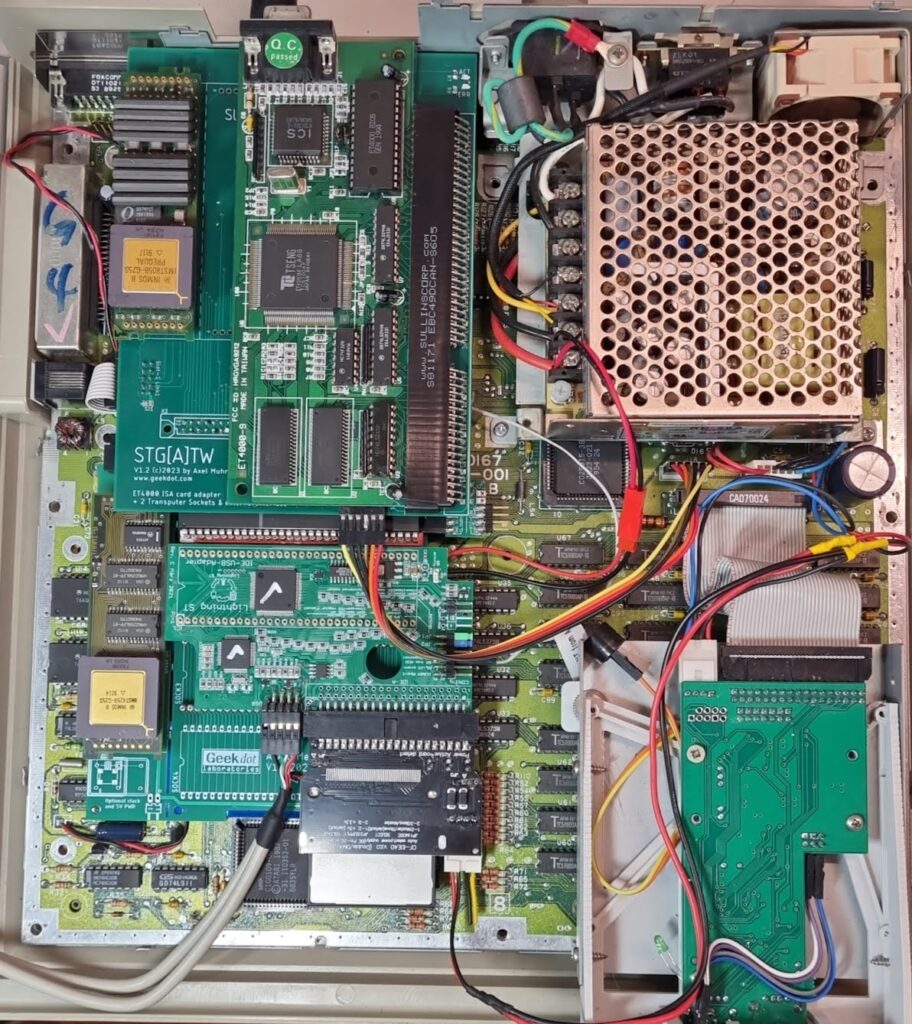
With everything in place, your “ATW800 for the poor” could look like this:
What you see here is the STG[A]TW plugged in, giving home to a low-profile ET4000 and a Size-1 TRAM.
The Relocator was plugged into the CPU socket and in its 1st slot the Cloudy-Storm and the 68000 sitting on top of it, took seat.
Slot 2 of the Relocator is taken by a Lightning-ST… and last but not least, a second TRAM was put onto the Relocator (you can spot the grey flat-cable connecting it to the STG[A]TW.
Want one?
All this sounds so cool that you want to own a STG[A]TW?
Well, first check out this list:
Do you have an ET4000 card of which you know it’s working with the NOVA drivers?
👉 I am not able to support you in getting your specific card working – there are just too many models and permutations of possible TOS/GEM/Driver installations. See this atari-forum.com thread to get an idea…
Do you own a TRAM?
👉 I might provide you with one at extra cost, mail me.
Do you have time to wait?
I’m manually building these boards and it’s a lot of work (0.5pich SMD, lots of trough-hole pins to cut and file down etc.)
If that’s 4 times “Yes” I can build & sell you one of the 6 which I have left for 100€ (plus shipping)… yes, that’s hefty but the quite large PCB is 4 layers (for stable power-distribution), just the ISA slot connector is 10€ already, Mega Bus 5€, GAL, CPLD etc.etc…. plus, as said, it takes quite some time to build & test them. Drop me a mail on the bottom of that page if interested…
SOLD OUT… sorry 😥
As for the CPU-relocator, I’m selling un-populated PCBs for 8€ (Or get the gerbers here and have yours made at your favorite PCB manufacturer).
I’m not building them because the CPU ‘socket’ (SOCK1) is made of 64 single pins which you have to pry/get out of precision pin-headers.
That’s a tedious work you most likely want to do once… but not many times.
All that said – If you weren’t able to get a STG[A]TW, don’t despair.
I consider this as my stepping stone and learning platform for something cooler to come 😎.
Because I don’t like vapor-ware and hot-air-talking, I’ll tell you more when it’s a) done and b) working.
Ok, you read/heard about the STG[A]TW and want to know more about how to use it and -most importantly- for what it’s good for?
First and foremost, a Transputer is a computer-system of its own connected to a host. In this case an ATARI Mega ST.
But given an available host-adapter that could also be e.g. a Unix machine, a classic PC, an Apple II or even a Commodore C64, C128 or Plus/4…
That host communicates with the Transputer over a link-interface using specific memory addresses or, if available, a library. That way the host can send executable binaries to the Transputer, send or receive data to/from it and control it (boot, debug, etc.).
Because each host system is different, these addresses are different, too. But the transfer protocol and Transputer executables are always the same. So looking at this BASIC code example for the C64 gives you an idea, how it works – the steps are the same for every host-communication no matter which host-system used.
As usual, here’s a table of contents for those being in a rush..
Yes, there have been very different ATARI ST and Transputer interfaces in the past. “Two and a half” systems were most prominent – let’s have a look at them before we go into details of the STG[A]TW.
The Atari Transputer Workstation aka ATW800
I think I’ve already wrote a lot about the ATW800 in several post on this page, even designed an expansion card for it – despite I don’t own an ATW myself.
To make a long story short: This is basically a design, where the ATARI Mega-ST is used as a boot device and after that just handles file- and user-I/O. The Transputer is attached to the ST via DMA and runs the Helios OS and has direct access to the graphics controller called ‘Blossom’. Totally different concept.
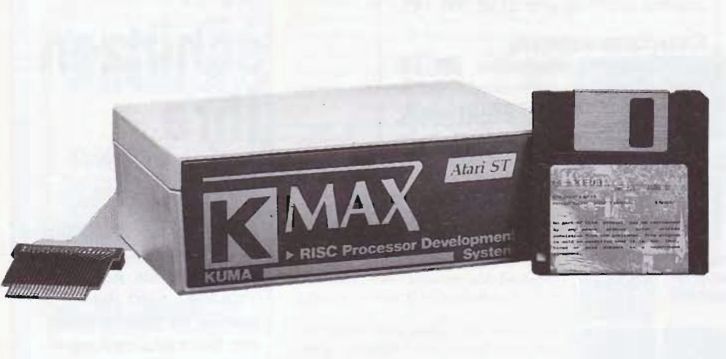
KUMA K-MAX
The KUMA K-MAX was a box connected to the ATARI ROM-module port and thus acted as pure ‘number cruncher on a leash’.
There are two reviews still available: The English review of atarimagazines.com and the German ST-Computer article even showing some photographs of which I ‘borrowed’ this:
Transfertech
Outside “the scene” this is a relatively unknown German company which actually made a lot of Transputer-centric hardware.
For the ATARI series they had 3 host interfaces:
A ROM port interface (all ST models)
A Mega ST bus interface (ROM port design botched onto the bus)
A VME-card (Mega-STE, TT)
Like the KUMA K-MAX, this design also attached the Transputer(s) as number cruncher.
As I own all of them, I might write a dedicated post about them some day.
This is how we do it
As all of the above did their own thing, there is and was no standard for interfacing the ATARI ST series – So I defined one with the other ATARI ST Transputer enthusiast André Saischowa, who did some intense ATARI Transputing fiddling back in the days.
In case of the ATARI ST the link-interface ( e.g. STG[A]TW) ‘lives’ at the base address 0xFFFAC0 and uses 18 bytes from there up to 0xFFFAD2. So the complete adress-range looks like this (uneven, so we can address the lower byte of a 68000 word):
But you don’t have to bother with those as we provide two more convenient ways to talk to a Transputer.
☝ Some words of warning to the programmers:
While the 68000 in your ATARI is big-endian, Transputers are little-endian. So data being send back and forth might need conversion.
Floating-point variables used by the Transputer are IEEE 754-1985, thus 32 Bit (single precision) or 64 Bit (double precision).
Some compilers like Turbo/Pure-C on the ATARI ST use 80bit doubles.
Those need to be converted by e.g. the xdcnv call from the PCFLTLIB library.
The static way
The raw-way is using an include file called “trproc.h”. It’s – like everything else – included in the program archive, located in the “DEVELOP” folder.
This include-file provides you these calls to receive (get) or send (put) data to/from your Transputer:
get/puttrchar(char)
read/send one byte
get/puttrshort(short)
read/send a short (2 bytes)
get/puttrint(int)
read/send an integer (32 bytes)
get/puttrlong(long)
read/send a long (32 bytes)
get/puttrfloat(float)
read/send a float (32 bytes)
get/puttrdouble(double)
read/send a double (64 bytes)
get/puttrraw(char *array, int length)
read/send an array of length
The calls marked blue are doing the endian-conversion for you.
Additionally there’s a call to check for an available Transputer: checkTransputer(int checkType)
If checkType is ‘0’, this function will return ‘1’ if it was able to find a Transputer or ‘0’ when not.
Setting checkType to ‘1’, the return value will give you the “family” of the found Transputer:
0 – No Transputer found
1 – Found a C004 link-switch
2 – A 16bit T2xx Transputer was found
4 – A 32bit T4xx/T8xx Transputer was found
-1 – Found something unknown
The elegant way – TBIOS
The much more elegant way is provided by André who extended the ‘ALIABIOS’ from a project published in the German computer magazine c’t back in 1989.
It’s a GEMDOS driver called “TBIOS.PRG” and can be put into your AUTO folder or called manually when needed. This driver has all the bells’n’whistles like a proper XBRA-ID etc.
As ATARI never planned something like this card, there’s no ready-to-use software… it’s up to you to create miracles 😊
But compared to my 8bit Transputer adapters, there’s quite some stuff to start with:
Yes, literally, we’re testing if your Transputer is working correctly using a BASIC program called T_TEST.GFA – so right, it’s GfA Basic in this case. But in essence it’s nearly the same used for my C64 or Apple II interfaces.
This little Program checks if it can find a link-interface, a Transputer and if so, which kind (16 or 32 bit). If that went OK, it does a little coms-speed test by reading 4KB from the Transputer and times that.
Mandelbrot fractal
You knew that this has to be the first thing to be written 😜
There are two Transputer binaries…
TMANDEL.PRG – the evil, dirty, down-to-the-metal, direct-to-screen-writing version.
This is good for getting an idea of how fast data is being pushed to the Atari ST without much handling overhead.
As this writes to the Screen directly, it only runs in “ST-High” resolution (i.e. 640x400x1).
GEMMAN.PRG – The well behaving GEM version.
It opens a window max’ed to the current resolution and starts plotting the fractal in 16 colors. This takes longer than TMANDEL, as it does quite a bit of GEM juggling before plotting a pixel…
Getting serious
So, this is the part for doing serious things with your Transputer(s) and specifically André Saischowas domain.
He did not only port all needed INMOS tools like iserver to run all the available development tools from back in the days (OCCAM, C, etc) but also ported the Helios server, i.e. the software which runs on the host (i.e. your ATARI) and communicates with the Helios Kernel(s) running on your insane Transputer Farm!
This is a good 75% of what the ATW800 offered – the missing 25% are the graphics which ran on the Blossom chip and was only accessible by the Transputer.
That said you’ll currently find 2 folders in the archive:
C-Code – contains the Mandelbrot demos
Andres – the serious stuff containing
AUTO – the TBIOS driver and stuff needed during ATARI bootup
BIN – the INMOS tools like iserver as well as the always-needed ispy utility
D72UNI – contains the transputer hosted compiler environment based on d7205a (OCCAM) and d7214c (C-Compiler). Visit transputer.net for plenty of documentation on those. See the README in that folder.
HELIOS11 – well, that’s the Helios v1.1 distribution. It’s way smaller than the v1.3 and good for an initial try. You can later switch to v1.3.1 following these steps.
There you have it (for now) – the ATARI ST is therefore the currently third best supported host platform after the PC running DOS or Windoze NT(!) or SPARCStations running Solaris 2.
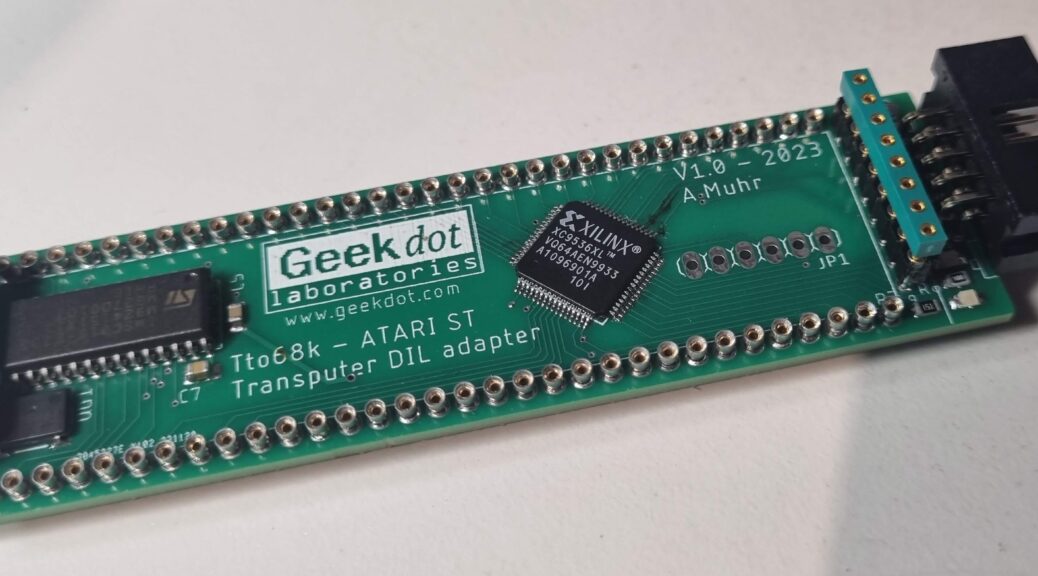
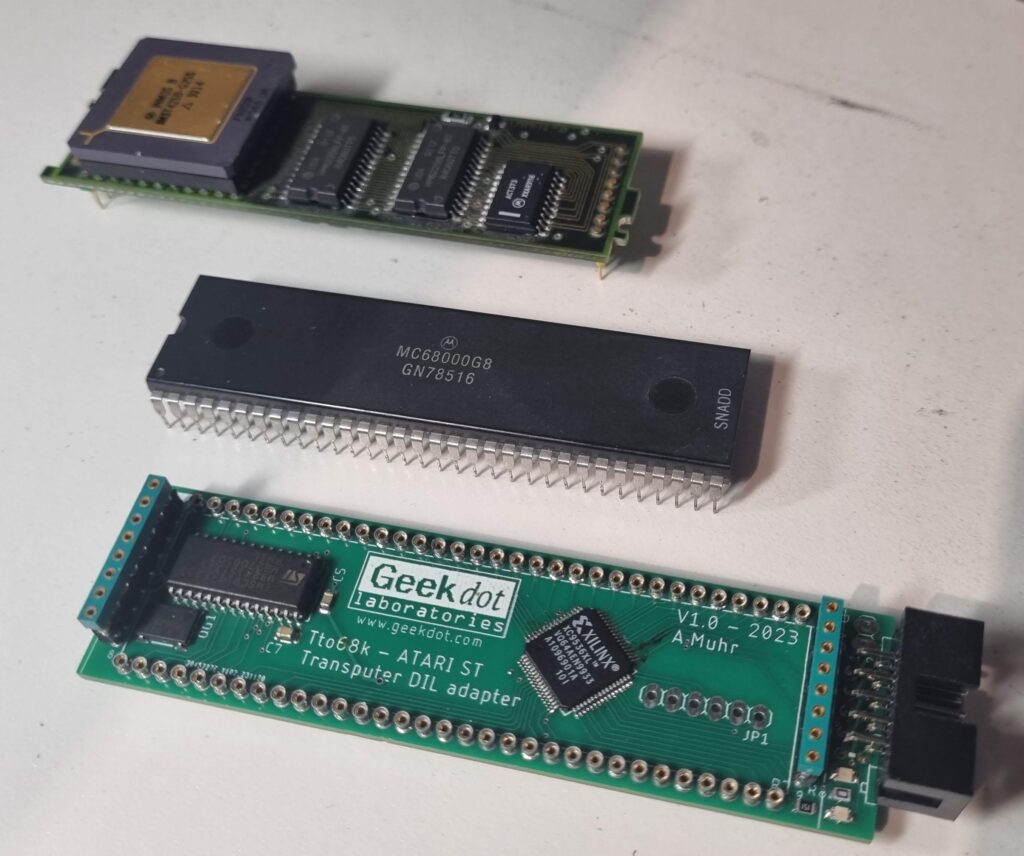
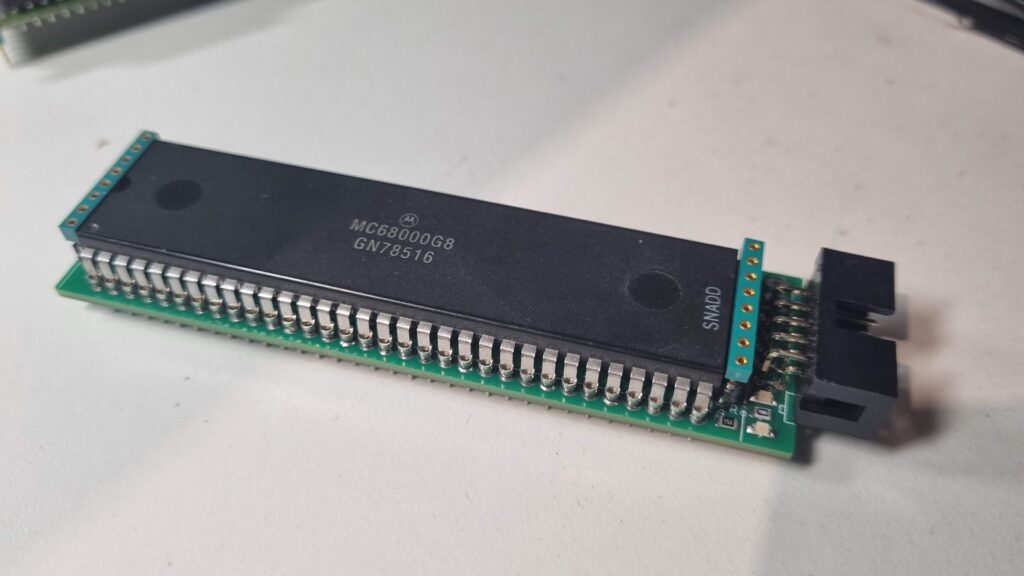
The Tto68k project started by a classic “phone call doodling” situation… but instead of drawing strange patterns I was fiddling alternately with one of Transputer TRAMs and a spare 68000 CPU I had laying on my desk.
At one point it dawned to me, that the 68000 classic 64pin DIL packageperfectly fits in-between a TRAMs socket-pins 😲.
Obviously this discovery immediately had to go into a project which I called Tto68k – actually it is a spin-off from the STG[A]TW project which I recently did for the Atari Mega-ST.
So this is fully compatible and everything developed for that card (minus the VGA stuff, obviously).
Where space allows, the PCB offers certain features:
2 LEDs showing the Transputer status (running/error)
An external Link, compatible with the STGATW and my CPU-relocator. Thus you can connect to another TRAM on that one.
Dedicated 5V/GND pins to feed-in external power (if needed)
Version 1.1 will have two “multi-purpose” pins (see below)
So while the features are pretty basic compared to the STGATW, it has one advantage: The 68000 socket is system-agnostic. And I don’t mean just the different ATARI ST models (520, 1040, Mega) but other systems, too. E.g. the AMIGA, the entry Macintosh line etc. As some of them have more advanced bus management than the ATARI, I saved two of the CPLDs pins as “multi-purpose” pins.
For example in the case of an AMIGA these could be used for the configuration chain (/CFGINn, /CFGOUTn).
While in the ATARI STs those will be used for TOS ROM decoding… or whatever comes to my/your mind.
All that said, this post is just an announcement for now.
Like mentioned, I’m working on a Version 1.1 which will be much more usable, especially for other systems than just the ATARI ST.
Welcome to the ATW800/2 page – read that as you like: “ATW800 two” or “ATW800 half”, depending on your expectation.😉
Whatever way, it’s the Atari Transputer Card as it was meant to be.
This is a pre-announcement – July/August 2024
Normally I do not talk about things which are still in the works.
This is an exception to the rule to inform “the scene” and especially other creators of hardware to prevent unnecessary diversification and fragmentation of an already small market.
I personally hate to buy a piece of hardware just to learn some time later, there’s another one available I wasn’t able to compare to the one I just bought.
So this is a ‘shoulder look’ for you to get an idea what’s coming.
To be dead sure: It already works. It will be released. It’s just not 100% done yet.
And for those, who haven’t watched it… here’s the hastly made YT video 😅
…and another one showing the card running on the VME bus of an ATARI TT
Background
Before we go into features & technical details (skip to those if you’re impatient) I’d like to talk a bit about motivation and goals of this project.
You might have read about my STG[A]TW card for the ATARI Mega-ST expansion bus. That contained an ET4000 graphics card borrowed from IBM PC ISA-land and an Inmos C011 Link-Adapter to connect to a Transputer CPU.
This showed the direction but was a bit cumbersome. Also, ET4000 cards are getting hard to find, expensive (>100€) and not all of them actually do work in your ATARI – and most important, my intention was to create something affordable – remember: Power without the price ✊
The idea is/was to provide a plug-and-play version of a expansion which brings your ATARI as close as possible to what the ATARI Transputer Workstation (ATW800) provided.
That is: Transputers of course as well as expanded graphics capabilities.
Here are my 6 goals I want(ed) to achieve:
Be reasonably ‘historically correct’
Create a design avoiding obsolete parts where possible
Stay in a affordable price range
Simple installation
Integrate/play nice with other peripherals
Offer flexibility
Goal #1 is a philosophical topic one can discuss for his/her whole retro-nerd life. It’s the same as with e.g. cars. Is it OK to put an US V8 into a Ferrari? Electrifying a 1970 Porsche 911? LED headlights in a vintage car? Trailer Queen or patina? The list and discussion will go to the end of humankind.
The very same goes for vintage computer systems. There’s nearly none left which hasn’t had a Raspberry Pi of some sort slapped into it. Starting with a Pi Nano as WiFi-module and ending with a full blown 1.5GHz Pi 4 in an 8bit machine… for my taste, this is not the way.
So with this project we stay with what would have been possible in the let’s say 90s. It might be reached by using more integrated parts, but no recent high-tech here. Sorry. Which brings us to the next point…
Goal #2 is more or less a financial decision. If you use parts which are long time out of production, you depend on a grey market which is limited and can quickly drain, might be full of fakes and prices explode due to greediness.
So instead of buying the last stock of e.g. ET4000W32 chips and create a redesign of an x86 ISA card kludged onto a 68k bus, it’s wiser to go for a ‘virtual design’ which won’t go EOL and can grow as we go… in this case: FPGA is the way. But following goal #1, don’t overdo.
If there’s (currently) no other option, we obviously have to go with the old parts. The Inmos C011 link-adapter is an example here.
Goal #3 limits #2 in some aspects. It’s relatively simple to pick a recent FPGA which actually would be capable to easily simulate your whole ATARI ST (or two)… but that would be quite expensive – not just the chip but also the design, which requires external RAM, 3-4 voltages and multi-layer PCBs to cope with 200+ BGA connects.
The compromise here is an FPGA board which offers all that already mounted onto it and will be piggy-backed onto our card.
And because cheap is always a challenge, we went for the Chinese Nano FPGA family which has an unreached price/feature ratio and fits the “Power without the price” mantra.
Goal #4 is quite simple: Not everybody is a virtuoso with his/her solder iron. So I tried to avoid as much additional soldering/cabling as possible. Basically you plug the card into the Mega-ST or VME slot and you’re good to go.
In fact, as of today, there’s just one cable to plug(!) if you want to use one optional feature of the ATW800/2 (ACSI INT). No soldering whatsoever.
Also, you should be able to plug the card in and use it without additional needs. That’s why it offers (optional) TOS ROMs.
This is the way 😉
Goal #5 reflects the awareness that there are mostly souped-up machines out there. I daresay no one who plays with uses his Atari unenhanced in one or the other way. The ATW800/2 tries to play nice with other common expansions by precisely decoding (previously unused) addresses and even integrate their features like the looped-through USB port of the Lightning-ST.
That said, there are so many old and new peripherals that nobody can guarantee that everything works nicely together with an ATW800/2 – especially on an overloaded bus.
And because of this Goal #6 will be covered by “bespoke ordering“.
Not everybody will be interested in having 2 TRAM slots for hosting real Transputers – so you can leave them out and save some €€.
The same goes for the TOS ROMs. If you already have another ROM switcher, just leave it unpopulated.
Reality kicked in
Having all that planned out, back to the drawing board I went… just to realize that I cannot handle that all by my self.
So it became clear that I have to ask specialists if they like to join the effort.
Let me introduce you to the team aka “The league of extraordinary Transputer gentlemen“:
Wolfgang ‘Idek’Hiestand of the Nova drivers fame. Back around the start of the 2000s, Wolfgang looked into getting his hands on the Nova source code with the intention of preserving knowledge about Nova cards. It took some time, but in the end he succeeded in recreating the original drivers. Since then, he has maintained and extended Nova drivers to support additional VGA cards and ATARI computers. For this project, Wolfgang has created a branch of the Nova drivers to support the FPGA-based card.
Claus Meder. God of all things FPGA and fellow Transputer maniac. So much actually that he wrote a Transputer core in VHDL. Claus designed and wrote the impressive graphics-core for an FPGA from hell.
André Saischowa. Atari and Transputer fiddler of the earliest hours. He wrote Transputer and Atari ST programs back then and just got into the matters again when we met. Perfect timing! André ported all INMOS tools as well as the Helios server… plus developing driver .sys files for NVDI.
Honorable mention: Mike Brüstle of transputer.net. The man whose brain natively runs Transputer assembly code. When you have a question regarding Transputers and he doesn’t know the answer, nobody does.
All four of them have many, many more talents and without them this project would still be just another dream of mine. ❤
Features
Ah, finally… features.
I assume you’re roughly in the picture, what the ATARI Transputer Workstation was all about. Basically, it was a Transputer system running Helios which used an Mega-ST1 as host. The powerful graphics chip (“Blossom“) was connected to the Transputer which ran X11 on it to display graphics in 1280 by 960 pixels (16 colors) or 1024 by 786 pixels in 256 colors, making the most out of its 1MB VRAM.
As said the Atari part was mainly just I/O: Harddisk, keyboard, mouse, serial and parallel interface. No access to Blossom and after booting, there was no way to run Atari software from/in Helios.
Today that’s bugging me, and like said before, I think Atari or Perihelion, the company behind Helios as well as the ATW, took the wrong approach.
The Transputer system should not sit on top of the Atari system but next to it. Both, TOS/GEM as well as the Transputer(s) should have access to all that pixel beauty.
So there you have it, the two main features and ‘raison d’Être’:
High-Res color graphics 👾
The ATW800/2 graphics controller is actually a tiny and cheap FPGA board piggybacked onto the card. While we started out with the Tang Nano9k it soon proved to be unstable as soon you stretched it to the max… as for now, we changed to the slightly more expensive Nano20k which therefore offers more room and faster/bigger RAM.
[NB: This is the prefect proof that it does make sense to keep this part “virtual” – no shortcoming or chip EOL’ing can stop the product itself. All it needs is an adaptor.]
Displays will be directly connected to its HDMI port.
The running core, called “Seurat” (named after the inventor of Pointillism), has access to 2MB of VRAM, which is twice what Blossom had. Thus there are quite some resolutions possible (in 2, 8 and 16 bit colors):
Woo-hoo… holy Bat-Resolution! 🤯 (1600×1200@256)
To cope with such an amount of pixels Seurat features a blitter with is able to push roughly 130MB/s for fast redraws and smooth scrolling.
As of today (July 2024) the current Gembench 6 numbers vs. 640×200 ST-Med (no NVDI!):
Transputer(s)
Yes, they might not be of everybody’s interest, but they were the main actor in the ATW800 and are fascinating beasts when you take a closer look at them.
32bit RISC’ish CPUs, running at 20-30MHz, each having 4 links to directly connect to other Transputers. That way one can create a massive, unlimited parallel system that blew away anything you could run at home back in 1990.
This strictly follows my goal #1: Historically correct. Run things on the real stuff and feel how an ATW800 felt back then.
The ATW800/2 features 2 slots for classic size-1 TRAM modules next to the Nano20k. Here’s one size-2 TRAM installed:
TRAMs were/are available in many configurations, for those who want to know more, I made a dedicated page about TRAMs.
But that’s not all. Because Claus isn’t Claus without some sort of magic, he also added a synthetic Transputer core into Seurat.
That core is 100% T425 compatible and can not only access his own RAM (6MB, can be partitioned by the user) but also the Video-RAM… like Blossom did.
To make everything perfect, this synthetic Transputer has a link to the physical Transputers on the ATW800/2 which are also linked and themselves have a link at the edge of the card to connect to the outside world.
To round this up: Everything is shared with the Atari host. You have access to the physical Transputer(s) and the synthetic ones over the 68k bus.
GEM has access to the VRAM as do the synthetic Transputers… and indirectly over their links, the physical Transputers, too.
Given proper programming, the possibilities are endless. Here are some ideas:
Accelerate Atari programs using Transputers (send data, let them do the math, collect results)
Run X windows on Helios (running the X client on a synthetic Transputer).
Use the synthetic Transputers as GPU. Let them do the VRAM manipulation. Lines, vertices, transformation… you name it.
Optional features
But wait, there’s more 🤓… at least for the Mega-ST:
Like I told you in the beginning, I’d like to be this as much plug-and-play as possible. So the ATW800/2 optionally features 1MB in-system programmable Flash ROM. That ROM can host 4 different versions of TOS selectable by two DIP-switches at the back-edge of the card.
Next to that DIP-switch you’ll find a dual USB port. That is a dumb loop-through to the front left edge of the ATW800/2. It is meant to connect an optional Lightning-ST so you have a nice & clean way to lead those connectors to the outside without cutting holes into your Mega-ST case.
Alternatively you can use these port to power external ACSI drives like the ACSI2SD or ACSI2STM etc.
Besides the 3 external Transputer-Links there’s also an internal one at the cards front. Just in case you have my relocator installed…
The ATW800/2 features a battery-holder for a coin battery. Because the original AA battery compartment of the Mega-ST can get in the way with the ATW800/2, this might have to be cut out 😥.
That holder can then replace the original one.
And finally, because the Nano20k has it already on-board, we’re planning to provide a harddisk interface using the Nano’s Micro-SD feature. For easy access, this is also routed to the back edge of the card providing another Mirco-SD socket. An alternative internal pin-connector is provided if you like to place the SD-card slot elsewhere. This feature is not yet implemented but is the next on the list after VME ist running…
Why “Mega-ST” only? Well the ATW800/2 will also be available for the VME bus, i.e. Mega-STe and Atari TT.
Most of those optional features aren’t needed in those systems. Also VME cards require a 0.5mm unpopulated edge on both sides to slide into its cage.
ROMs cannot fully served through the VME bus.
When installed in the VME cage, there’s nearly no way to feed in the USB connector of a Lightning-TT.
Same goes for internal TRAMs and a battery cable.
There you have it. This is all we’re able to talk about right now. Some smaller details might change until the release – that’s called ‘agile’ 😏
Let’s sum it up again:
The ATW800/2 will be available for the Mega-ST bus as well as VME bus. This is our progress so far. It will be updated every time we think it’s worth doing so.
Mega-ST bus support
100%
VME bus support
90%
Graphics
99%
Real Transputers
100%
Synthetic Transputers
80%
4 TOS ROMs selectable and programmable
100%
Using MicroSD as harddrive
50%
Technical details
The ATW800/2 basically consists of 3 main devices:
The FPGA (“Seurat”)
The CPLD (“Absinth”)
The Inmos C011 link-adapter
Absinthis the glue to the system-bus. He decodes addresses, manages the different functions on the card and controls the C011. He’s also the gateway between the 5V and 3.3V worlds.
Seuratitself, the core within the FPGA, consist of the Framebuffer controller, a blitter and (currently) two synthetic T425 Transputer cores.
This is a schematic representation:
FAQ
Q: When will you release? A: When we think it’s usable. That is at least Graphics and Transputers are at 100%.
Some minor features might be added by firmware updates later on. E.g. we consider the harddisc interface as “nice to have” but not essential as most users have at lease one HD replacement already. So that might be added later.
Q: Ok, I’m confused. How many versions will be available then? A: As of today, we plan various levels of populating the PCB, depending on what makes sense on the specific platform – all versions have the graphics part, i.e. Seurat and Absinth and the USB loop-through connector.
The ATW800/2-VME card will be basically it. Most additional features are useless or redundant in an Atari Mega-STe or TT.
On the other hand the vanilla ATW800/2 for the Mega-ST comes with the clock-battery holder, an auxiliary power cable and will give you some options to choose from:
ATW800/2-R – added TOS ROM sockets and Flash ROMs plus DIP switch to pick one of 4 TOS versions.
ATW800/2-T – features the Inmos C011 link adapter, TRAM sockets, internal and external link connectors.
ATW800/2-RT – the full whopper 🍔
Q: If I chose not to go for a “-T” or “-R” model in the first place, can I populate those parts myself later? A: Sure! All extra functionalities are build in Absinth already. If you’re fine with soldering and do not expect support on your additions, give it a shot.
Q: Shut up and take my money! What will it cost? A: We’ll calculate this as soon we are 100% sure that all basic functionalities are working as expected. But according to goal #3, it won’t be incredible expensive.
Q: How will updates work? A: As for now, Seurat (the FPGA) has to be updated via USB-C using the GoWIN Programming software (Registration required, Linux and Windows only but also works fine in VMs).
Absinth (the CPLD) needs to be updated via JTAG. This requires an Altera USB Blaster and the proper Software (part of Alteras/Intels Quartus II IDE – 1.5GB download, registration req’d… sorry.)
We’ll provide proper documentation on this when we’re shipping.
Q: Will it work with device XYZ and/or accelerator ABC? A: We tested the ATW800/2 with peripherals we own ourselves. That’s probably 2% of the things ever made for the Atari ST/TT – so there won’t be a guarantee that a device we don’t own will perfectly work with the ATW800/2.
That said, we will depend on your feedback and are happy to support creators of other devices to make the ATW800/2 behaving well.
As for now we positively tested the ATW800/2 against these accelerators:
AdSpeed
Turbo25
Also those devices seem to work OK up to now (more in-depth testing needed):
Lightning ST
Cloudy(-Storm)
Q: Regarding software compatibility, would you consider adding Blossom support? I mean Blossom hardware registers like blitter, screen resolutions etc.
A: No, we’re not doing anything Blossom’ish. There’s actually not much sense behind this for some reasons:
Nothing supported Blossom but the Helios graphics/X11 driver.
The Atari-side of the ATW800 had no access to Blossom at all.
Developing VDI drivers for it requires reverse-engineering of hardware which we do not own
It’s simpler to start from scratch and add things as we need them
So “Seurat”, the controller inside the FPGA is accessible by both, the Atari (VDI etc.) and the Transputer(s). Even at the same time(!) if this would make sense in some cases.
Seurat also has more possible video-modes than Blossom had with 1MB video RAM:
mode 0: 1280 by 960 pixels, 16 colors out of a palette of 4096
mode 1: 1024 by 768 pixels, 256 colors out of a palette of 16.7 million
mode 2: 640 by 480 pixels, 256 colors out of a palette of 16.7 million
mode 3: 512 by 480 pixels, 16.7 million colors
With 2MB video RAM Seurat can go from 320×200 up to 1600x1200x8. Bit depths are currently ranging from 1 to 16bit. It also supports the original Atari modes like 640x400x1 and could do 640x200x2 and 320x200x4… even there’s not much sense behind this.
Q: Hey, I have an idea: What about adding [enter cool feature here] !? A: Sorry, we had hard times to even hold ourselves back from feature-creep. Actually, we think the ATW800/2 has enough features already. Some not implemented functionalities are just handled better by already available devices .
Q: I don’t have an HDMI display, what about good old analog VGA? A: We had to decide how to use the limited space at the external edge of the card. So the onboard HDMI of the used FPGA board was a natural choice.
Sadly all Nano FPGAs provide a “just enough-HDMI” signal which does not provide all needed signals for external converters etc. This includes HDMI to VGA converters or power-injectors.
Q: Why didn’t you just took a Raspberry Pi? A: Have you read our goals? Please do so now. Thank you.
Q: Do I need a bigger power-supply? A: It depends. If you’re still using the original power-supply of your Mega-ST this might be a good moment to replace it with something more recent.
The ATW800/2 is not tremendously demanding. With one TRAM plugged into the board, calculating Mandelbrots and displaying them in 1024×786@8bit, a 4MB Mega-ST draws 1.65 amperes in total.
Q: Can I have the source-code, schematics or gerber files? A: Sorry, this is not an open-source project. We have to cover quite some initial R&D costs and we actually don’t like those ePay copycats.
That said, we – the extraordinary transputer gentlemen – are open for personal request in which you can explain why you need those and if there’s a convincing reason, we might share what we have.
Q: This sucks! XYZ is way better than your crap! A: Yes, you’re right. So please move on, there is nothing to see here.
The Tto68k project started by a classic “phone call doodling” situation… but instead of drawing strange patterns I was fiddling alternately with one of Transputer TRAMs and a spare 68000 CPU I had laying on my desk.
At one point it dawned to me, that the 68000 classic 64pin DIL packageperfectly fits in-between a TRAMs socket-pins 😲.
Obviously this discovery immediately had to go into a project which I called Tto68k – actually it is a spin-off from the STG[A]TW project which I recently did for the Atari Mega-ST.
So this is fully compatible and everything developed for that card (minus the VGA stuff, obviously).
Where space allows, the PCB offers certain features:
2 LEDs showing the Transputer status (running/error)
An external Link, compatible with the STGATW and my CPU-relocator. Thus you can connect to another TRAM on that one.
Dedicated 5V/GND pins to feed-in external power (if needed)
Version 1.1 will have two “multi-purpose” pins (see below)
So while the features are pretty basic compared to the STGATW, it has one advantage: The 68000 socket is system-agnostic. And I don’t mean just the different ATARI ST models (520, 1040, Mega) but other systems, too. E.g. the AMIGA, the entry Macintosh line etc. As some of them have more advanced bus management than the ATARI, I saved two of the CPLDs pins as “multi-purpose” pins.
For example in the case of an AMIGA these could be used for the configuration chain (/CFGINn, /CFGOUTn).
While in the ATARI STs those will be used for TOS ROM decoding… or whatever comes to my/your mind.
All that said, this post is just an announcement for now.
Like mentioned, I’m working on a Version 1.1 which will be much more usable, especially for other systems than just the ATARI ST.
Ok, you read/heard about the STG[A]TW and want to know more about how to use it and -most importantly- for what it’s good for?
First and foremost, a Transputer is a computer-system of its own connected to a host. In this case an ATARI Mega ST.
But given an available host-adapter that could also be e.g. a Unix machine, a classic PC, an Apple II or even a Commodore C64, C128 or Plus/4…
That host communicates with the Transputer over a link-interface using specific memory addresses or, if available, a library. That way the host can send executable binaries to the Transputer, send or receive data to/from it and control it (boot, debug, etc.).
Because each host system is different, these addresses are different, too. But the transfer protocol and Transputer executables are always the same. So looking at this BASIC code example for the C64 gives you an idea, how it works – the steps are the same for every host-communication no matter which host-system used.
As usual, here’s a table of contents for those being in a rush..
Yes, there have been very different ATARI ST and Transputer interfaces in the past. “Two and a half” systems were most prominent – let’s have a look at them before we go into details of the STG[A]TW.
The Atari Transputer Workstation aka ATW800
I think I’ve already wrote a lot about the ATW800 in several post on this page, even designed an expansion card for it – despite I don’t own an ATW myself.
To make a long story short: This is basically a design, where the ATARI Mega-ST is used as a boot device and after that just handles file- and user-I/O. The Transputer is attached to the ST via DMA and runs the Helios OS and has direct access to the graphics controller called ‘Blossom’. Totally different concept.
KUMA K-MAX
The KUMA K-MAX was a box connected to the ATARI ROM-module port and thus acted as pure ‘number cruncher on a leash’.
There are two reviews still available: The English review of atarimagazines.com and the German ST-Computer article even showing some photographs of which I ‘borrowed’ this:
Transfertech
Outside “the scene” this is a relatively unknown German company which actually made a lot of Transputer-centric hardware.
For the ATARI series they had 3 host interfaces:
A ROM port interface (all ST models)
A Mega ST bus interface (ROM port design botched onto the bus)
A VME-card (Mega-STE, TT)
Like the KUMA K-MAX, this design also attached the Transputer(s) as number cruncher.
As I own all of them, I might write a dedicated post about them some day.
This is how we do it
As all of the above did their own thing, there is and was no standard for interfacing the ATARI ST series – So I defined one with the other ATARI ST Transputer enthusiast André Saischowa, who did some intense ATARI Transputing fiddling back in the days.
In case of the ATARI ST the link-interface ( e.g. STG[A]TW) ‘lives’ at the base address 0xFFFAC0 and uses 18 bytes from there up to 0xFFFAD2. So the complete adress-range looks like this (uneven, so we can address the lower byte of a 68000 word):
But you don’t have to bother with those as we provide two more convenient ways to talk to a Transputer.
☝ Some words of warning to the programmers:
While the 68000 in your ATARI is big-endian, Transputers are little-endian. So data being send back and forth might need conversion.
Floating-point variables used by the Transputer are IEEE 754-1985, thus 32 Bit (single precision) or 64 Bit (double precision).
Some compilers like Turbo/Pure-C on the ATARI ST use 80bit doubles.
Those need to be converted by e.g. the xdcnv call from the PCFLTLIB library.
The static way
The raw-way is using an include file called “trproc.h”. It’s – like everything else – included in the program archive, located in the “DEVELOP” folder.
This include-file provides you these calls to receive (get) or send (put) data to/from your Transputer:
get/puttrchar(char)
read/send one byte
get/puttrshort(short)
read/send a short (2 bytes)
get/puttrint(int)
read/send an integer (32 bytes)
get/puttrlong(long)
read/send a long (32 bytes)
get/puttrfloat(float)
read/send a float (32 bytes)
get/puttrdouble(double)
read/send a double (64 bytes)
get/puttrraw(char *array, int length)
read/send an array of length
The calls marked blue are doing the endian-conversion for you.
Additionally there’s a call to check for an available Transputer: checkTransputer(int checkType)
If checkType is ‘0’, this function will return ‘1’ if it was able to find a Transputer or ‘0’ when not.
Setting checkType to ‘1’, the return value will give you the “family” of the found Transputer:
0 – No Transputer found
1 – Found a C004 link-switch
2 – A 16bit T2xx Transputer was found
4 – A 32bit T4xx/T8xx Transputer was found
-1 – Found something unknown
The elegant way – TBIOS
The much more elegant way is provided by André who extended the ‘ALIABIOS’ from a project published in the German computer magazine c’t back in 1989.
It’s a GEMDOS driver called “TBIOS.PRG” and can be put into your AUTO folder or called manually when needed. This driver has all the bells’n’whistles like a proper XBRA-ID etc.
As ATARI never planned something like this card, there’s no ready-to-use software… it’s up to you to create miracles 😊
But compared to my 8bit Transputer adapters, there’s quite some stuff to start with:
Yes, literally, we’re testing if your Transputer is working correctly using a BASIC program called T_TEST.GFA – so right, it’s GfA Basic in this case. But in essence it’s nearly the same used for my C64 or Apple II interfaces.
This little Program checks if it can find a link-interface, a Transputer and if so, which kind (16 or 32 bit). If that went OK, it does a little coms-speed test by reading 4KB from the Transputer and times that.
Mandelbrot fractal
You knew that this has to be the first thing to be written 😜
There are two Transputer binaries…
TMANDEL.PRG – the evil, dirty, down-to-the-metal, direct-to-screen-writing version.
This is good for getting an idea of how fast data is being pushed to the Atari ST without much handling overhead.
As this writes to the Screen directly, it only runs in “ST-High” resolution (i.e. 640x400x1).
GEMMAN.PRG – The well behaving GEM version.
It opens a window max’ed to the current resolution and starts plotting the fractal in 16 colors. This takes longer than TMANDEL, as it does quite a bit of GEM juggling before plotting a pixel…
Getting serious
So, this is the part for doing serious things with your Transputer(s) and specifically André Saischowas domain.
He did not only port all needed INMOS tools like iserver to run all the available development tools from back in the days (OCCAM, C, etc) but also ported the Helios server, i.e. the software which runs on the host (i.e. your ATARI) and communicates with the Helios Kernel(s) running on your insane Transputer Farm!
This is a good 75% of what the ATW800 offered – the missing 25% are the graphics which ran on the Blossom chip and was only accessible by the Transputer.
That said you’ll currently find 2 folders in the archive:
C-Code – contains the Mandelbrot demos
Andres – the serious stuff containing
AUTO – the TBIOS driver and stuff needed during ATARI bootup
BIN – the INMOS tools like iserver as well as the always-needed ispy utility
D72UNI – contains the transputer hosted compiler environment based on d7205a (OCCAM) and d7214c (C-Compiler). Visit transputer.net for plenty of documentation on those. See the README in that folder.
HELIOS11 – well, that’s the Helios v1.1 distribution. It’s way smaller than the v1.3 and good for an initial try. You can later switch to v1.3.1 following these steps.
There you have it (for now) – the ATARI ST is therefore the currently third best supported host platform after the PC running DOS or Windoze NT(!) or SPARCStations running Solaris 2.
This is my first ever project I did for one of my favorite computers, the ATARI Mega-ST. Like told in one of my blog posts, the ATARI ST was my 2nd greatest love ❤ (after the C64) and being part of a very cool company back in the days I only have fond and happy memories of it.
After all the years of fiddling with nearly every machine on the market, it’s like coming home by just looking at its system font or hearing it’s specific bell-sound (even the ever-annoying key-click sound it makes by default).
And now it’s time to do something cool with it… adding, what I’ve missed back then: Color and -of course- Transputers 😉
TLDR;
Ok, so you’re in a hurry or suffer from severe ADHD?
This is a graphics card for the ATARI Mega ST internal bus including a Transputer interface.
What’s that about the strange naming?! Well, this card is a hybrid of a classic STGA ISA graphics-card adapter and a Transputer interface for the Mega-ST bus.
Mega-ST, high-res graphics and Transputers? Mhh, does this ring a bell? Yes, component-wise this is exactly the configuration of an ATARI ATW800, the famous and rare ATARI Transputer Workstation (for which I designed a Farmcard, just in case you own an ATW).
So adding the two, it’s an STGA-ATW or STG[A]TW for short… and it looks like this:
Looking at the top you’ll spot the 90° angled ISA Slot at the right edge, giving (selected) ET4000 graphic cards a home.
To the left there are two Transputer TRAM slots making it possible to use two size-1 or a single size-2 TRAM.
Obviously, an ISA card and the TRAMs would collide, so you have to choose… or you’re a lucky owner of a low-profile ET4000. Then you could use your VGA card plus one TRAM like this:
But even if your ET4000 card is covering the whole STG[A]TW don’t despair! Looking at the backside you can spot the external Transputer link connector (on the right edge):
Using this you can connect to e.g. an external Transputer(-farm) of any size… for example something like my 64 CPU Final Cube 🔥
Looking further around the backside you can spot a preparation for a CR2032 coin-shape battery holder. That is meant to replace the two AA batteries used in the original case-lid because depending on the TRAMs used, it might be necessary to remove the battery compartment (yes, you’d need to cut it out 😰) .
Talking about power… at the bottom you can see the external power connector which supply is mandatory – you need to connect at least 5V and ground, optionally 12V if your ET4000 needs that.
That said, I highly recommend to make sure your Mega ST’s PSU is powerful enough – best would be to replace it by e.g. a Maxwell RD-50A.
Why?!
I knew you’d ask. Well in case you haven’t noticed yet, I’m a total Transputer nut. It’s a fabulous, genius CPU and design. The more you dig into it, the more you’ll love it.
Back then I adored the ATW800 and always wanted to own one. But it was insanely expensive and -to be honest – wasn’t a real member auf the ST/TT-family anyhow.
This is because the Mega-ST1 inside the ATW was mainly used as a bootup machine for the Transputer and after that was up and running, everything the ST did was file- and user-I/O (Mouse, Keyboard, RS232).
In my humble opinion, the STG[A]TW is (somewhat) the way how ATARI should have done it back then. Instead of creating an ‘island solution’ they should have used the existing install-base and offer an expansion to it. Plug in the missing parts (graphics & Transputer) and keep the TOS/GEM eco-system in charge.
Users could keep running their applications and use the extra ‘ooomph’ to speed them up. Think of all the accelerators Apple Macintosh users had available to speed up PhotoShop filters or have it do the heavy number crunching of science applications etc.
Even all data has to travel over the bus to the Transputer and back, this is still faster than the 8MHz 68000.
Given that in 1990 about 350 ATW800 were produced and sold at 5000-7000 GBP which equaled to about 13700 DM or 8000$ (that’s about 11400 GBP, 13700 EUR or the same in US$ today),
I bet the number of a “ATW for the poor” would have been much higher.
So, again, why? Well to have Mandelbrot fractals calculated fastand in colo(u)r, of course!
Fast means ~60sec, even using slow GEM routines. Using the same algorithm and iteration depth, the ST’s 8MHz 68000 took nearly 3 hours to calculate the same fractal.
Here’s a quick peek how ‘fast’ looks like:
Evolution – a quick excursion
If you’re into hardware development you might wonder why there’s a very vintage GAL and a semi-vintage CPLD used in this design.
Here’s my explanation and shameful justification 😉
From the very simple and basic design of the STGA I took the usual nerdy feature-creep road to hell 🙄
My initial design naturally included the GALs logic into one big CPLD. And having all address-lines available on this, that design also included (on top of the ISA and Transputer interface) a 68882 FPU, an IDE interface and a ROM decoder… everything worked fine BUT all ‘modern’ ET4000 cards didn’t.
I stared at logic-analyzer traces for weeks and weeks and compared them to the original STGA they were absolutely identical. But whatever I did, I wasn’t able to get ET4k cards with a Rev. TC6100AF chip working.
In the end I decided to keep the STGA part as-is, including the external AND-ing of /LDS & /UDS and inverting of /DTACK and put the Transputer handing into a smaller (and cheaper) CPLD.
Thus the FPU, IDE and ROM decoding was off the table and to be honest, there are other solutions which do that job better anyhow.
So there you have it: Colorful high-res GEM combined with the mighty Transputer power… but I understand, that those low-profile ET4k cards are getting rarer and rarer and not everybody has an external Transputer farm to connect to.
So I made another card or better a so-called CPU relocator…
The TRAM-Relocator
Most (Mega) ST users out there already have one or more expansions to their system, mostly plugging into or onto the CPU creating a ‘stack’ of PCBs.
Because the STGA (as well as the STG[A]TW) overlaps over the Mega STs CPU socket you might want relocate the CPU a bit away from the Mega-Bus socket. Simple relocators simply move it a bit towards the front of the case. But that still results in having a stack of multiple extensions. For example here’s a Storm ST (Alt-RAM) on top of a Cloudy (4x ROM) plugged into a Lightning ST (IDE & USB):
This can get tricky in some crowded Mega ST cases…
I really liked the ‘Bus I/O port design’ of the Exxos’ STF Remake Project having multiple sockets next to each other.
And if you have your original TOS ROMs removed (and replaced by e.g. a Cloudy) there’s actually some space to roll out 4 of them having the Relocator sitting flush on the Mega-ST mainboard (make sure the backside of the Relocator is completely isolated!):
4 Sockets and a cool TRAM socket 😁
Like clearly written on the PCB, SOCK1 goes into the (to-be-retrofitted) CPU Socket and using ‘hollow pins’, it can take a CPU itself.
SOCK2-4 are available to extensions of your choice – all 3 of them are protected against power-surges by a fuse and a diode.
This design decision has been made due to my own painful experience loosing everything which had been plugged into the CPU socket… and the Blitter 😥
In the lower right corner are pins for an additional external power connector, also protected. That might be necessary depending what you’re plugging into those sockets.
Finally, the left edge is a Transputer TRAM socket which can be connected to the STG[A]TW by a 10pin flat-cable providing link signals and a 5MHz clock signal.
That way, you can use the STG[A]TW with an internal Transputer even your ET4000 card is big as a baking-tray.
It is highly recommended to use external power when doing so. The poor 68000 power-pins won’t be enough for it.
If needed, the whole TRAM part can be snapped-off from the Relocator to, uhm, relocate the TRAM elsewhere in- or outside the case or use it stand-alone. For that matter itself features an optional connector for power as well as a place to solder a required 5MHz oscillator and 2 mounting holes.
With everything in place, your “ATW800 for the poor” could look like this:
What you see here is the STG[A]TW plugged in, giving home to a low-profile ET4000 and a Size-1 TRAM.
The Relocator was plugged into the CPU socket and in its 1st slot the Cloudy-Storm and the 68000 sitting on top of it, took seat.
Slot 2 of the Relocator is taken by a Lightning-ST… and last but not least, a second TRAM was put onto the Relocator (you can spot the grey flat-cable connecting it to the STG[A]TW.
Want one?
All this sounds so cool that you want to own a STG[A]TW?
Well, first check out this list:
Do you have an ET4000 card of which you know it’s working with the NOVA drivers?
👉 I am not able to support you in getting your specific card working – there are just too many models and permutations of possible TOS/GEM/Driver installations. See this atari-forum.com thread to get an idea…
Do you own a TRAM?
👉 I might provide you with one at extra cost, mail me.
Do you have time to wait?
I’m manually building these boards and it’s a lot of work (0.5pich SMD, lots of trough-hole pins to cut and file down etc.)
If that’s 4 times “Yes” I can build & sell you one of the 6 which I have left for 100€ (plus shipping)… yes, that’s hefty but the quite large PCB is 4 layers (for stable power-distribution), just the ISA slot connector is 10€ already, Mega Bus 5€, GAL, CPLD etc.etc…. plus, as said, it takes quite some time to build & test them. Drop me a mail on the bottom of that page if interested…
SOLD OUT… sorry 😥
As for the CPU-relocator, I’m selling un-populated PCBs for 8€ (Or get the gerbers here and have yours made at your favorite PCB manufacturer).
I’m not building them because the CPU ‘socket’ (SOCK1) is made of 64 single pins which you have to pry/get out of precision pin-headers.
That’s a tedious work you most likely want to do once… but not many times.
All that said – If you weren’t able to get a STG[A]TW, don’t despair.
I consider this as my stepping stone and learning platform for something cooler to come 😎.
Because I don’t like vapor-ware and hot-air-talking, I’ll tell you more when it’s a) done and b) working.
Ahh, back in cosy main: – looks much easier now after that crazy MMU stuff in the previous part, right?
The next subroutine called is proc32. In the complete source code (reminder: Available at GitHub) I commented that with “works (get some RSC strings)“… and well, that sums it up pretty good. proc32 loads (i.e. creates handles) from the resource-fork, e.g. the icons used in the menu-bar and several error-messages like “This application must run on the 68030 processor, please quit all other 68040 applications and re-run this application.“. That’s it. Boring…
That boredom instantly changes when we get to the next subroutine proc43located at 0x29DA…
I did it my way…
One fascinating thing about classic Mac OS is how easy it is to patch system calls, aka Toolbox traps. For example in the previous post we came about _BlockMove, which is a Toolbox call to copy an amount of RAM from A to B.
For example you have just read this article about a faster BlockMove method, you’re totally free to patch (read: replace) _BlockMove with your speedier version and automatically use this throughout your application – or even system-wide, if you’ve created an INIT… [If you want to know allabout it… here’s a book for you]
And that’s what proc43heavily does. Because it’s a long subroutine (230 lines) so I will give you just one example – the inline comments should do…
2BE2: MOVE #$A02E,D0; BlockMove
2BE6: _GetTrapAddress newOS ; (D0/trapNum:Word):A0\ProcPtr
2BE8: MOVE.LA0,$270(A5); oldBlockmove
2BEC: LEA data42,A0; myBlockMove
2BF0: TST.B MMU32bit ; loMem global "current address mode"
2BF4: BNE.S lae_70 ; skip if 32bit clean machine else
2BF6: LEA data43,A0; use a different entry for dirty machines
2BFA: lae_70 MOVE.LA0,$274(A5); save routine pointer to $274(A5)
2BFE: LEA data41,A0; DC.L 0000 0000
2C02: MOVE.L$270(A5),(A0); save oldBlockmove vector into there
2C06: MOVE.L #$A02E,D0; BlockMove
2C0C: LEA data40,A0; aaaand replace it by myBlockmove
2C10: _SetTrapAddress newOS; (A0/trapAddr:ProcPtr; D0/trapNum:Word)
This is the sum up what else being done:
Save all debugger vectors into A5-world locations (suspicious. I sense Macsbug killing…)
Load the PACK4 resource, that’s the Floating Point emulation package (aka SANE) if no FPU found
Check & read several system Gestalt codes into A5-world (0x2AAC-0x2B44)
Patch several Toolbox traps
SwapMMUMode replaced by data19
VM_Displatch by data22
Pack4 by data10
Pack5 by data11
BlockMove by data40
jClearCache by myClearCache
GetNextEvent by myGetNextEvent
GetResource by myGetResource
SCSIdispatch by mySCSIdispatch
DrawMenuBar by myDrawMB
LoadSeg by data31
UnLoadSeg by data32
HWPriv by data33
vStdExit by data34
So far, so many. Then there’s some RAM copying going on, of which I’m currently not quite sure what it is good for (0x2CAC-0x2CD8) 💡 .
Finally, the myShutdown routine is installed into the Shutdown Manager, i.e. it will executed before the Mac is powered down/restarting (it simply switches the host back to its own 68030). After that, RTS into main…
“There and back again…”
Barely back in main, a JSR 12(A6) warps us into MacII_4th, the last of the four handlers every supported system has.
This loads specific data from the FPSP into RAM (namely IDs 0x12C and 0x12D).
Finally a special floppy driver is installed (myFloppyDrvr @ 0x954) which IMHO just differs from the original in handling the ‘040 caches correctly. That was that and back to main…
The next sub-routine in line is chkATalkVer. I can rightfully name that routine because it’s short and crystal clear: Figure out if AppleTalk is installed, and if true, return its version in D0 (and also write it into A5-world). C’est ca…
This is the end…
It’s getting ugly (for now)… proc42 will be called – the last subroutine in main before my SE/30 crashes and burns 😥
The first few lines (0x28F4-0x293C) are comparably harmless. They are working around a bug in System 7.1 which was corrected in 2/17/92 according to some dark sources (“Corrected value of timeSCSIDB from 0DA6 to 0B24”).
After that, proc38 (0x293C) is called which again calls proc39 and something’s done with the TimeManager, not really sure what’s exactly going on, but it feels like a timing-benchmark heavily using InsTime, PrimeTime and RmvTime Toolbox calls.
[hold yer breath] Then we’re getting closer to the flat line… The stack is filled with these parameters:
P.S: I changed course (again) and started to investigate more into the C040’s hardware. The more I understand of the INIT/CP workings the more I can’t fight the idea that it really might be a hardware timing issue.
Next up is the 3rd handler, MacII_3rd: (0x3F94) in our case. Actually it’s called with JSR 8(A6), but that’s an 8 byte offset to the ‘base-address’ of any handler. Clever stuff, huh (Google for ‘pointer-table’)?
This subroutine contains serious magic and was a real hard nut to crack. Especially because it tricked me into believing that I’ve found the ‘crashsite’… which, to spoil the tension, isn’t.
It just kept on killing Macsbug, because it’s so low-level.
What this routine does is replacing the Vector Base Register (VBR) which ‘lives’ at address 0x00000000. Evil stuff.
After disabling interrupts and switching to 32bit-mode a field with 6 long-words (data107) will be populated with data generated in other routines.
For now I can only guess what these entries are (Values from my SE/30 given in brackets). We’ll discuss all that further down.
0x3FC6 to 0x3FD8 calculates the size of the chunk of code starting at data106 (0x4008) to the beginning of MacII_4th (i.e. the end of Mac_3rd), which is 180 bytes.
Using this length, the routine first saves the current VBR onto the stack using the system call _BlockMove.
Then the original VBR (+some more) will be replaced by the new version beginning at data106. (Killing Macsbug – more on that later)
BSR 53_cmd_1x is been called. This brings the Carrera040 into life most likely using the just copied VBR (This is discussed in much detail further down).
Now the contents of the stack (= copy of the original VBR) will be copied back into its place, this time using a classic DBRA loop (0x3FF4). My guess, no Toolbox call possible at the moment.
Adjust the stack, back to 16bit mode, restore Registers and return-from-subroutiene. Done.
Here’s the code doing all this:
3F94:MacII_3rd: MOVESR,-(A7); 3rd call from MacII handler
3F96: ORI #$700,SR; Set bit 9-11 of SR (disable Interrupts)
3F9A: MOVEM.L D0-D2/A0-A2,-(A7)
3F9E: MOVEQ #1,D0
3FA0: _SwapMMUMode
3FA2: PUSH.BD0
3FA4: SUBA.LA2,A2; faster movea.l #0,a2
3FA6: LEA data107,A0; Filling the data into the 6x32 field
3FAA: MOVE.L96(A5),D0
3FAE: MOVE.LD0,(A0)+; SE30: 9FE00
3FB0: LEA data69,A1
3FB4: MOVE.LA1,(A0)+; SE30: 9D6E2 (User/Supervisor Rootpointer?)
3FB6: MOVE.L$64(A5),(A0)+; 807FC040
3FBA: MOVE.L$6C(A5),(A0)+; 807FC040
3FBE: MOVE.L$68(A5),(A0)+; 00000000
3FC2: MOVE.L$70(A5),(A0)+; 00000000
3FC6: LEA MacII_4th,A0
3FCA: MOVE.LA0,D2
3FCC: LEA data106,A0
3FD0: SUB.LA0,D2; 'distance' from data106 to MacII_4th
3FD2: SUBA.LD2,A7
3FD4: MOVEA.LA2,A0
3FD6: MOVEA.LA7,A1; save the current VBR to the stack
3FD8: MOVE.LD2,D0; A0 = SE30: 00000000 (src) - IIci: $FBB08000; A1 = SE30: 027ff34c (dest) - IIci: $3BF9FC6; D0 = B4 (count) - SAME on the IIci!
3FDA: _BlockMove ; (A0/srcPtr,A1/destPtr:Ptr; D0/byteCount:Size) ; write my own VBR...; This copies 180 bytes into 0x000000000 replacing the original VBR. ; ... and kills Macsbug if not circumvented properly.
3FDC: LEA data106,A0
3FE0: MOVEA.LA2,A1
3FE2: MOVE.LD2,D0; A0 = 9F900 (src) - IIci 10C4EA (data88) ; A1 = 00000 (dest) - IIci FBB08000; D0 = B4 (count) - IIci same
3FE4: _BlockMove ; (A0/srcPtr,A1/destPtr:Ptr; D0/byteCount:Size)
3FE6: BSR53_cmd_1x ; Bring the C040 to life
3FEA: MOVEA.LA7,A0; SP to A0
3FEC: MOVEA.LA2,A1; SE30: 00000000
3FEE: MOVE.LD2,D0; the code length (B4 again)
3FF0: BRA.S lae_163
3FF2: lae_162 MOVE.B(A0)+,(A1)+; Write the VBR back from the stack
3FF4: lae_163 DBRAD0,lae_162
3FF8: ADDA.LD2,A7; adjust the stack
3FFA: POP.BD0
3FFC: _SwapMMUMode
3FFE: MOVEM.L(A7)+,D0-D2/A0-A24002: MOVE(A7)+,SR4004: MOVEQ #0,D04006: RTS; Start of VBR replacement- and 040-Code being copied to 0x0 the by line 0x3FE4 ; /if/ theses are the Vectors 0-17, then their meaning would be:4008: data106: DC.L #$00001000; Reset initial Stack Pointer
400C: DC.L #$00000050; Reset initial Program Counter; - ALL of these Vectors point to addr 4050 (offset 0x48) -4010: DC.L #$00000048; Buserror 4014: DC.L #$00000048; Adress Error4018: DC.L #$00000048; Illegal Instruction
401C: DC.L #$00000048; Zero Divide4020: DC.L #$00000048; CHK, CHK2 instruction4024: DC.L #$00000048; cpTRAPcc, TRAPcc, TRAPV instruction4028: DC.L #$00000048; Privilige Violation
402C: DC.L #$00000048; Trace4030: DC.L #$00000048; LINE 1010 Emulation4034: DC.L #$00000048; LINE 1111 Emulation; THESE are definitely no vectors, they are dynamically written by the code above; and to be used to setup the 040 MMU registers.4038: data107: DC.L #$0009FE00;
403C: DC.L #$0009D6E2; 4040: DC.L #$807FC040; 4044: DC.L #$807FC040; SE30: 4048: DC.L #$00000000; SE30: 00000000
404C: DC.L #$00000000; SE30: 00000000 4050: CLR.L$53000000; Poke 0 to $530000004056: BRA lae_164 ; This points to itself... I'm lost at the moment.4058: LEA data107,A0; SE30: 9F900
405C: MOVE.L(A0)+,D1; SE30: 0009FE00 (User/Supervisor Rootpointer)
405E: MOVEA.L(A0)+,A1; 0009D6E24060: MOVE.L(A0)+,D4; 807FC0404062: MOVE.L(A0)+,D5; 807FC0404064: MOVE.L(A0)+,D6; 000000004066: MOVE.L(A0)+,D7; 000000004068: MOVE.L #$C000,D0
406E$ MOVEC D0,ITT0 ; Set Instruction Transparent Translation4072$ MOVEC D0,DTT0 ; Set Data Transparent Translation4076$ MOVEC D1,SRP ; Set Supervisor Rootpointer
407A$ MOVEC D1,URP ; Set User Rootpointer
407E: MOVE.L #$C000,D04084$ PFLUSHA ; Invalidates all entries in the address translation cache4086$ MOVEC D0,TC
408A: LEA data108,A0
408E: ADDA.L #$53002000,A0; (=0x530A1900)4094: JMP(A0); JuMP to data108 code (below) in C040 RAM range? 4096: data108: MOVEQ #0,D04098$ MOVEC D0,ITT0
409C$ MOVEC D0,DTT0
40A0$ MOVEC D4,ITT0
40A4$ MOVEC D5,DTT0
40A8$ MOVEC D6,ITT1
40AC$ MOVEC D7,DTT1
40B0$ CINVA BC
40B2: NOP
40B4: MOVEQ #0,D0
40B6$ MOVEC D0,CACR
40BA: JMP(A1); 0009D6E2; END 040 Code being copied to somewhere by line 3FE4
40BC: MacII_4th: MOVEM.L D1-D7/A0-A4,-(A7); 4th subroutine called my MacII_handler[...]
The Vector Base Register
I wasn’t precise when I initially said “replacing the VBR”. What actually happens is that this routine uses what I’d call an interim-VBR for the moment it initializes the 68040 on the C040. You’ve probably saw the link referring to what the VBR is in the 1st post of this series, but let me go a bit more into detail.
The VBR is a list of addresses (aka vectors) the CPU refers to in case of an exception – and this is true for every 68k system out there, e.g. Mac, SUN, NeXT, Amiga or Atari. Some of them might do some relocation using their MMU, but even the virtual address will be 0x00000000 and the order is the same. There are 16 basic vectors as listed here:
If for example a divide-by-zero happens, the CPU would call a handler which address is stored in 0x14. Pretty simple.
So let’s have a look what MacII_3rd left in the VBR (and below that) when the ‘interim VBR’ is in place:
0000: data106: DC.L #$00001000; Reset initial Stack Pointer
0004: DC.L #$00000050; Reset initial Program Counter; - ALL of these Vectors point to addr 0x48 -
0008: DC.L #$00000048; Buserror
000C: DC.L #$00000048; Adress Error
0010: DC.L #$00000048; Illegal Instruction
0014: DC.L #$00000048; Zero Divide
0018: DC.L #$00000048; CHK, CHK2 instruction
001C: DC.L #$00000048; cpTRAPcc, TRAPcc, TRAPV instruction
0020: DC.L #$00000048; Privilige Violation
0024: DC.L #$00000048; Trace
0028: DC.L #$00000048; LINE 1010 Emulation
002C: DC.L #$00000048; LINE 1111 Emulation; - THESE are definitely no vectors, they are dynamically written by the ; code above and to be used to setup the 040 MMU registers.
0030: data107: DC.L #$00000000; SE30: 0009FE00 (12)
0034: DC.L #$00000000; SE30: 0009D6E2 (13)
0038: DC.L #$00000000; SE30: 807FC040 (14)
003C: DC.L #$00000000; SE30: 807FC040 (15)
0040: DC.L #$00000000; SE30: 00000000
0044: DC.L #$00000000; SE30: 00000000
0048: CLR.L$53000000; Poke 0 to $53000000 ; C040 off
004C: blocker3 BRA blocker3 ; Points to itself... probably a "blocker"
0050: LEA data107,A0; initial Program Counter (SE30: 9F900)
0054: MOVE.L(A0)+,D1; SE30: 0009FE00 (User/Supervisor Rootpointer)
0058: MOVEA.L(A0)+,A1; 0009D6E2
005C: MOVE.L(A0)+,D4; 807FC040
0060: MOVE.L(A0)+,D5; 807FC040
0064: MOVE.L(A0)+,D6; 00000000
0068: MOVE.L(A0)+,D7; 00000000
006C: MOVE.L #$C000,D0
0070: MOVEC D0,ITT0 ; Set Instruction Transparent Translation
0074: MOVEC D0,DTT0 ; Set Data Transparent Translation
0078: MOVEC D1,SRP ; Set Supervisor Rootpointer
007C: MOVEC D1,URP ; Set User Rootpointer
0080: MOVE.L #$C000,D0
0084: PFLUSHA ; Invalidates all entries in the address translation cache
0088: MOVEC D0,TC
008C: LEA data108,A0
0090: ADDA.L #$53002000,A0; (=0x530A1900)
0094: JMP(A0); JuMP to data108 code (below) in C040 RAM range?
009C: data108: MOVEQ #0,D0
00A0: MOVEC D0,ITT0 ; 0
00A4: MOVEC D0,DTT0 ; 0
00A8: MOVEC D4,ITT0 ; 807FC040
00AC: MOVEC D5,DTT0 ; 807FC040
00B0: MOVEC D6,ITT1 ; 00000000
00B4: MOVEC D7,DTT1 ; 00000000
00B8: CINVA BC
00BC: NOP
00C0: MOVEQ #0,D0
00C4: MOVEC D0,CACR
00C8: JMP(A1); 0009D6E2
Farewell, old friend
At this point, my SE/30 always froze and I thought this must be the point where to find incompatibilities between the IIci and SE/30.
But after understanding, what’s really going on, it was clear that overwriting the TRAP exception (Nr.7), Macsbug was simply kicked out of the game as this exception is triggered after every step/trace you do in a debugger…
So to get beyond this point, I had to modify the program counter to skip the point where TRAP is copied-over… which is done inside the Toolbox’ _BlockMove call. So I had to single-step into that and find the right call/time to do a ‘pc=pc+2’ 😉 (Good thing you can define a macro for that).
Okayyyyy. After that’s been written, 53_cmd_1x is called, presumably telling the C040 to come to life.
And keen as it is, it’ll look up the “Reset initial Program Counter” (VBR: 0xC) and starts executing code from 0x50. Any other occurring exception will call the ‘handler’ at 0x48, simply switching the C004 off and sit in an endless loop (0x4C) – probably making the 68030 to take over again.
EmEmYou!
Given everything’s fine, the code at 0x50 will start reading the previously populated data from data107 into several registers.
Then some serious 68040 MMU table setup happens – so this is some kind of ‘040 initialization routine… and the ‘040 is actually running. Woohoo!
Time for some special register explanation:
As we all know, the 68040 has two in-build 4k caches and an MMU. The latter can be programmed how and what to cache. This is defined in 4 registers of which only 2 are of interest here: ITT0 and DTT0, the Instruction and Data Transparent Translation registers, both sharing the same bit-fields following this pattern:
BBBBBBBBMMMMMMMMESS000UU0CC00W00
B – Logical Address Base – compared with address bits A31-A24. Addresses that match in this comparison are transparently translated
M – Logical Address Mask – setting a bit in this field causes corresponding bit in Base field to be ignored
E – Enable Bit – 1 – translation enabled; 0 – disabled
S – Supervisor Mode – 00 – match only in user mode 01 – match only in supervisor mode 1x – ignore mode when matching
a bit less than 2GB transparently translated (2032MB)
translation enabled
Supervisor Mode: ignore mode when matching
Cache mode: Noncacheable, Serialized
Write permitted
So let’s have a look at the code again:
At 0x70/0x74 the MMU is set to 0xC000, i.e. Enable translation, apply for user & supervisor mode, write-though cache, for logical address space 0x80000000-0x00ffffff (2GB minus the bottom 16MB).
Then Supervisor & User Rootpointer are set to 0x9FE00, then the address translation cache is flushed to finally set the Translation Control register to Enable & 8K page size (0x88)… up to here this was pretty much ‘by the book’ of how to set-up MMU tables.
Having its MMU all set, the 68040 now gets something to chew on:
The address of data108 is added to 0x53002000 and jumped to!
💡 Does 0x53002000 equal 0x00000000 for the C040?
Let’s assume the C040 executes the code at data108 for now. That is:
Clear the ITT/DTT registers
Set the MMU to 0x807FC040 (see decoding example above)
invalidate caches and wait’a’NOP to have that happened
then disable all caches
and jump to where A1 points to. In my SE/30 that’s 0x9D6E2, previously loaded from data107 in 0x58
Writing all this from the top of my head, I’m not 100% sure where this address is pointing to. I must be somewhat back into MacII_3rd (0x3FEA), because this is where the program execution resumes (Need to check this with Macsbug and will update).
For now, I’m tempted to call MacII_3rd something like ‘C040_MMU_setup‘… but I’d love to have this confirmed 💡 by somebody who knows more than me 😉
Next up will be continuing working further through the main: procedure again… so move over here.
The disassembled code of the Micromac Carrera 040 control panel is quite big: 6000+ lines of 68030/40 assembly…
While these posts might be entertaining and giving you an insight into classic MacOS driver code, they are also meant as a notebook to myself to get into the source quickly – especially after some weeks or months of distraction 😉
That said, I will not discuss each and every line of code. There are many parts which aren’t important (for now) or just not reached yet.
Still, it will take several parts/chapters to cover everything I worked on.
The complete code is available over here on GitHub and will updated every time I’m working on it.
Whenever I’m mentioning addresses I’m referring to this code on GitHub. NB: I will never use line-numbers as these might change during editing the source.
Also, when you’ll see a light-bulb 💡 somewhere, this is where I’m not sure and happy about enlightenment or comments from you 😉
This article is totally work-in-progress closed. E.g. every now and then my theories about what a certain code does changes, I learn new things and all the sudden whole blocks of code make sense… so this post will change/grow, too.Bolle did a lot of hardware research and in the end it became clear that the INIT/Driver has nothing to do with the non-function of the Carrera in an SE/30. After Bolle modified his adapter, the Carrera 040 is happily running in my ’30 now.But still, this series of posts is definitely worth reading, especially if you’re into reverse engineering 68k assembly code.
Approaching… difficulties.
What’s the main job of this code? From a 30000ft perspective the simple answer is “switching the Carrera040 on and off”, i.e. toggling between the hosts slower on-board 68030 and the insanely fast 68040 on the C040. At boot-time… as well as during the system is running (by user interaction).
Sounds pretty simple, huh? Lowering our flight altitude to 3000ft more things come into play:
Identify the hosting Macintosh. As mentioned in the previous chapter, the C040 was able to run in a Mac II, IIx, IIcx, IIvx, IIvi, IIvm, IIsi, IIci, LC and LCII… all of them different in many places. These differences have to be handled…
Down at 30ft we have to admit that there are differences between a 68030 and his younger brother 68040, mainly concerning caches, FPU and the MMU.
Finally hitting the ground, it’s becoming clear that it is everything but trivial to halt a running processor, save its complete context and start another (slightly different) processor with that. And back again…
Some given things before we start:
We will concentrate on the IIx “branch” as this machine is closest to the SE/30 like not-32bit-clean, memory-map, the GLUE chip, two real VIAs with the same register layout etc.
I learned from the code that the C040 is memory-mapped at 0x53000000 in some of the supported models, especially the IIx and IIci. This means 32bit addressing is a must (-> need “mode32” INIT or clean ROM)
I tried to comment as much as possible/understood inline (i.e in the code) – a good bit of 68k machine language knowledge is still required 😉
If something needs more explanation, I’ll try to provide this before the code quote or afterwards.
So this is the main routine (at 0x21FC):
main MOVEM.L A4-A6,-(A7)MOVE.LD0,D7MOVE.L #$31E,D0; need 798 bytes
_NewPtr ,CL_SY ; allocate requested amount of memory (D0) in system; heap (returned in A0) and initialize to zeroesTSTD0; success?BNE.S lae_6 ; nope, exit.LEA data2,A1; elseMOVE.LA0,(A1); Init A5 world and save into data2MOVEA.LA0,A5MOVE #$A89F,D0; UnimplTrap
_GetTrapAddress ; (D0/trapNum:Word):A0\ProcPtr MOVE.LA0,$29C(A5); save the trap addr into 2 places MOVE.LA0,$2A0(A5); in the A5 worldBSR sysDetect ; Jump to Machine detection routine BNE.S lae_6 ; success?MOVE.LD7,D0JSR4(A6); We jump to the subroutine set in the detection routine; for the second time, this time offset 4...; i.e. we skip the 1st 'BRA' thereBNE.S lae_6 ; success?BSR instFPSP ; Install Motos FPSPBNE.S lae_6 ; success?JSR8(A6); That's the 3rd call in the handler call cascade (needs hack for MacsBug!)BNE.S lae_6 ; success?BSR proc32 ; works (get some RSC strings)BSR proc43 ; install trapsBNE.S lae_6 ; success?JSR12(A6); That's the 4th call in the handler call cascadeBNE.S lae_6 ; success?BSR proc41 ; works (atalk?)BSR proc42 ; VIA stuff and such - BOOMBSR proc29
MOVEM.L(A7)+,A4-A6MOVEQ #0,D0
As you can see, there are 10 calls to subroutines- currently it crashes inside the 8th subroutine, currently called proc42… But let’s check these subroutines one by one.
sysDetect
This is the subroutine I had to “patch” to initially make the driver work with an SE/30. It starts at 0x2022 and does these things:
Check if the ‘Gestalt‘ trap is available at all (very good style!) else throw an error
If it is, read the machines Gestalt code into D0, throw an error if zero
Decide which ‘handler’ to choose given the Gestalt code.
Based on their Gestalt codes there are four groups of Macs defined in the following lines (0x204C – 0x20AC):
Mac II/IIx/IIcx — “dirty Macs”, not 32bit clean, no PDS
“Expansion I/O Space” from 0x51000000 to 0x5FFFFFFF
the C040 installs with an adapter right into the CPU socket in the II/IIx/IIcx
SE/30 is also “dirty”, need mode32 or IIsi ROM in slot
these machines also use the GLUE chip to emulate the VIA2 like the SE/30
Mac IIvx, IIvi, IIvm — special kind of PDS slot
there’s no mentioning of support on the MicroMac page
Mac IIsi, IIci
Kind of interesting because the si has the same PDS slot like the SE/30
Uses the RBV (Ram Based Video) controller which emulates the VIA2
Therefore totally different memory layout (VRAM at 0x00000000 mapped by the MMU etc.)
Mac LC, LCII, Color Classic
These share the same LC-PDS slot
If your Mac is one of those (or patched at 0x2058), you’ll branch into sys_check: (0x20BA) which will make sure you run at least System 6.0.5, have virtual memory switched off and jumps into the selected handler code (address saved in A6) at 0x20EA for the first time.
Here’s the code of what’s discussed above:
2022: sysDetect: MOVE.L #$A0AD,D0; Gestalt2028: _GetTrapAddress newOS ; (D0/trapNum:Word):A0\ProcPtr
202A: MOVE.LA0,D2
202C: MOVE.L #$A89F,D0; UnimplTrap2032: _GetTrapAddress newTool; (D0/trapNum:Word):A0\ProcPtr 2034: CMP.LA0,D22036: BEQ OS_bad
203A: MOVE.L #'mach',D02040: _Gestalt ; (A0/selector:OSType):D0\OSErr 2042: BNE bad_conf ; If we can't read it, fire general Error Msg2046: MOVE.LA0,D02048: MOVE.LD0,2(A5); Check for several Mac models which are grouped into 3, each having its own handler routine. ; 1) Mac II/IIx/IIcx ; 2) IIvx, IIvi, IIvm ; 3) IIsi, IIci ; 4) LC, LCII, Color Classic
204C: LEA MacII_handler,A6; -- The dirty gang2050: CMPI.L #6,D0; MacII 2056: BEQ.S sys_check
2058: CMPI.L #7,D0; MacIIx - we replace this by the SE/30 #9
205E: BEQ.S sys_check
2060: CMPI.L #8,D0; IIcx2066: BEQ.S sys_check
2068: LEA V_handler,A6; -- The "V" Macs.
206C: CMPI.L #48,D0; IIvx2072: BEQ.S sys_check
2074: CMPI.L #44,D0; IIvi
207A: BEQ.S sys_check
207C: CMPI.L #45,D0; IIvm2082: BEQ.S sys_check
2084: LEA IIci_handler,A6; -- IIci and IIsi; BOTH share the same "Expansion I/O Space" (0x5300 0000)2088: CMPI.L #11,D0; IIci
208E: BEQ.S sys_check
2090: CMPI.L #18,D0; IIsi 2096: BEQ.S sys_check
2098: LEA LC_handler,A6; -- The LC-PDS family
209C: CMPI.L #19,D0; LC
20A2: BEQ.S sys_check
20A4: CMPI.L #37,D0; LCII
20AA: BEQ.S sys_check
20AC: CMPI.L #49,D0; Color Classic
20B2: BEQ.S sys_check
; Any other Model/Gestalt will bring up an error alert-box
20B4: MOVE #$1B5B,D0; "Carrera040 does not support this Macintosh model."
20B8: BRA.S RET_err ; -> "TST D0 & RTS"; We found a supported model, so keep on going checking for the OS version...
20BA: sys_check: MOVE.L #'sysv',D0; Check OS version
20C0: _Gestalt ; (A0/selector:OSType):D0\OSErr
20C2: BNE.S bad_conf ; If we can't read it, fire general Error Msg
20C4: MOVE.LA0,D0
20C6: CMPI #$605,D0; System 6.0.5
20CA: BGE.S OS_ok ; or greater
20CC: OS_bad: MOVE #$1B5C,D0; "Carrera040 does not work with this version of the operating system."
20D0: BRA.S RET_err ;
20D2: OS_ok: MOVE.L #'vm ',D0; Check for enabled Virtual Memory
20D8: _Gestalt ; (A0/selector:OSType):D0\OSErr
20DA: BNE.S bad_conf ; If we can't read it, fire general Error Msg
20DC: MOVE.LA0,D0
20DE: BTST #0,D0
20E2: BEQ.S VM_ok
20E4: MOVE #$1B5D,D0; "Carrera040 does not work with Virtual Memory turned on. ; Please turn off Virtual Memory in the Memory control panel and restart your Mac."
20E8: BRA.S RET_err
20EA: VM_ok: JSR(A6); This is the actual HANDLER CALL, been set in $204C-$2098
20EC: BNE.S RET_err
20EE: MOVE.B34(A5),D0; 34(A5) seems to contanin the Jumper settings at the lowest 3 bits and only three of them are valid:
20F2: CMPI.B #7,D0; 7 -> 111
20F6: BEQ.S RET_ok
20F8: CMPI.B #6,D0; 6 -> 110
20FC: BEQ.S RET_ok
20FE: CMPI.B #5,D0; and 5 -> 101 2102: BEQ.S RET_ok
2104: MOVE #$1B5E,D0; "Carrera040 does not recognize the jumper settings on the Speedster card. ; Please check the settings against the manual.2108: BRA.S RET_err
210A: RET_ok: MOVEQ #0,D0; clear D0 (no errors)
210C:RET_err: TSTD0; Set the Z-Flag (D0 contains Err-Code) and
210E: RTS; return from Subroutine2110:bad_conf:MOVE #$1B5A,D0; "Carrera040 does not support your system configuration."2114: BRA RET_err
Yes, there’s also stuff after the call to the handler, but let’s check that handler first.
As said in the beginning, I chose to take the “IIx route”. The MacII_handler code is actually just another vector jump-table which will later be used with offsets:
414E: MacII_handler: BRA MacII_1st ; From II, IIx & IIcx4152: BRA MacII_2nd
4156: BRA MacII_3rd
415A: BRA MacII_4th
As you can see, even in such simple and short subroutines are some things I just don’t get? For example why is the effective address of data105 written to 0x8? Is that replacing the Error Handler in the VBR?
Anyhow, I think I got the overall meaning of the rest of it. What happens is this:
After switching into 32bit mode (_SwapMMUMode) it reads a longword from 0x53000000. As initially mentioned, the C040 is mapped to this address. There are 2 identical functions to read from there, that’s why this one here called read_5300k2.
It looks like reading is sufficient because the result (returned in D7) is immediately overwritten by a pop. Also that BNE after two moves is beyond me (0x3D40)… OTOH the rest of the code is pretty clear: It’s ‘populating’ the A5-world with subroutines I’d call 53-commands. These commands write a specific byte sequence to 0x53000000, obviously communicating with the C040. For better understanding I’ve named them e.g. 53_cmd_5.3.5.1 meaning writing 5, then 3, then 5 and finally 1 to this address.
At the end, 0x5300k is read again, this time the result is masked to the last bit and written to 34(A5) – this represents the C040 jumper-settings by the way. Return from Subroutine…
Back in sys_check: this jumper-setting will be checked immediately for three valid settings: 111, 110 or 101 representing the supported CPU types (68040,68LC040,68EC040). If the setting is ok we’re done with sysDetect:and return to main:.
2nd handler
Located at 0x3D94 this is kind of a ’50/50 subroutine’. One half is totally obvious (check RAM, ROM and addressing mode) and the other half is all greek to me… e.g. what is all that PUSHing about? There’s not a single POP inside this routine (or subroutines call from within). Here’s a wild guess of mine:
It looks like 1 to 4 ‘RAM range triplets’ being pushed onto the stack and after that gestaltPhysicalRAMSize (#’ram ‘) is called, for example:
But the gestaltPhysicalRAMSize call does not take parameters and simply returns the amount of available RAM.
The good thing is, this sub-routine works flawlessly on the SE/30 and we can move on…
instFPSP
instFPSP is the next call in line. I’m not going to discuss this code in detail because it actually doesn’t do much. Still there are many inline comments in this routine if you like to know more. Here’s the background:
The FPU in the 68040 was made incapable of IEEE transcendental functions, which had been supported by both the 68881 and 68882 and were used by the popular fractal generating software of the time and little else. The Motorola floating point support package (FPSP) emulated these instructions in software under interrupt. As this was an exception handler, heavy use of the transcendental functions caused severe performance penalties.
TLDR; Check for FPU(type) and load the FPSP code from the resource-fork into RAM. Done. Return to main:.
As promised in my blog entry nearly one year ago, here’s the (monster) post about this project.
Background
Boy, what a ride! This is definitely my most complex (and still ongoing finished) software reverse engineering stunt ever!!
When starting this venture I was a blue-eyed Mac user and just-for-fun programmer and never imagined to learn this much about those machines I loved since 1985… by the way of a very nice guy I was finally able to get an SE/30. Immediately I thought of accelerating the cutie.
This first post will give you an insight about the workflow, hardware and software used. Following posts will then guide you deep into the code…
The MicroMac Carrera040
For many years I had a Carrera040 (or C040 for short) – a Motorola 68040 accelerator for Apple Macintoshes – in my locker which I bought in wise foresight without even owning a Mac to plug it in. The C040 I got was meant for usage in a Macintosh IIci, plugged into its L2 cache-slot. That said, using special adapters, the C040 could also be used in other 68030 Macs like the IIx, IIcx, IIsi, IIvi/vx and the LC/LC II.
Is the Carrera a Speedster?
What’s this question about? Well, you might also have come about notions of an accelerator called the ‘Mobius Speedster‘ which is pretty similar to the C040.
Well, it is and my wild assumption is that at one point MicroMac bought the design from Mobius. There’s even a leftover in the C040’s ReadMe:
“Applications that do not work with Quadra or Centris Macs are not likely to work on ‘040 accelerators, including the Carrera040. Generally, these incompatibilities are limited to the ‘040’s copy-back cache, or FAST mode on the Speedster.“
So when I had my glorious SE/30 sitting on my desk it immediately came to my mind to make this card running in it.
You have to know, that the SE/30 is a somewhat shrinked-down version of a Mac IIx which again is pretty close to the IIci – and there was an adapter in existence to use another popular IIci accelerator in an SE/30 (Daystar Turbo 040). But it’s very rare and there’s next to no chance to find one. Anyhow, it’s doable, so I was hooked.
I stumbled across a cry for help in the 68kmla forum, a user owning such an adapter and a C040 tried to get it running in his SE/30… to no avail. So while still not having the proper adapter (yet) I thought “why not start looking into the driver while waiting for the hardware?”.
So the journey started…
MacNosy – a users nightmare, a hackers heaven.
My natural reflex is to reach deep into my tool-bag, get out my favorite disassembler/hex-viewer and start digging through its output. But for System 7 my bag was empty. Is there any disassembler at all?
While the good thing is, that most software packages which cost plenty of $$$ back then are abandonware today, the bad thing is that many are undocumented and unsupported. After some research it became clear that MacNosy was and still is the best m68k MacOS disassembler around.
Boy, this disassembler is powerful! But it seems to be written by Steve Jasic for, well, Steve Jasic. I know that kind of tools – I’ve written some of those… and never showed it to anybody because it was, erm, special. Prepare yourself for “everything will be different than you’ll expect it”. Steve gave a sh!# about UI or keyboard conventions. Cope with it.
Luckily there’s a very good review and some sort of documentation can be found here.
Same but different – which is where?
Does ‘A5-world’ ring a bell to you? No? Don’t worry, it was the same for me, even I am using Macs for a long time.
Even it’s an 68k system, there are so many things done different than e.g. in Amiga OS or Ataris TOS – so you have to learn a lot.
Because it would absolutely bloat this post, I will link to external pages explaining the used term. So watch for the first mentioning, it’ll be a URL…
The provided Carrera040 “drivers” consist of an INIT/Extension (“Startup Carrera”) and a Control Panel (“Carrera 040 1.8”).
In the provided readme file there’s the line “With version 1.8 we have included an extension which ensures the Carrera040 code to load very early in the boot process.”
And indeed, the INIT code does not do much more than loading a specific resource from the control panels resource-fork.
So I concentrated on the control panel (CP for short). Using ResEdit, you’ll find the main detection and control-code in its resource fork called “SPDR’ (SPeedster DRiver, got it?).
While working through the code, commenting whatever I immediately understood (which wasn’t much in the beginning), I stumbled over several things you should also have an idea about before reading the disassembly in the coming chapters – so here’s a growing reading list:
During all that code-gazing, head-scratching and learning-new-things-every-day great luck struck and I virtually-met ‘Bolle‘. A guy who created a clone of the mystical PDS-to-IIci-slot-adapter. Woohoo!
So after spending some Euros I was finally able to jump into the ‘the real thing’ and try my patches in-vivo, or watch the code being executed. Thanks again, Bolle!
The drill
The weapon-of-choice for watching code run is definitely Macsbug, the official debugger from Motorola, heavily modified by Apple through all the years until MacOS 9.2.
Back in the days my contact with Macsbug was very brief. When a program ‘bombed’, I’ve entered “g” (for Go) and hoped the system will somewhat heal and keeps running…
Ok, now I had to be somewhat more serious – and my skills had improved over the last 20 years, so my routine turned into single-stepping and tracing through the code, skip certain instructions which might kill the code, watching all the registers and most important and watch how the Carrera “driver” behaves in an SE/30 vs. IIci.
I even created some macros (which have to saved into Macsbug own resource-fork!) and started an endless try-and-crash drill.
The working drill is tedious: You step through the instructions, while following your steps in the disassembled source, to the point where it crashes. Remember/note the point (address) where it crashed and try again.
This means you have to manually trace closer to “the edge” but try not to fall off the cliff. And when you did – and I did many times – rinse & repeat.
Sometimes you can ‘skip’ complete function calls containing hundreds of instructions (called ‘Trace’), sometimes you have to sit-through (i.e. single-step) a very, very, very long loop just to be sure it works 100%.
The next post/chapters will finally dive into the control panels code.
While it’s all about this specific ‘driver’ I’m sure it’ll help everybody who starts the adventure of understanding pretty low-level 68k Macintosh code.
That said, in Dec. 2019, continuously working with Bolle, we came to the conclusion it has to be a hardware problem and Bolle was able to prove this and most importantly found a way to fix it. There will be a 4th and final post concluding all of our findings.
home of real men's hardware
We use cookies on our website to give you the most relevant experience by remembering your preferences and repeat visits. By clicking “Accept”, you consent to the use of ALL the cookies.
This website uses cookies to improve your experience while you navigate through the website. Out of these, the cookies that are categorized as necessary are stored on your browser as they are essential for the working of basic functionalities of the website. We also use third-party cookies that help us analyze and understand how you use this website. These cookies will be stored in your browser only with your consent. You also have the option to opt-out of these cookies. But opting out of some of these cookies may affect your browsing experience.
Necessary cookies are absolutely essential for the website to function properly. This category only includes cookies that ensures basic functionalities and security features of the website. These cookies do not store any personal information.
Any cookies that may not be particularly necessary for the website to function and is used specifically to collect user personal data via analytics, ads, other embedded contents are termed as non-necessary cookies. It is mandatory to procure user consent prior to running these cookies on your website.