Tag Archives: apple

UMAX tuning

[UPDATE 2025 – got a CacheDoubler! 😍 See further down for added details]

Apple Performa and PowerMac models 5400/6400 used a mainboard code-named “Alchemy“. The same board, sometimes with some changes, was used in different Mac clones like the UMAX Apus 2000 & 3000 series (SuperMac C500 & C600 in the US) and PowerComputing PowerBase.

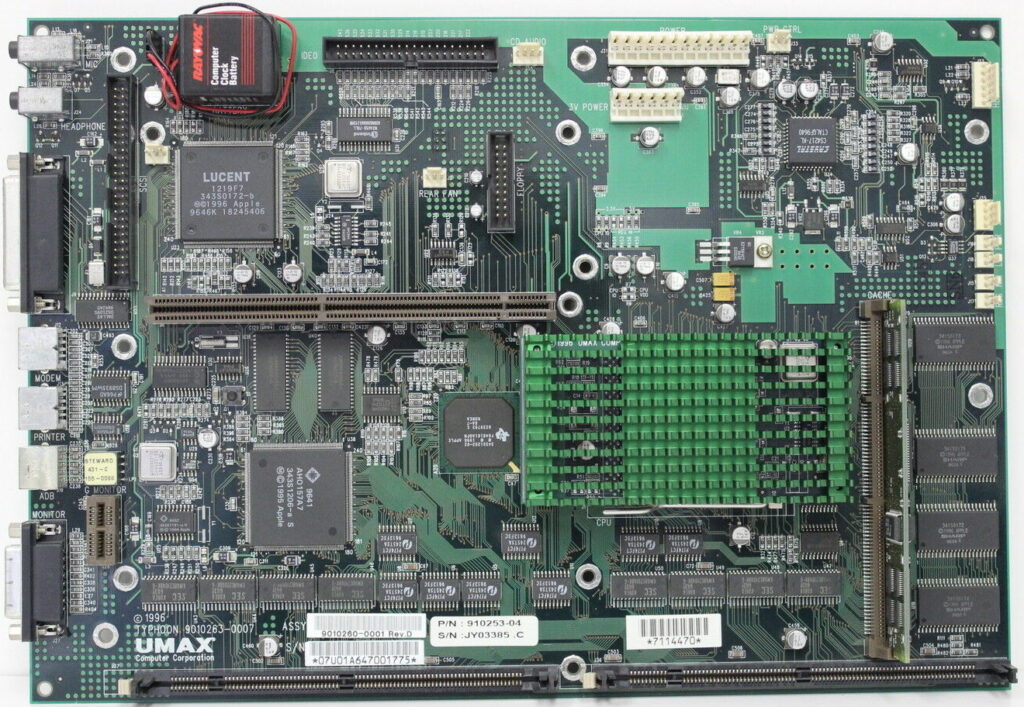
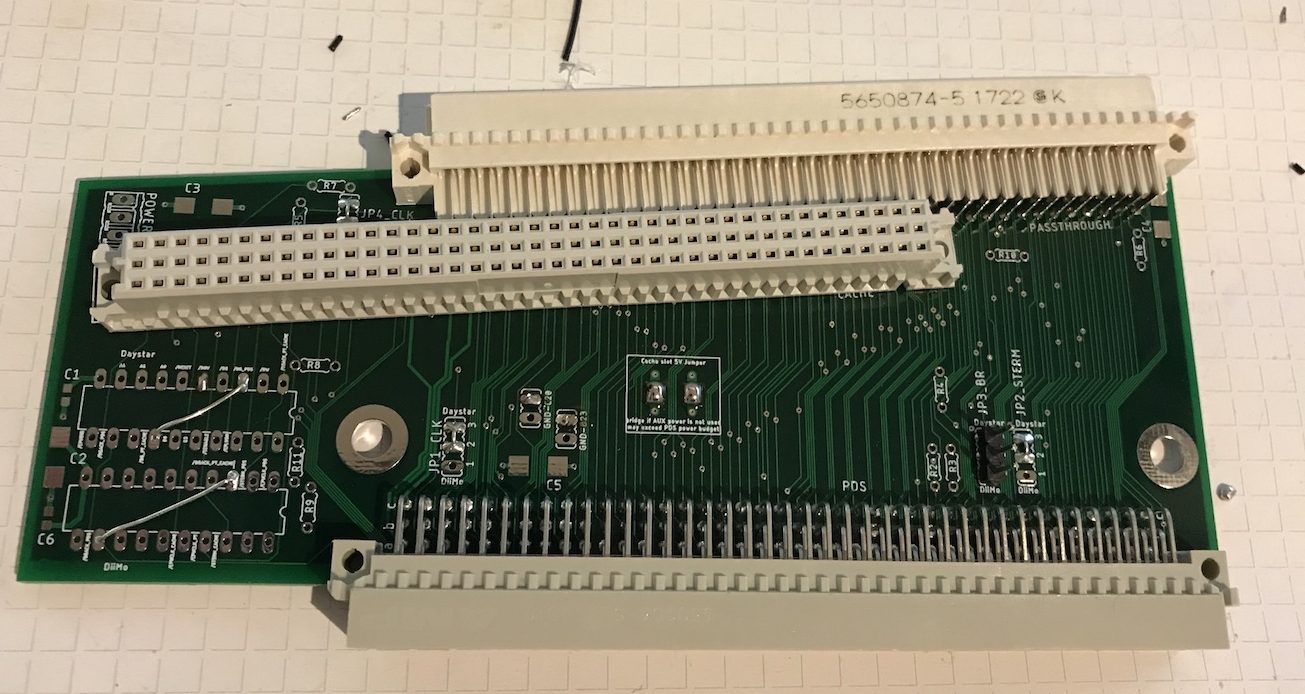
One fine day I got an UMAX Apus 2k, which uses a derivate of this board, re-cristened to “Typhoon” which you can see here in it’s full beauty:

Processor
  • Apple: PowerPC 603e
  • Power Computing: PowerPC 603e, 750
  • Umax: PowerPC 603e, 750
Only Power Computing and Umax can be upgraded
Systembus 40 MHz fixed
L2-Cache Slot for 256k or 512k L2-Cache
RAM 5V DIMM 168 Pin 60 ns (EDO)

  • Apple: 2 DIMM-Slots, 8MB on-board (136MB max.)
  • Power Computing: 3 DIMM-Slots (160MB max, Bank 1 only 32MB, Bank 2&3  64MB)
  • Umax: 2 DIMM-Slots, 16MB on-board (144MB max.)

To the limit!

So being the way I am… I had to optimize it. Jus can’t help it 😉
Here are the steps I’ve taken – in the order of making sense the most and being less difficult:

RAM

Simple rule: The more, the better.
This will get you the maximum performance – not in speed, but you can run memory-hungry applications without swapping (virtual memory) which is a major PITA and drags down everything.
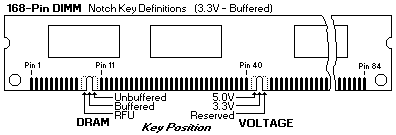
That said, finding the correct RAM is also a pain because this board uses now very obsolete 5V buffered 168-pin DIMMs. 5 Volt is already hard to find – but the buffered version is even worse.
You can check that by looking at the coding keys (“groves”) at the DIMMs bottom:

The UMAX/SuperMac board can handle two 64MB DIMMs… if you can find & afford them.

L2 Cache

A “Level 2” cache is a must-have on all PPC machines. AFAIK UMAX/SuperMac did not sell their clones without one – Apple certainly did.
If your machine doesn’t have one, get one ASAP!
If you can get a bigger one than the one you have, do so!

  • None to 256K – increases CPU performance about 30 %
    The overall responsiveness is dramatically increased
  • 256K to 512K – adds about 20% performance.
  • 512K to 1MB – need this SIMM! Mail me 😉

Umax offered an optional CacheDoubler PCB plugging between the  socket and the CPU. It features an 1MB L2-Cache and upped the bus-clock to 80 MHz. AFAIK it came as standard in the UMAX C500x/C600x models.
Of course these are unicorns now and rare as chicken teeth.

NB: There are some caveats about the L2 cache discussed further down…

Faster CPU

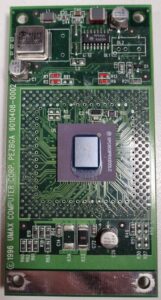
Yes, this board has a ZIF socket like the Pentiums did back then. And as such, you might be able to find a faster one. But unlike the Intel CPUs, these come on a small board covered by a big, green heat-sink.
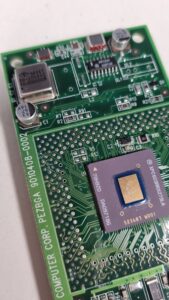
Underneath is the CPU (in BGA package) a bit of logic, caps, lots of resistors and an oscillator.

So even if you were unable to find a faster CPU you can still ‘motivate’ yours – read: Overclocking!

As usual with overclocking, every CPU has its limits. The experiences with the 603e(v) used by UMAX are:

  • 160Mhz to max. 225
  • 200Mhz to max. 240
  • 240Mhz to max. 270

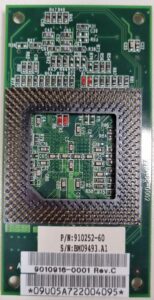
How’s that done? Quite simple (if you’re ok with soldering 0603 SMD parts) by relocating some of 8 resistors which are on the top and bottom of the CPU card… marked red on the pictures below:

Use this table to change the CPU multiplier relative to the standard 40MHz bus-clock. There are also settings for 80-140MHz, but this is about overclocking so these make no sense whatsoever, right?

CPU Speed
160MHz
180MHz
200MHz
220MHz
240MHz
Busclock x
Multiplier
40 x 4
40 x 4.5
40 x 5
40 x 5.5
40 x 6
R1 [1.0k]
R2 [1.0k]
R3 [1.0k]
R9 [1.0k]
R6 [1.0k]
R7 [1.0k]
R8 [1.0k]
R13[1.0k]

Resistor color: Green = Bottom, Red = TOP
✔ = set, ❌ = not set

If the multiplier is not enough, you can also increase the bus-clock, too.
That way you can go up to a theoretical maximum of 300MHz 🔥

Oszillator 40.0MHz 45.0MHz 48.0MHz 50.0MHz
x4.0 160MHz 180MHz 192MHz 200MHz
x4.5 180MHz 202.5MHz 216MHz 225MHz
x5.0 200MHz 225MHz 240MHz 250MHz
x5.5 220MHz 247.5MHz 264MHz 275MHz
x6.0 240MHz 270MHz 288MHz 300MHz
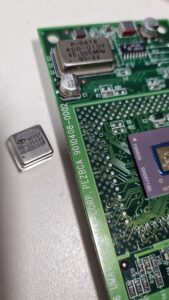
As with the resistors, you’ll need some (de)soldering skills… but it’s a simple procedure: Old oscillator out, new one in. They were even kind enough to plan for a bigger oscillator case.

Before…

…and after.

For maximum bus-performance don’t use odd divisors like “x4.5”

☝ If you plan to overclock your bus to 50MHz or more you have to get a faster L2 cache…

Most 256K cache SIMMs seem to have an IDT7MP6071 controller using an IDT71216 TAG-RRAM which has a match-time of 12 ns (You can derive that from the marking “S12PF”” on the chip). That`s far too slow for 50MHz bus-clock. If you would be able to change the TAG-RAM to a 8 ns Part, it would probably work.
Bigger cache SIMMs seem to feature faster TAG RAMs. Here’s a nice thread on 68kmla.org on those SIMMs.

Finally, here’s a comment from an Motorola engineer referring to the Tanzania board (but same issue) I found in a corner of the web:
One final problem is the main memory (DRAM) timing. If the firmware still thinks the bus clock is 40 MHz (25 ns), it won’t program enough access time (measured in clocks) at 50 MHz (20 ns). There are resistors to tell the firmware what the bus speed is, so that it can program the correct number of clocks into the PSX/PSX+ to get the required 60 ns access time. For the StarMax, this means removing R29 and installing it in the R28 location for 50 MHz operation.”
I have no clue (yet) if and where those resistors are on a Typhoon board.

Update 2025

While I was asleep, my brother in arms Bolle wasn’t, so he saved the CacheDoubler which was on eBay for me! 😍
So after some days, look what the cat brought in:

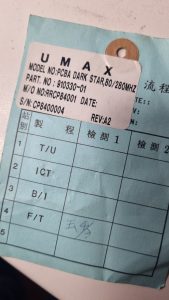
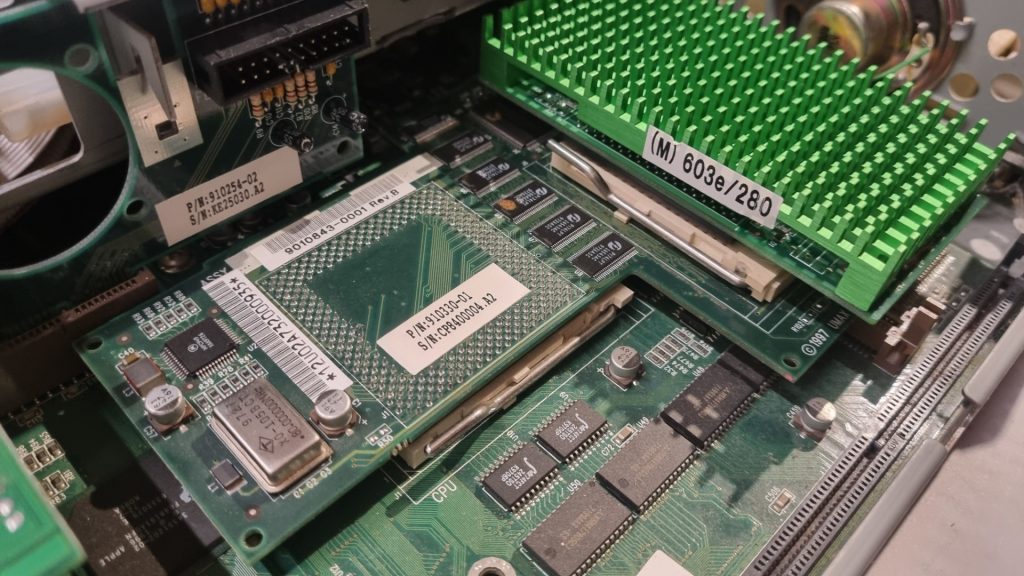
a “Dark Star” Rev A2, aka the super-rare CacheDoubler… and in it went. Ahh, what a nice view!

Crossing fingers, power on, aaaaand:

Woo-Hoo! Full steam ahead ahead🚀!
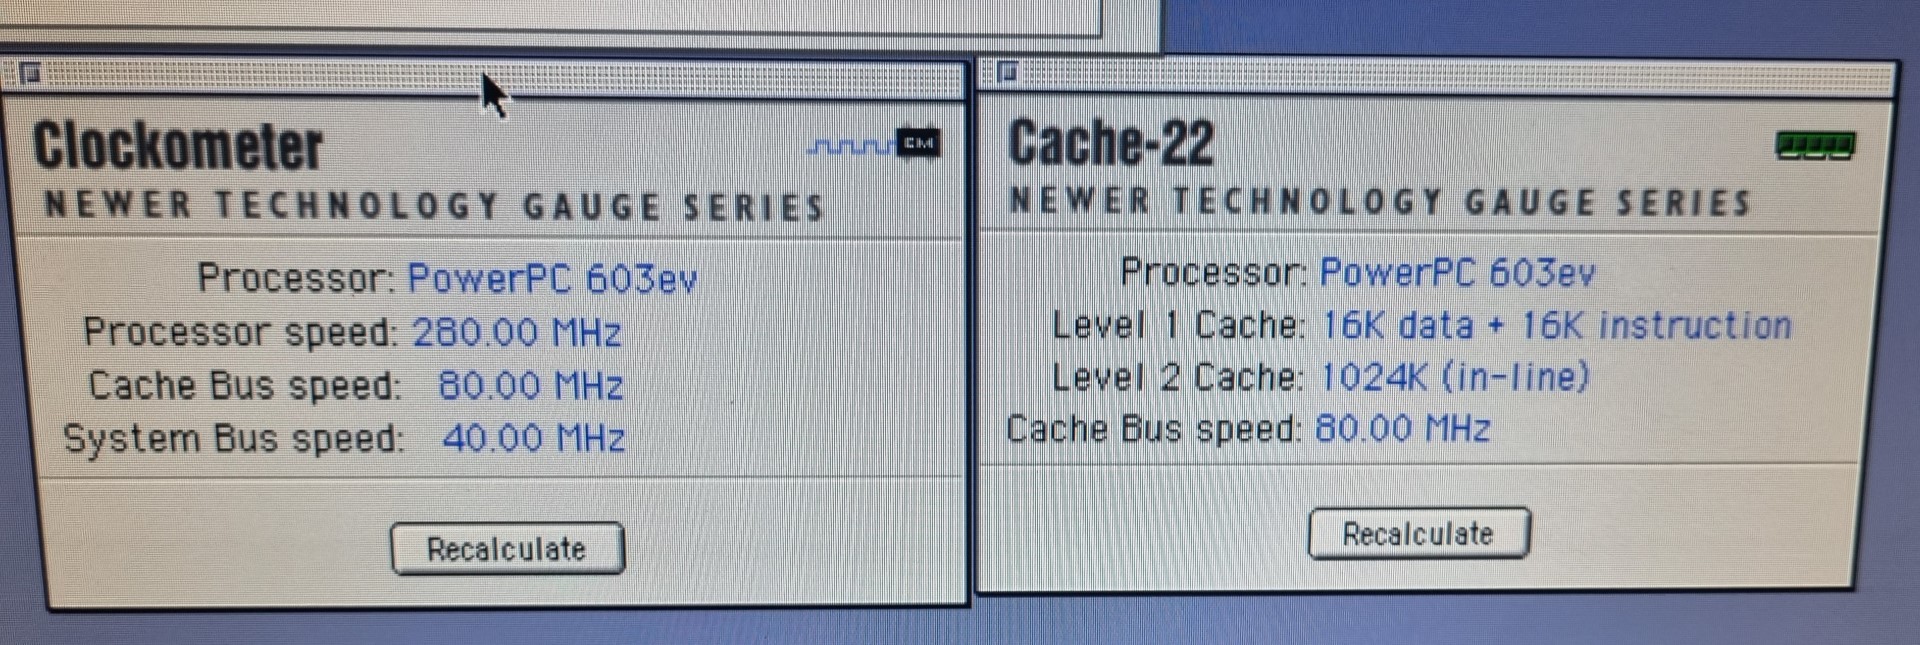
Now the CPU is clocked at 280MHz as it was meant to be… interesting enough, my bus overclocking on the CPU module is completely ignored. So it seems that the 80MHz crystal on the CacheDoubler is overruling it – multiplying it by 3.5 to get to the 280MHz CPU clock.
There would be room for experiments e.g. setting the multiplier to 4 or up the bus to 85MHz, but a can hold myself back, given the rarity of this board 😎.
And if this would be enough of luck, I found a pair of 64MB 5 Volt EDO DIMMs nearly the same day Bolles package arrived.
So this little UMAX x500 / APUS 2000 is now filled up to the brim.

Conclusion

So, what have I done in total?

I added as much RAM I was able to find (16MB on-board, one 16MB and one 32MB DIMM two 64MB DIMMs) to get a total of 64MB 144MB which is just OKish frickin’ awesome for a 603 PPC Mac

I wasn’t able to (yet) find any bigger or faster L2 cache than the 256KB I already had installed. So that one stayed as-is.

One megabyte of 80MHz inline L2 cache, baby! All my sub-G4 PowerMacs hate this litte UMAX for that 😉

I replaced my stock 200MHz 603e CPU with a module containing a 275MHz 603ev (Even the label says 280). It has its multiplier set to 6 already… so running on a 40MHz bus is runs at just 240MHz.
My wild guess is that it was meant for the CacheDoubler mentioned above and switched to a multiplier of 3.5… [you guessed right, Axel]
So I upped the bus-clock oscillator to 45MHz resulting in a 270MHz clock – 5Mhz below the CPUs spec but the bus is not stressed too much… the system runs stable and I measured a comfortable 45°C/113°F on the heat-sink.
This mod will be ignored by the CacheDoubler. So even the modded CPU module now runs at 280MHz.

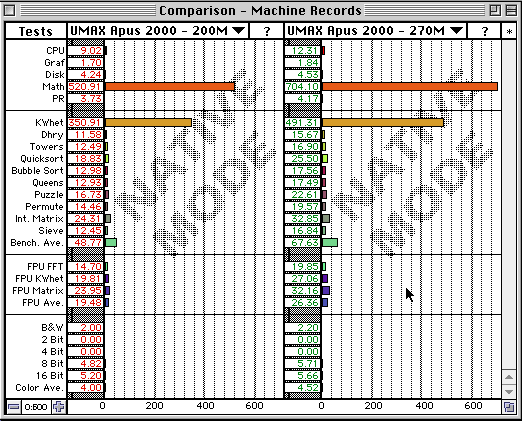
Here’s a Speedometer 4.02 comparison of before and after:

This shows that every CPU benchmark ran more or less those 35% faster, which are the difference of 200 vs 270MHz – even the Disk and Grafics performance increased between 7% and 10% which is also due to the increased bus-speed.

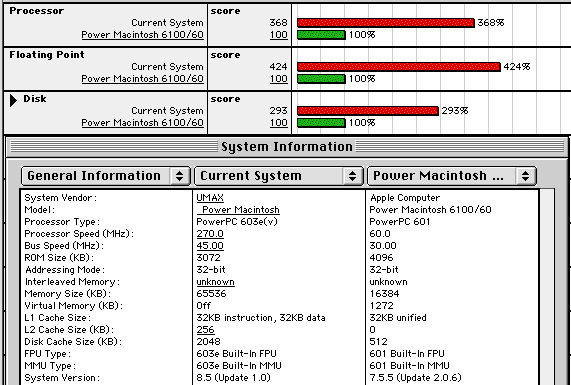
How does that fit into a greater perspective? Let’s compare to the Macbench numbers provided by user Fizzbinn in the 68kmla forum:

My system sorts itself 29% above the 240MHz machine concerning CPU performance… but FPU is less?!? No idea why that is.
Disk is probably a faster model than mine (WD Caviar 21600).

with CacheDoubler these numbers went up even more:

506 CPU (+37%)
474 FPU (+11%)
331 Disk (+12%)

Pretty nice for an 603e, huh? Yeah, that’s still way behind the crescendo G3/400  L2 accelerator… but therefore it’s all Supermac original 😉

What else

Well, 2 PCI slots… one for a standard 100Mbps NIC and the other one got a VillageTronic Picasso 520 which fits nicely in a System 8.5 Mac.
I tried a PCI USB card… that lead to constant boot-crashes. I should have google’d that first, else I would have known that “Although CacheDoubler does great things for performance, field reports indicate you cannot use a USB PCI card with CacheDoubler installed.” 🙄

The truly worst Apple Product ever!

If you Googling for it it seems everybody (and his/her dog) has at least posted one top-10 listing of the worst Apple product ever (and ever-ever).

Same-Same

All those pages seem to “inspire” themselves from each other. So it’s essentially always the same suspects:

  • Apple III
  • Macintosh TV
  • Quicktake Camera
  • The Newton PDA
  • The Pippin Games-console
  • The Performa x200 family
  • The 20th Aniversary Mac
  • The first USB Mouse (aka Hockey Puck) as well as the Mighty Mouse
  • The G4 Cube and
  • the flimsy iPod Shuffle.

I’m ignoring those lists of people who learned about Apple as a company more or less with the launch of the iPhone. Pfffft, kids, come back in 20 years, will you?  😛

So before I tell you the truly worst Apple product ever (ever-ever-ever!) let me give you my two or three cents to that list…

Reality Check

First of all: All those products had a certain degree of design-language and an eye for details – I dare saying passion to them.

Even the Apple III was -at its time- a design statement (look at other computers of 1980: Commodore PET, TRS-80, ZX81 ot the KAYPROs). It was meant to be a better Apple II and yes, it had technical flaws, but if something made it “worse”, it was its price-tag.
I’d call the design of the 20th Anniversary Mac or the Hockey Puck  bold – maybe too bold for its time. And both, as well as the G4 Cube and the Newton (110 and up) were designs by Jony Ive – the much hyped designer who also did the iPhone, iMac and nearly everything since, well,  the iMac.
Some of them were more or less pioneers of their kind like the Newton being the first usable PDA and the Quicktake one of the first digital cameras (Put both put into one device, add 10 years: iPhone!)

So let’s recap:

They all might be commercial flops but they had a raison d’etre, followed a certain design concept and most important, you can feel a certain level of passion behind it. Maybe they were too expensive, released too early or just way ahead of its time – but in my humble opinion they were not the worst Apple products ever.
And do I have to add that mostly every product on that list is a highly sought-after collectors item now?

The truly worst Apple product ever

So finally, this is it. This Apple product is very unknown – probably rightly so. It ignores all the points I was recapping above:

  • No reason d’etre
  • No design philosophy or concept
  • And absolutely no passion at all!

Its only intention was to save costs… yeah, that can be reason for being, but in this case “it’s worse”.

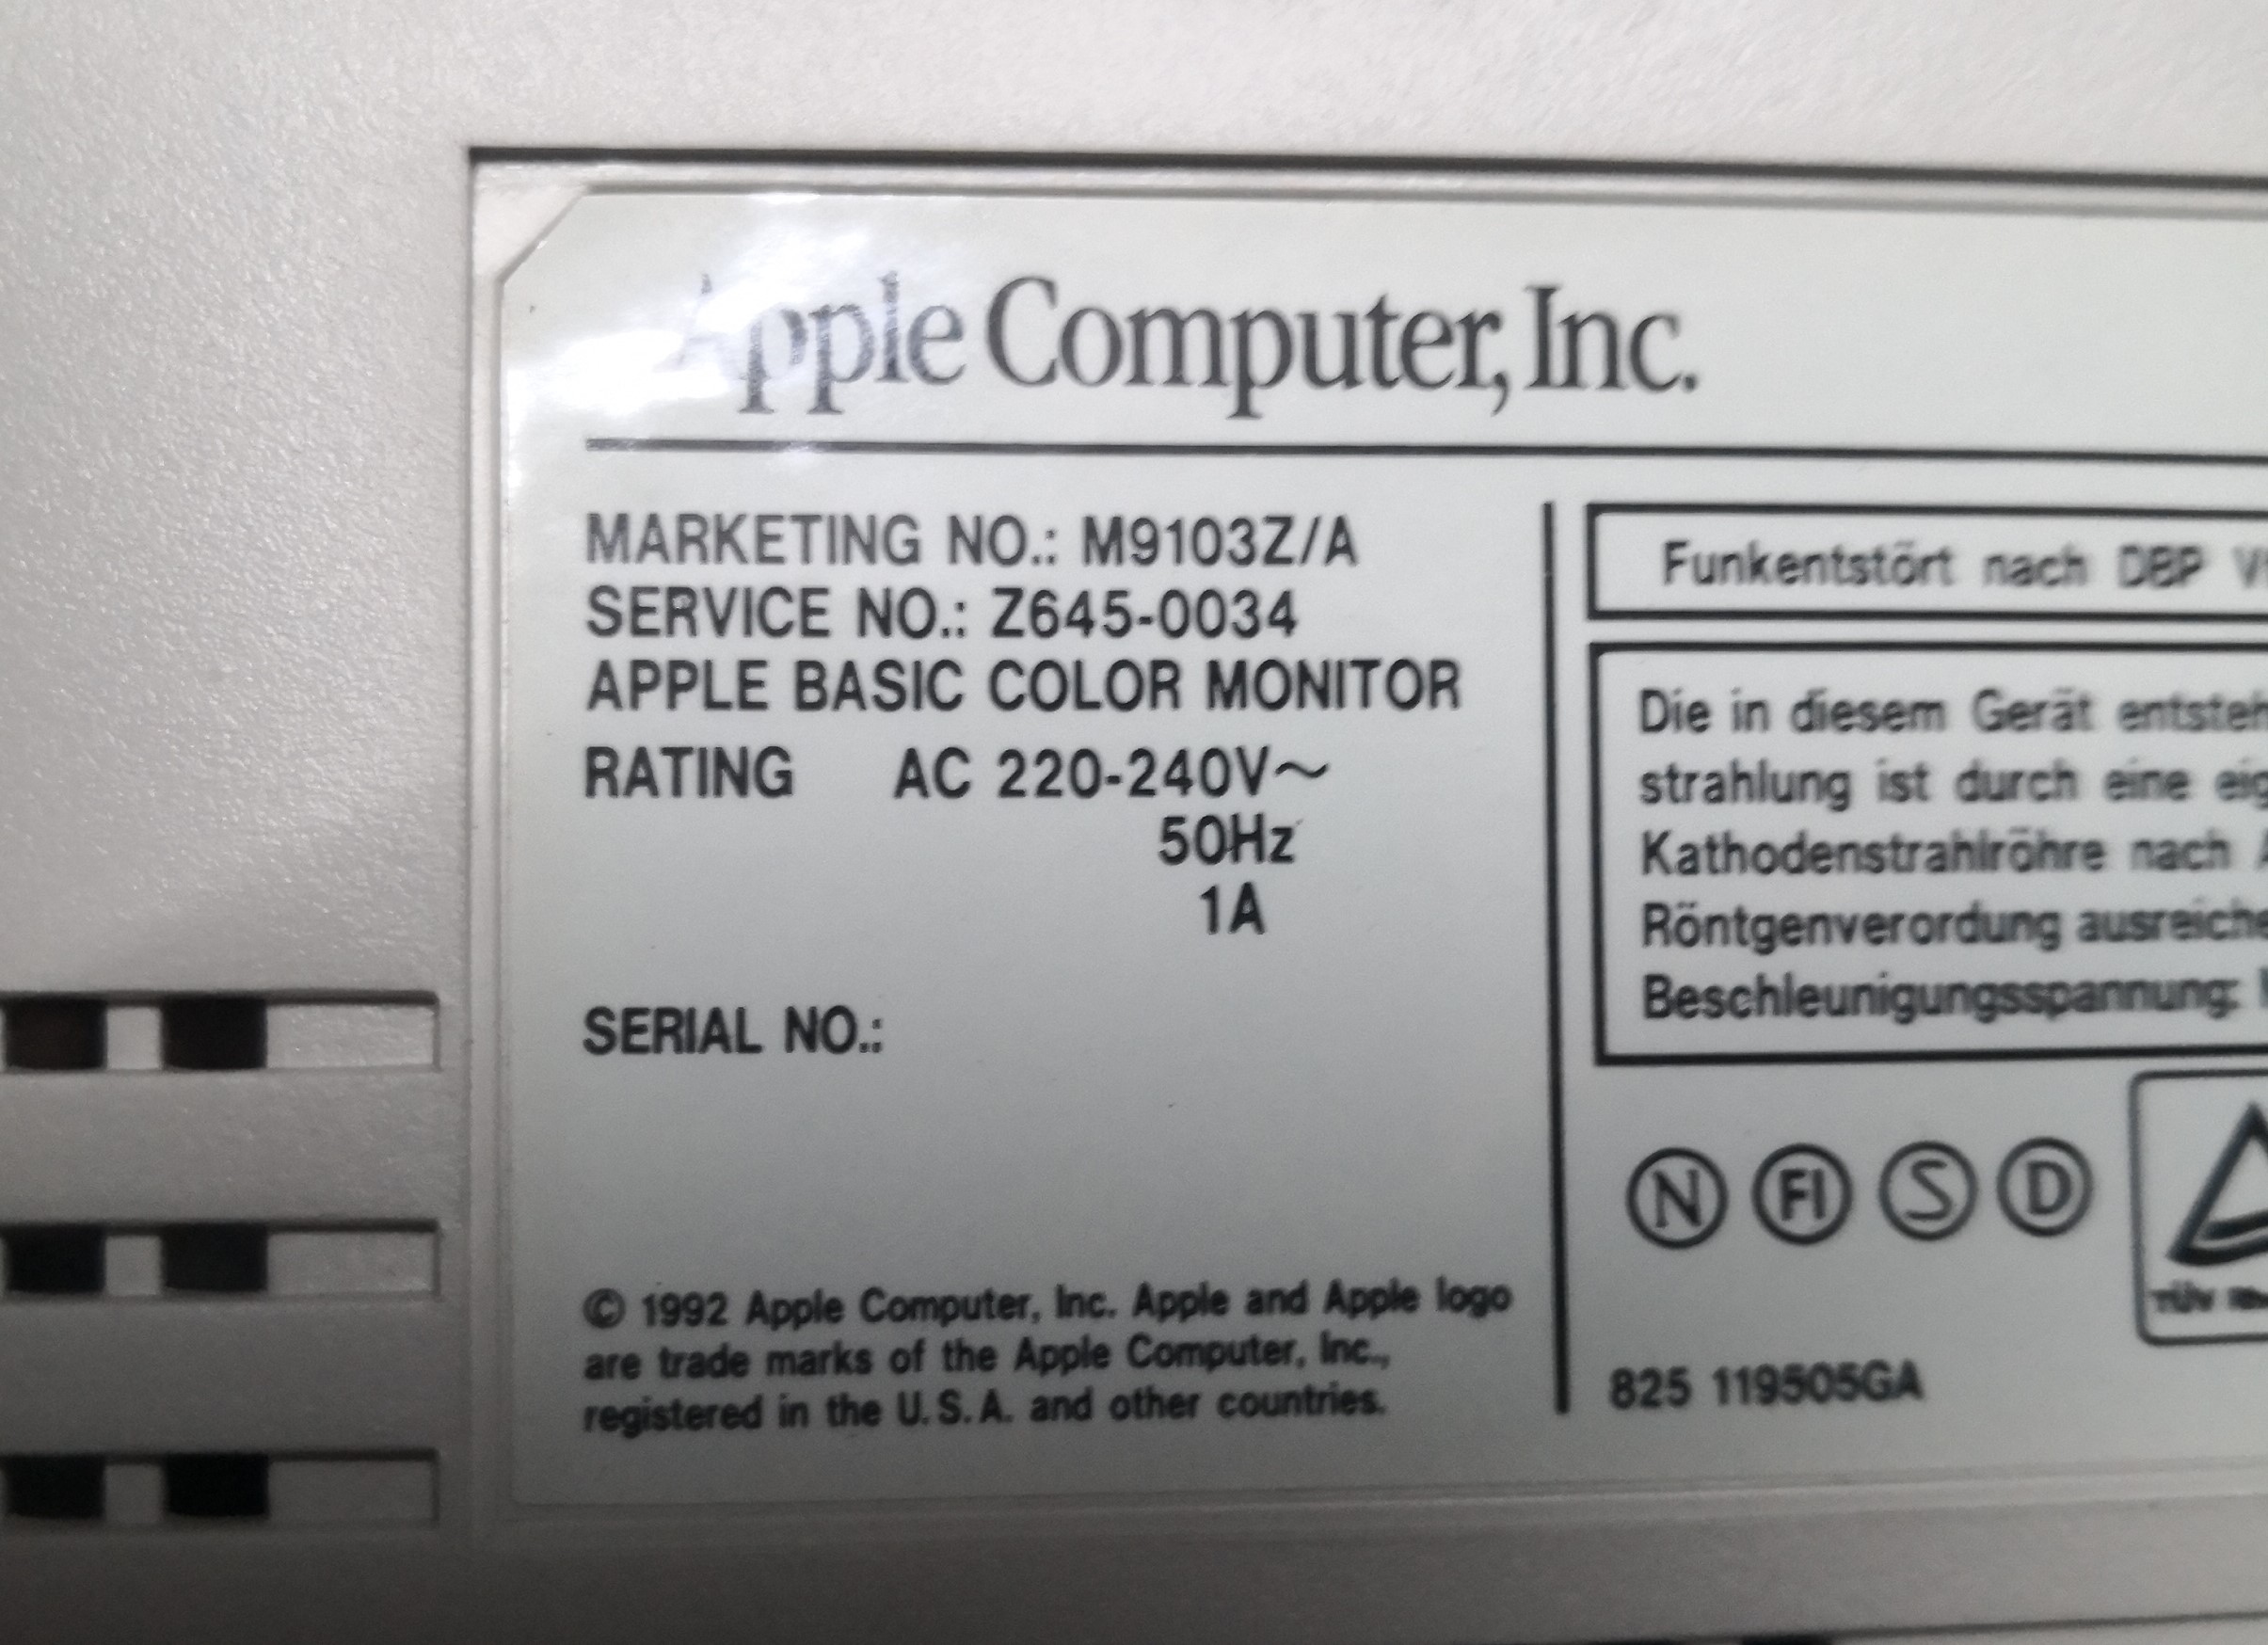
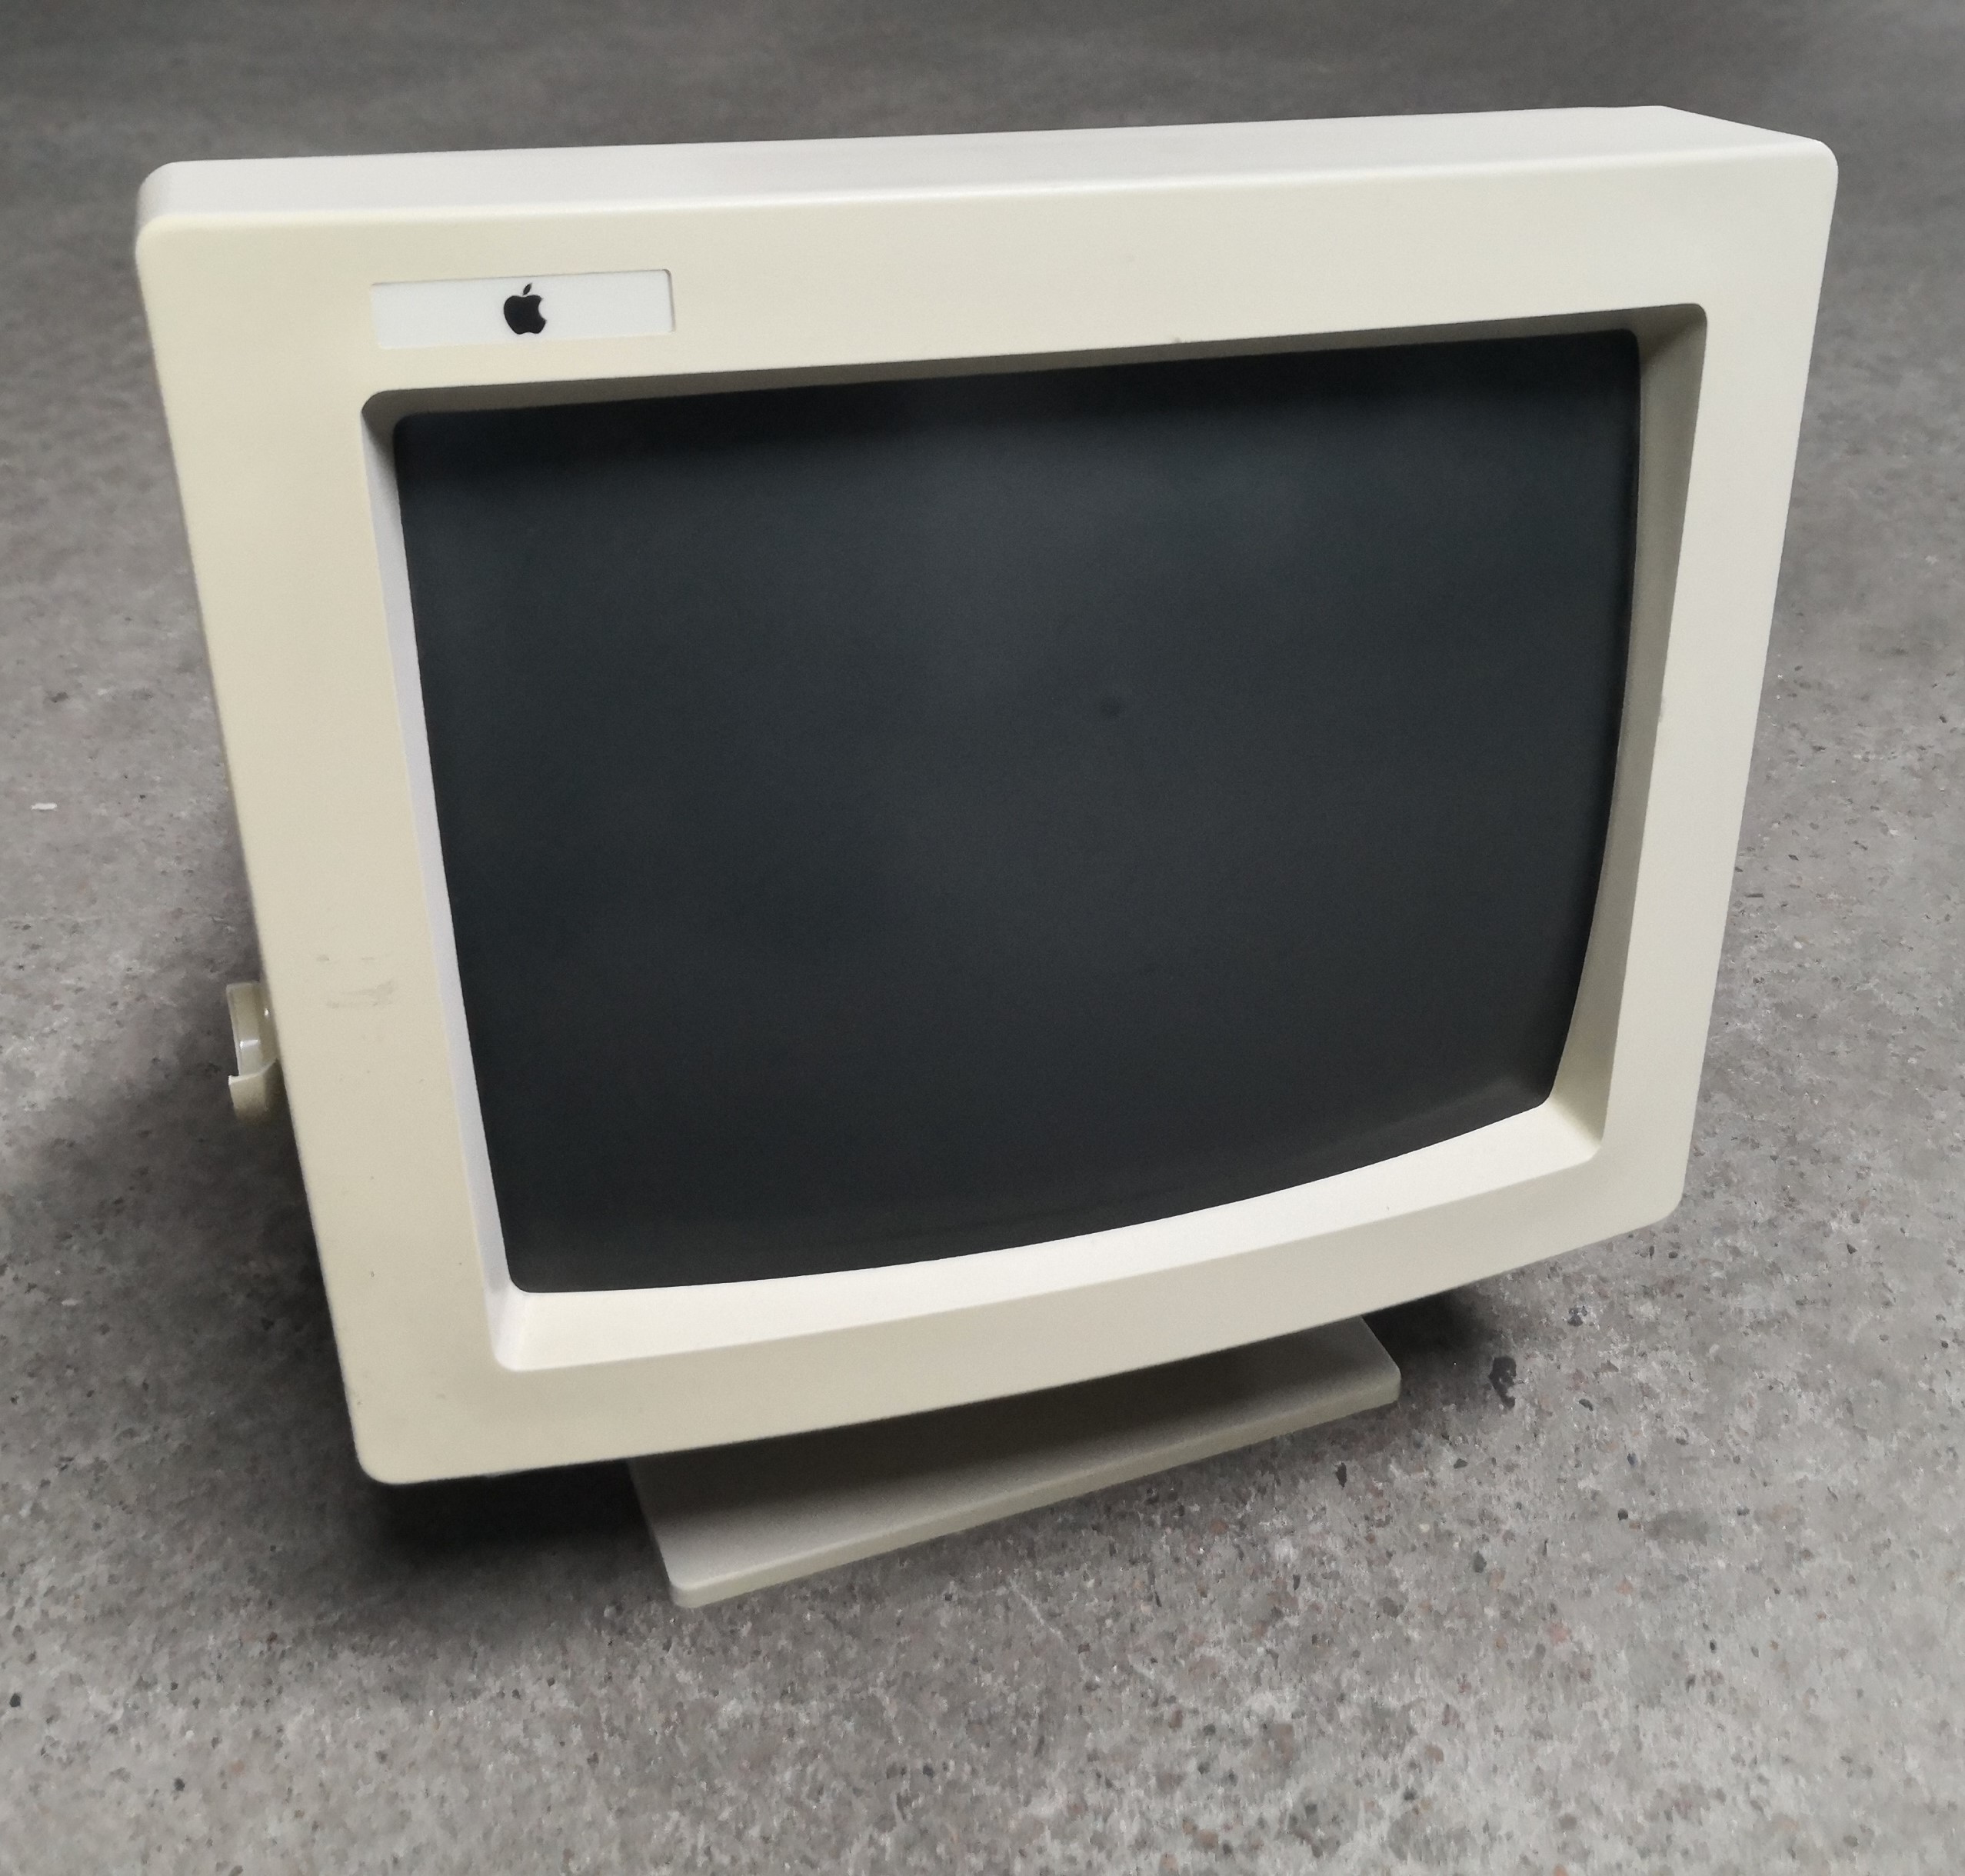
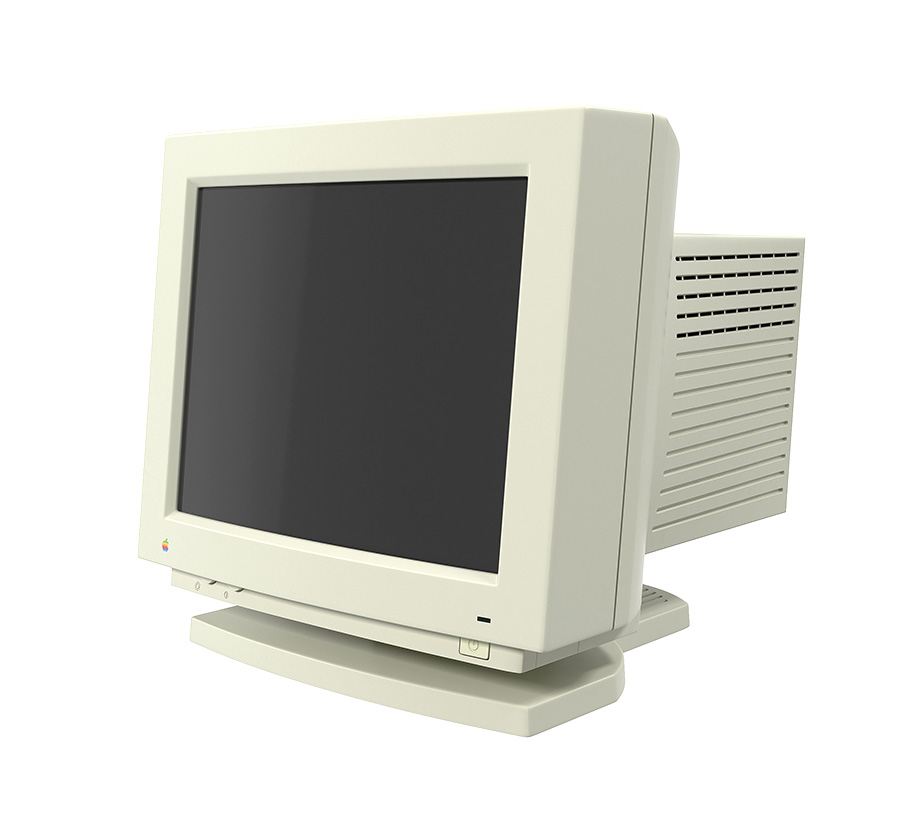
Please let me introduce you to “M9103” also known as the “Apple Basic Color Monitor“.

It’s a product from the beginning of an era in which Apple was close to bankruptcy. Struggling against the much cheaper x86 PC the Macintosh product family got confusing and they tried to somehow compete with PC prices spitting out one low-cost system after another.
The rightfully hated Performa x200 (the #1 “road apple”) and PowerMac 4400 were the pinnacle of all cost-reduced products Apple released… and the M9103 is where it all started.

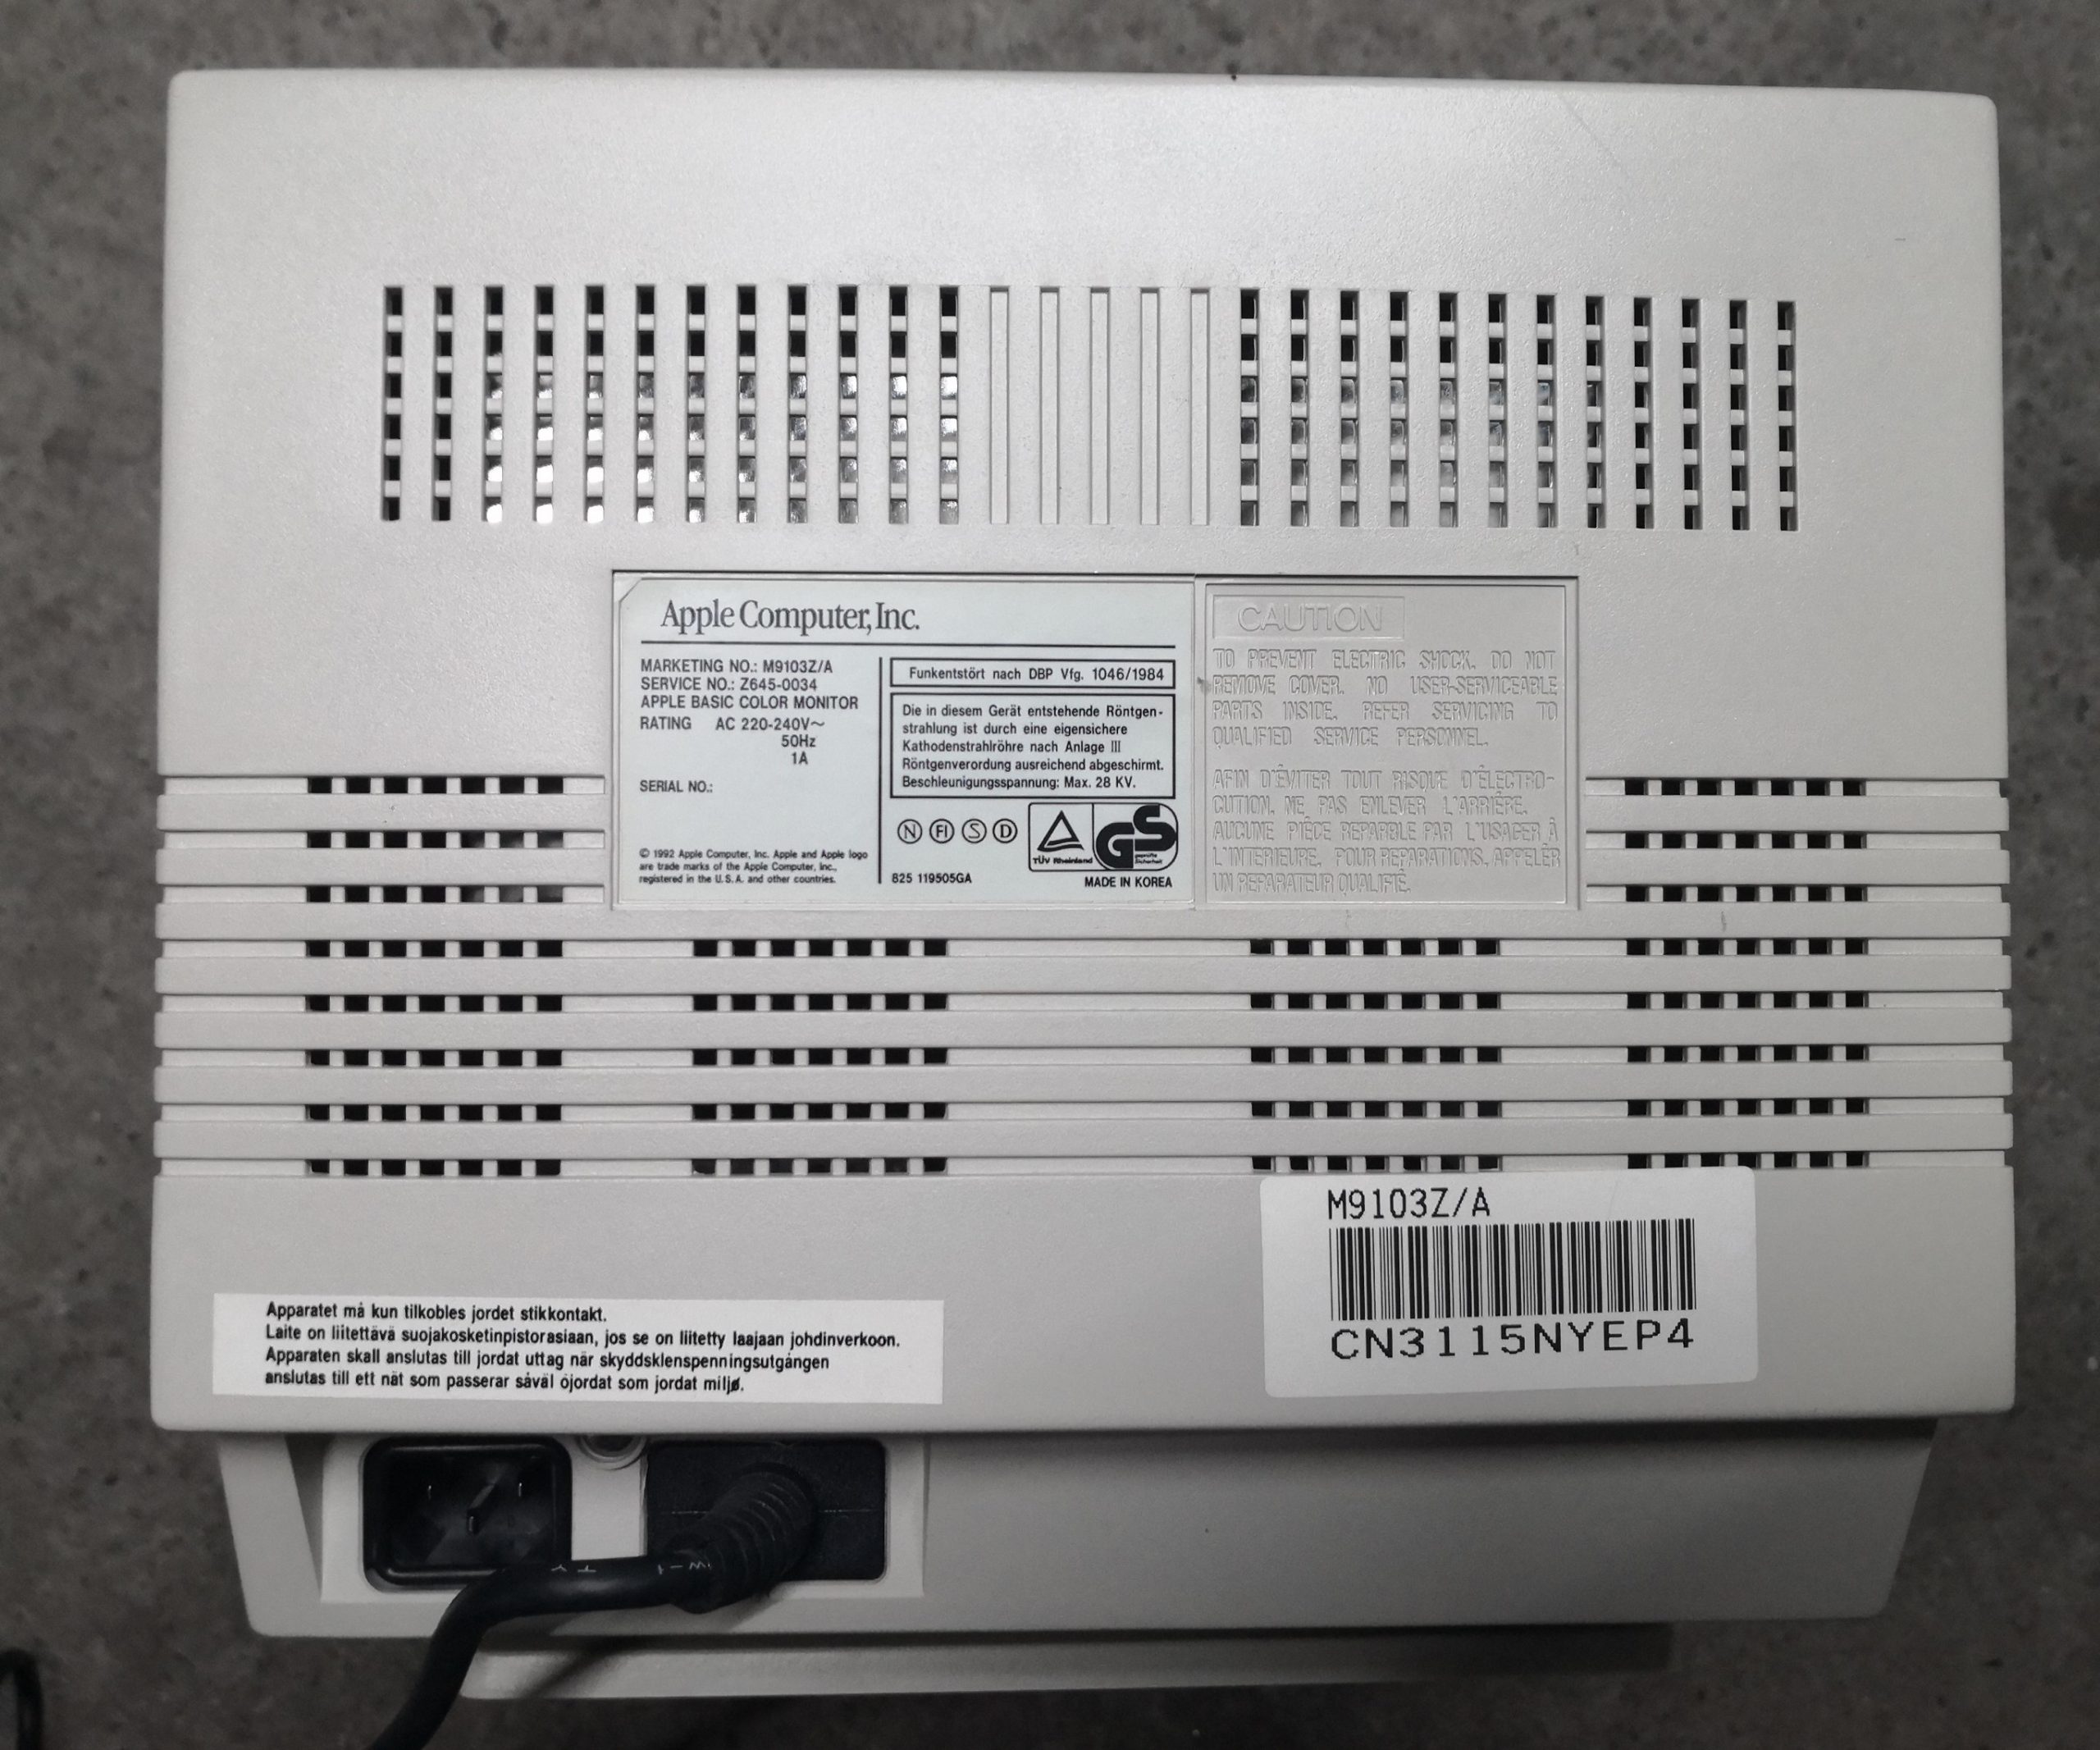
To protect you from severe shock I slowly move backwards, beginning with the label on its back, proving it’s a genuine Apple product:

Let’s take some distance to see it’s backside in full – still, there could be hope if they would have kept the more or less rectangular shape… but bottom of the case is not looking promising.

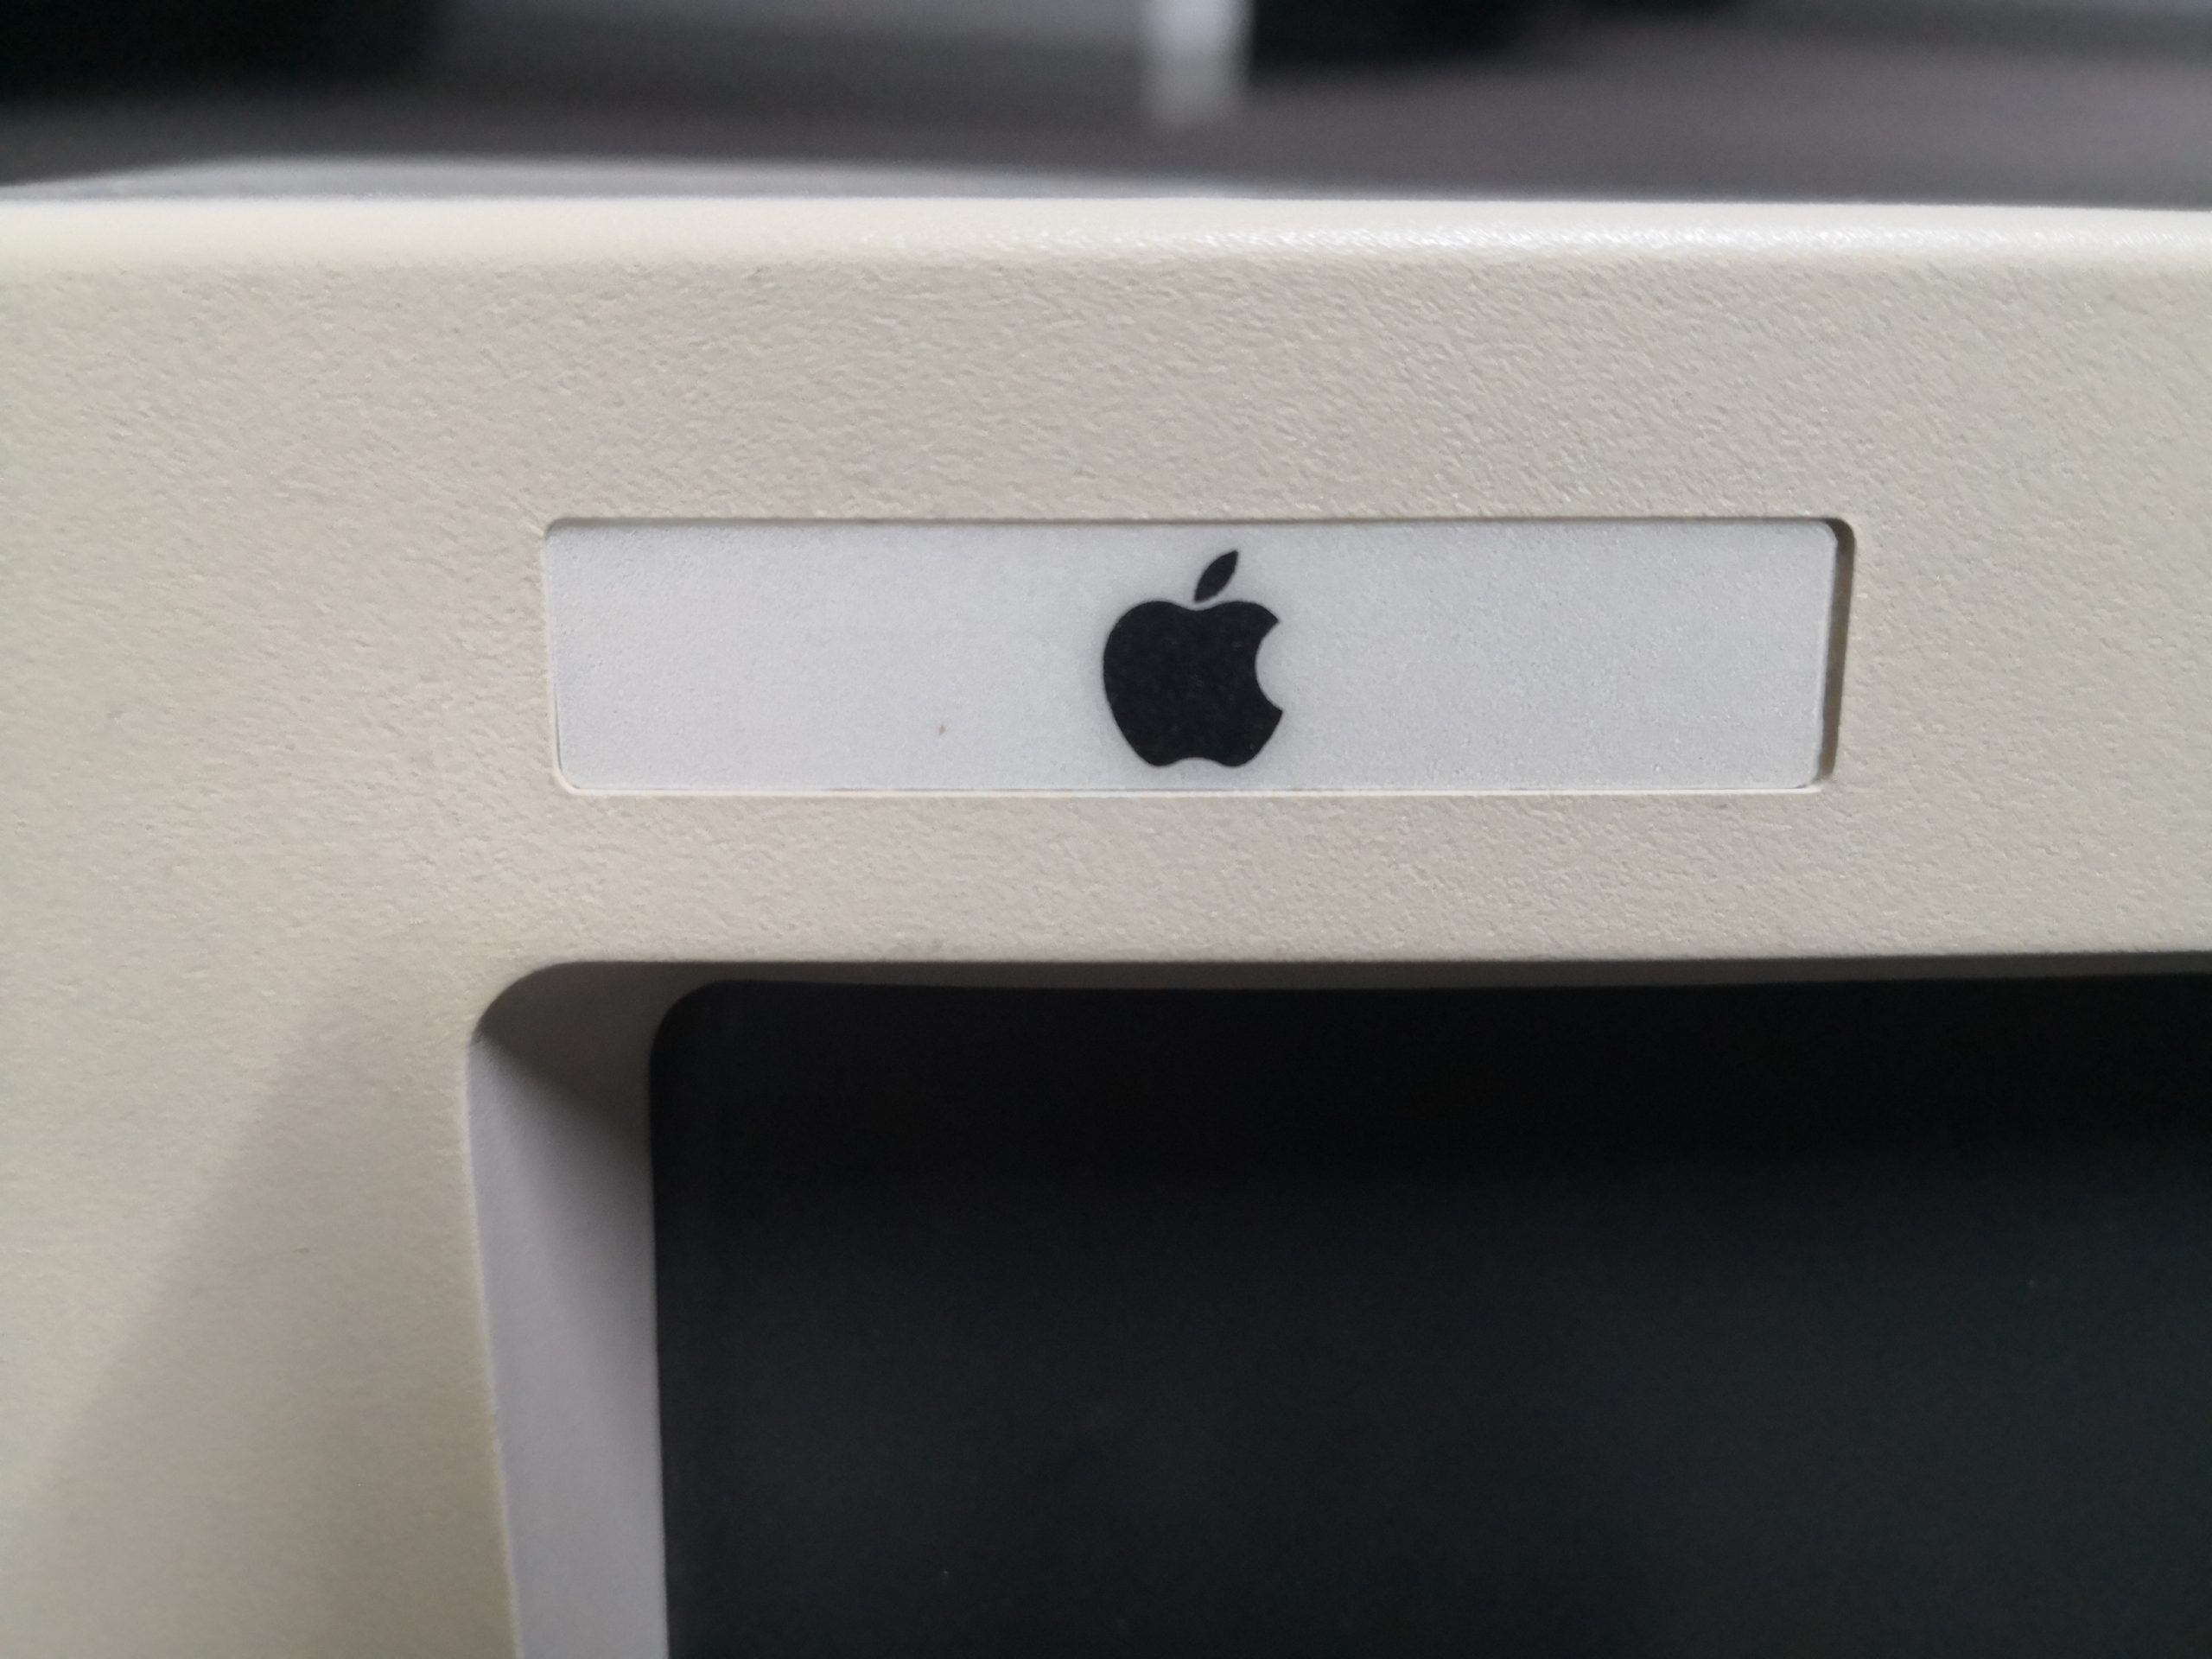
At the front you’ll spot the proof of absolute zero passion. The Apple logo somewhat slapped into the space which the OEM left there:

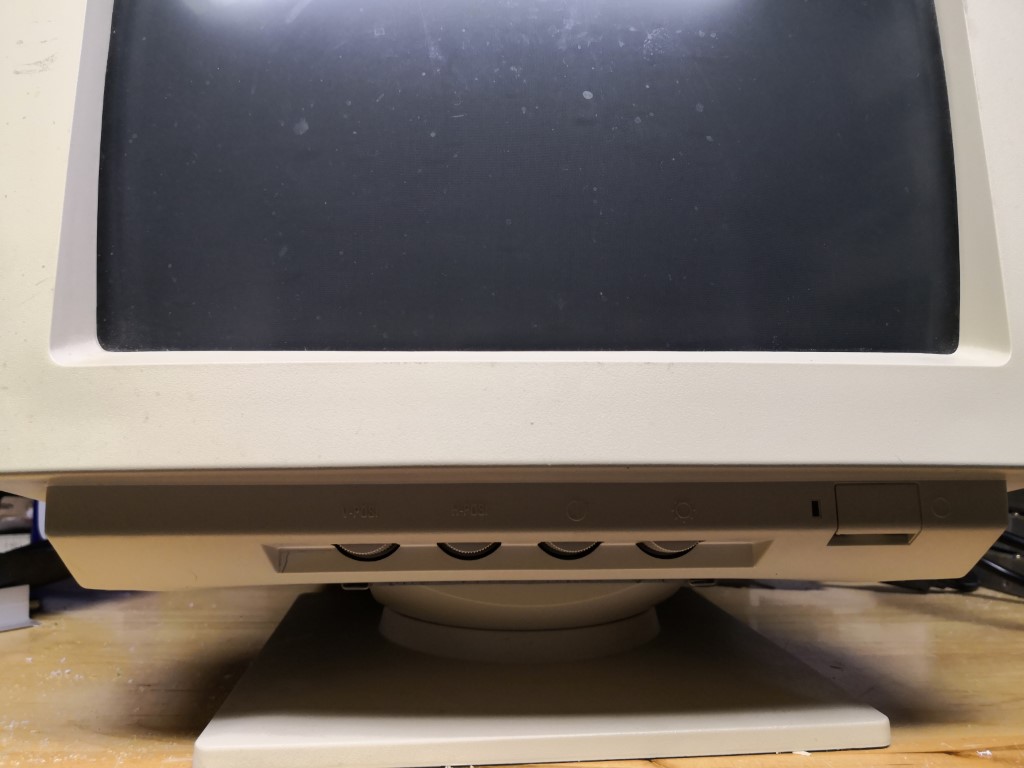
Yes, it’s a bog-standard,  VGA monitor, lowly specs and ugly as hell.

The photos don’t do it justice – it’s even uglier in real-life.

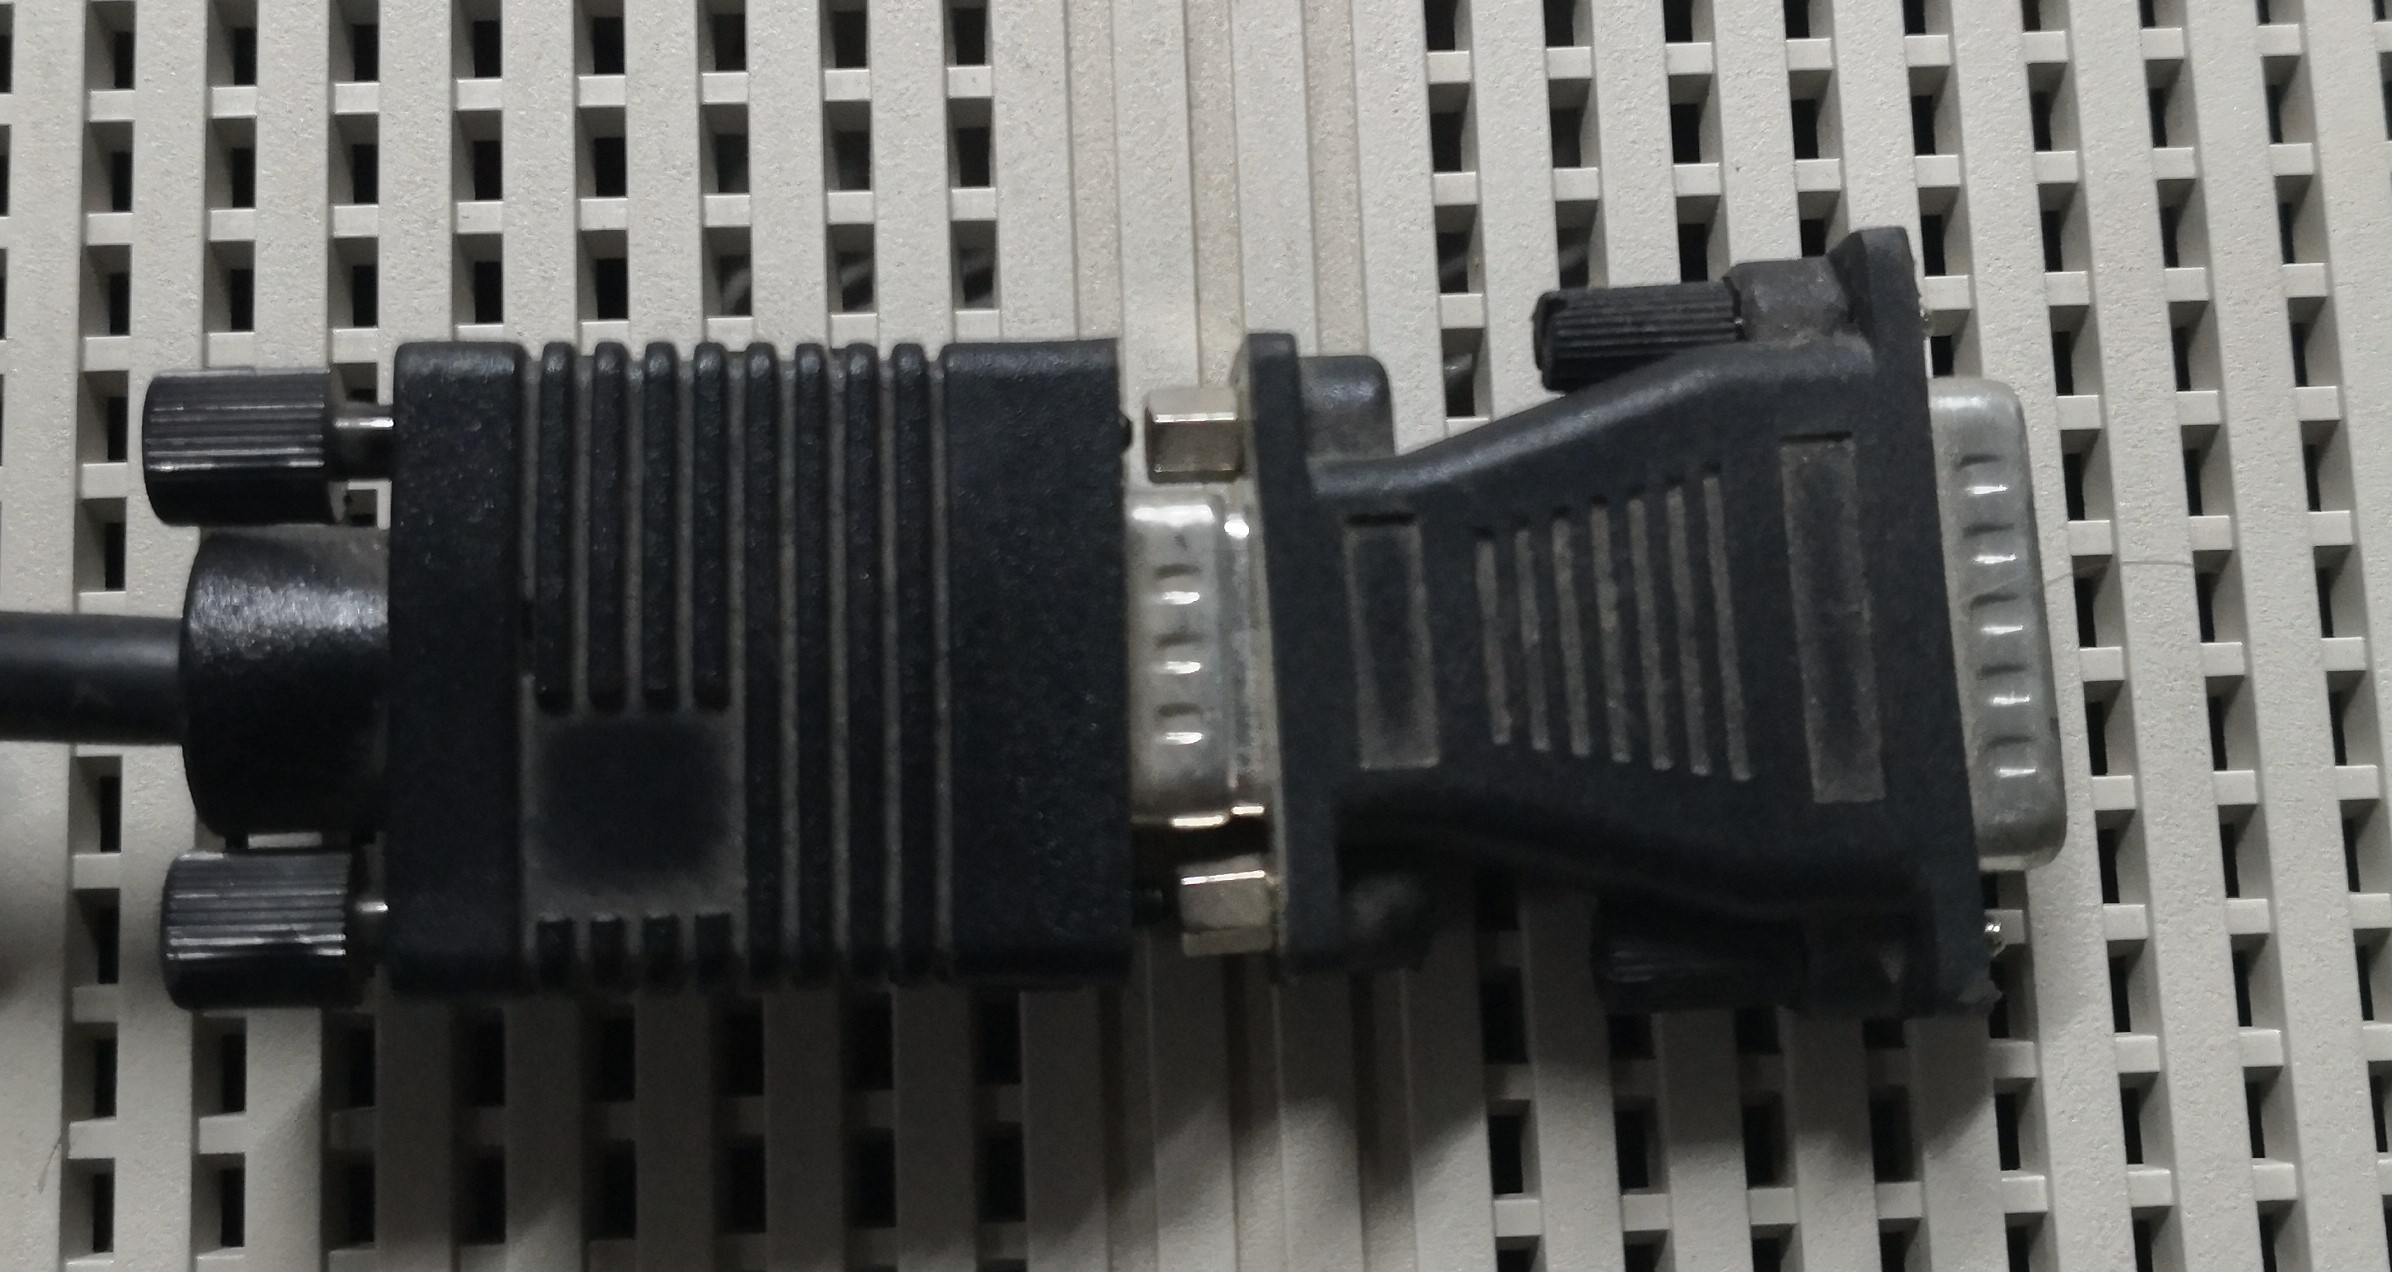
They even did not change the cable to the (back then) Apple 15-pin standard video port but just stuck an adapter to it:

No wonder it was so short-lived (February 10 to October 21, 1993)

Just to show that Apple was definitely to do better. The first monitors sat more or less flush on the computer cases. Even those with a swivel-base showed the typical design language, an embossed/color Apple logo etc.

Carrera 040 in an SE/30

As promised in my blog entry nearly one year ago, here’s the (monster) post about this project.

Background

Boy, what a ride! This is definitely my most complex (and still ongoing finished) software reverse engineering stunt ever!!
When starting this venture I was a blue-eyed Mac user and just-for-fun programmer and never imagined to learn this much about those machines I loved since 1985… by the way of a very nice guy I was finally able to get an SE/30. Immediately I thought of accelerating the cutie.
This first post will give you an insight about the workflow, hardware and software used. Following posts will then guide you deep into the code…

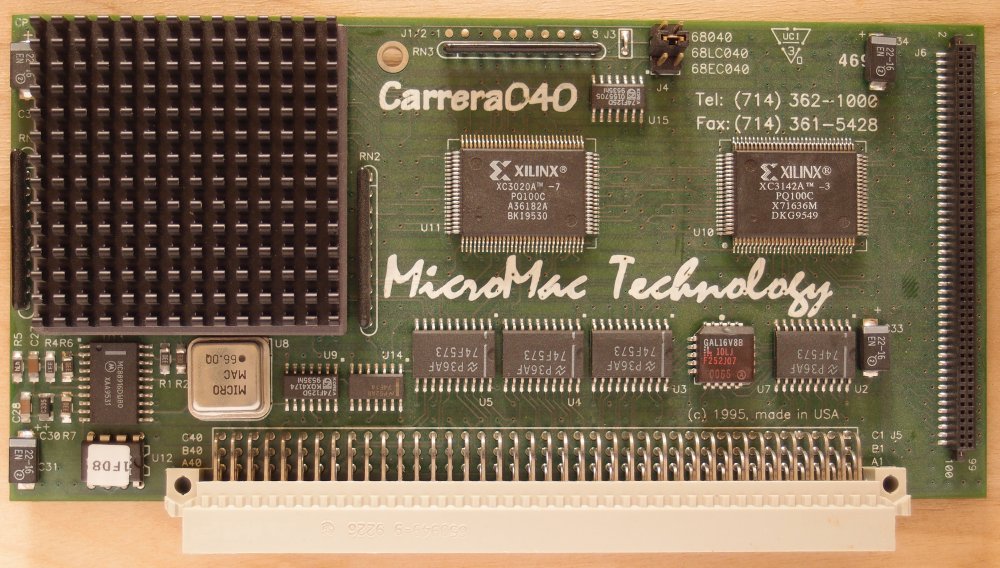
The MicroMac Carrera040

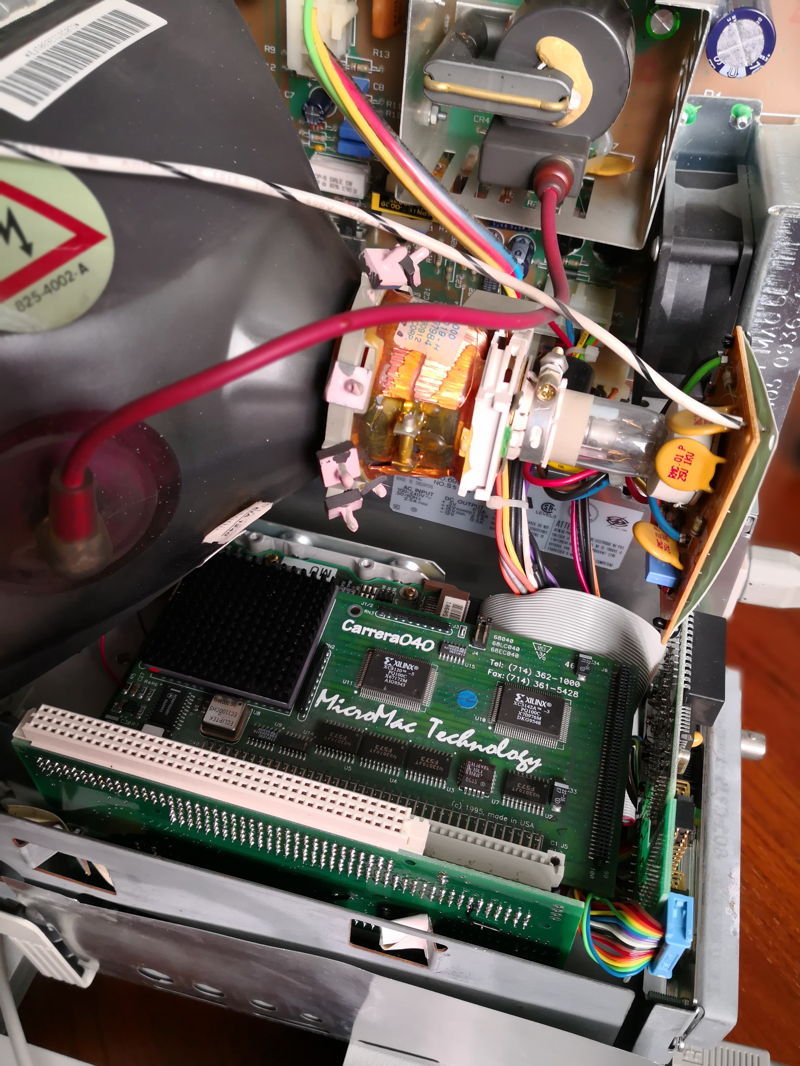
For many years I had a Carrera040 (or C040 for short)  – a Motorola 68040 accelerator for Apple Macintoshes – in my locker which I bought in wise foresight without even owning a Mac to plug it in. The C040 I got was meant for usage in a Macintosh IIci, plugged into its L2 cache-slot. That said, using special adapters, the C040 could also be used in other 68030 Macs like the IIx, IIcx, IIsi, IIvi/vx and the LC/LC II.

Is the Carrera a Speedster?

What’s this question about? Well, you might also have come about notions of an accelerator called the ‘Mobius Speedster‘ which is pretty similar to the C040.
Well, it is and my wild assumption is that at one point MicroMac bought the design from Mobius. There’s even a leftover in the C040’s ReadMe:
Applications that do not work with Quadra or Centris Macs are not likely to work on ‘040 accelerators, including the Carrera040. Generally, these incompatibilities are limited to the ‘040’s copy-back cache, or FAST mode on the Speedster.

So when I had my glorious SE/30 sitting on my desk it immediately came to my mind to make this card running in it.
You have to know, that the SE/30 is a somewhat shrinked-down version of a Mac IIx which again is pretty close to the IIci – and there was an adapter in existence to use another popular IIci accelerator in an SE/30 (Daystar Turbo 040). But it’s very rare and there’s next to no chance to find one. Anyhow, it’s doable, so I was hooked.
I stumbled across a cry for help in the 68kmla forum, a user owning such an adapter and a C040 tried to get it running in his SE/30… to no avail. So while still not having the proper adapter (yet) I thought “why not start looking into the driver while waiting for the hardware?”.
So the journey started…

MacNosy – a users nightmare, a hackers heaven.

My natural reflex is to reach deep into my tool-bag, get out my favorite disassembler/hex-viewer and start digging through its output. But for System 7 my bag was empty. Is there any disassembler at all?
While the good thing is, that most software packages which cost plenty of $$$ back then are abandonware today, the bad thing is that many are undocumented and unsupported. After some research it became clear that MacNosy was and still is the best m68k MacOS disassembler around.

Boy, this disassembler is powerful! But it seems to be written by Steve Jasic for, well, Steve Jasic. I know that kind of tools – I’ve written some of those… and never showed it to anybody because it was, erm, special. Prepare yourself for “everything will be different than you’ll expect it”. Steve gave a sh!# about UI or keyboard conventions. Cope with it.

Luckily there’s a very good review and some sort of documentation can be found here.

Same but different – which is where?

Does ‘A5-world’ ring a bell to you? No? Don’t worry, it was the same for me, even I am using Macs for a long time.
Even it’s an 68k system, there are so many things done different than e.g. in Amiga OS or Ataris TOS – so you have to learn a lot.

Because it would absolutely bloat this post, I will link to external pages explaining the used term. So watch for the first mentioning, it’ll be a URL…

The provided Carrera040 “drivers” consist of an INIT/Extension (“Startup Carrera”) and a Control Panel (“Carrera 040 1.8”).
In the provided readme file there’s the line “With version 1.8 we have included an extension which ensures the Carrera040 code to load very early in the boot process.

And indeed, the INIT code does not do much more than loading a specific resource from the control panels resource-fork.
So I concentrated on the control panel (CP for short). Using ResEdit, you’ll find the main detection and control-code in its resource fork called “SPDR’ (SPeedster DRiver, got it?).
While working through the code, commenting whatever I immediately understood (which wasn’t much in the beginning), I stumbled over several things you should also have an idea about before reading the disassembly in the coming chapters – so here’s a growing reading list:

Macsbug reloaded

During all that code-gazing, head-scratching and learning-new-things-every-day great luck struck and I virtually-met ‘Bolle‘. A guy who created a clone of the mystical PDS-to-IIci-slot-adapter. Woohoo!

Even those 120pin DIN connectors are incredibly hard to find.

So after spending some Euros I was finally able to  jump into the ‘the real thing’ and try my patches in-vivo, or watch the code being executed. Thanks again, Bolle!

My C040 cramped into my beloved SE/30

The drill

The weapon-of-choice for watching code run is definitely Macsbug, the official debugger from Motorola, heavily modified by Apple through all the years until MacOS 9.2.
Back in the days my contact with Macsbug was very brief. When a program ‘bombed’, I’ve entered “g” (for Go) and hoped the system will somewhat heal and keeps running…

Ok, now I had to be somewhat more serious – and my skills had improved over the last 20 years, so my routine turned into single-stepping and tracing through the code, skip certain instructions which might kill the code, watching all the registers and most important and watch how the Carrera “driver” behaves in an SE/30 vs. IIci.
I even created some macros (which have to saved into Macsbug own resource-fork!) and started an endless try-and-crash drill.

The working drill is tedious: You step through the instructions, while following your steps in the disassembled source, to the point where it crashes. Remember/note the point (address) where it crashed and try again.
This means you have to manually trace closer to “the edge” but try not to fall off the cliff. And when you did – and I did many times – rinse & repeat.
Sometimes you can ‘skip’ complete function calls containing hundreds of instructions (called ‘Trace’), sometimes you have to sit-through (i.e. single-step) a very, very, very long loop just to be sure it works 100%.

The next post/chapters will finally dive into the control panels code.
While it’s all about this specific ‘driver’ I’m sure it’ll help everybody who starts the adventure of understanding pretty low-level 68k Macintosh code.

That said, in Dec. 2019, continuously working with Bolle, we came to the conclusion it has to be a hardware problem and Bolle was able to prove this and most importantly found a way to fix it.
There will be a 4th and final post concluding all of our findings.


Fixing the Quadra 950 power-supply

One day the power-supply of my beloved Quadra went “bzzzzzt-poof” (sparks flying, smoke rising).
First I was desperate… try to find a Quadra 950 power-supply these days. And if you find one, it’ll cost you the same you’d pay for a complete system… and then you’re still not sure, if it won’t go poof very soon, too.

Then I thought: Hey, why don’t replace the whole thing by something more modern, much cheaper and smaller?!
It’s already been proven with other Mac systems that using a standard PC power-supply (PSU for short) is feasible, so why should a Quadra 950 power-supply be much different?
As there are some descriptions out there – mainly for those “10-pin connectors” (Mac IIcx, vx or PMac family) I thought it might be helpful to have a step-by-step how-to with lots of photos…

We’re interuppting this transmission for a stern word of warning:

Working on/in power supplies is dangerous. I take no responsibility for any damages, injuries or fatal strokes! If you’re unsure if you can do this hack, just don’t do it!

First (obviously), unplug the unit. Leave it unplugged for 15 minutes or so. In most PSUs there are bleeder resistors that will bleed down the stored voltages inside over time BUT THERE ARE NO GUARANTEES!!

When you open the unit, understand that there are two hazards:

  1. Stored high voltage (200V or so) on the “input” side of the unit.
  2. Stored high currents (tens of amps) on the “output” side of the unit.

Either 1 or 2 can be deadly. If you die, it’s social darwinism. You have been warned. 

Dismantle

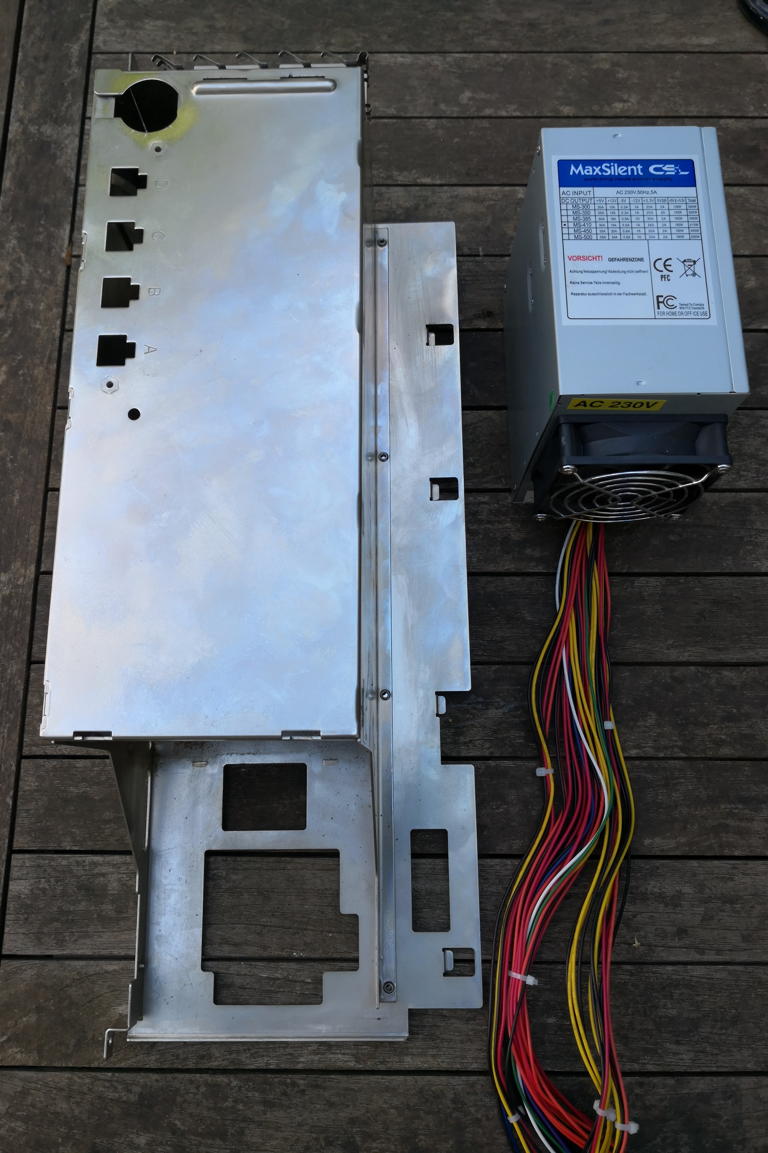
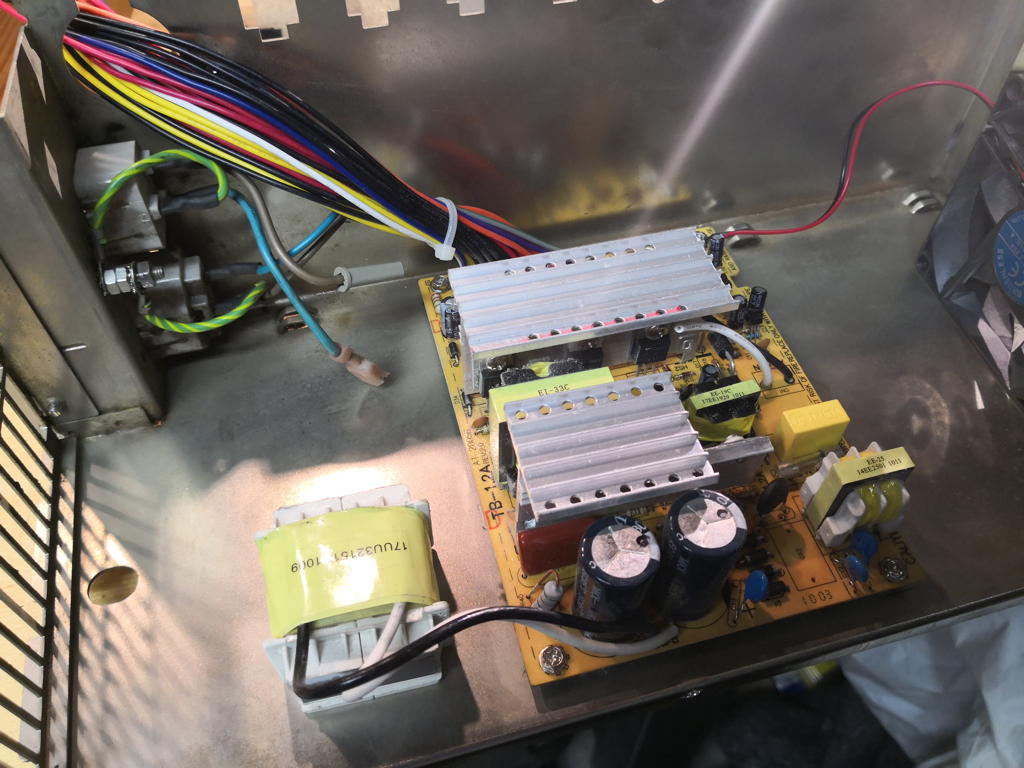
So for the initial try I pulled a cheap ATX power-supply out of my junk-pile (wife-speak for “basement”) and put it next to the original, humongous Supplyzilla created by Apple. Ok, that should fit in 😉

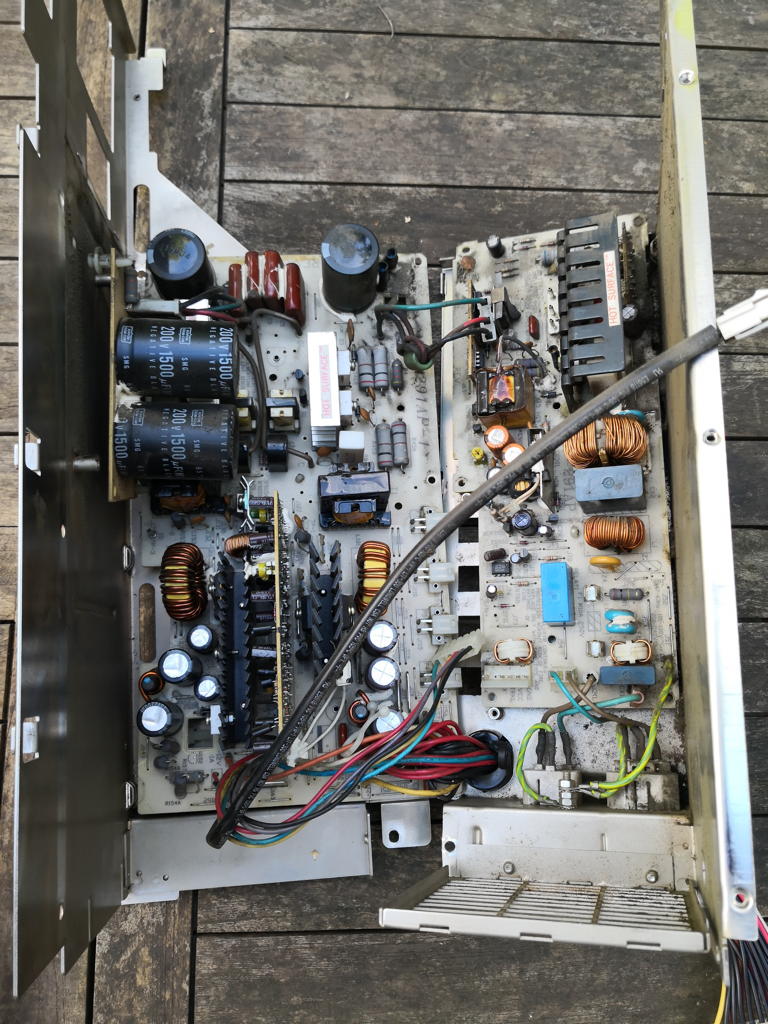
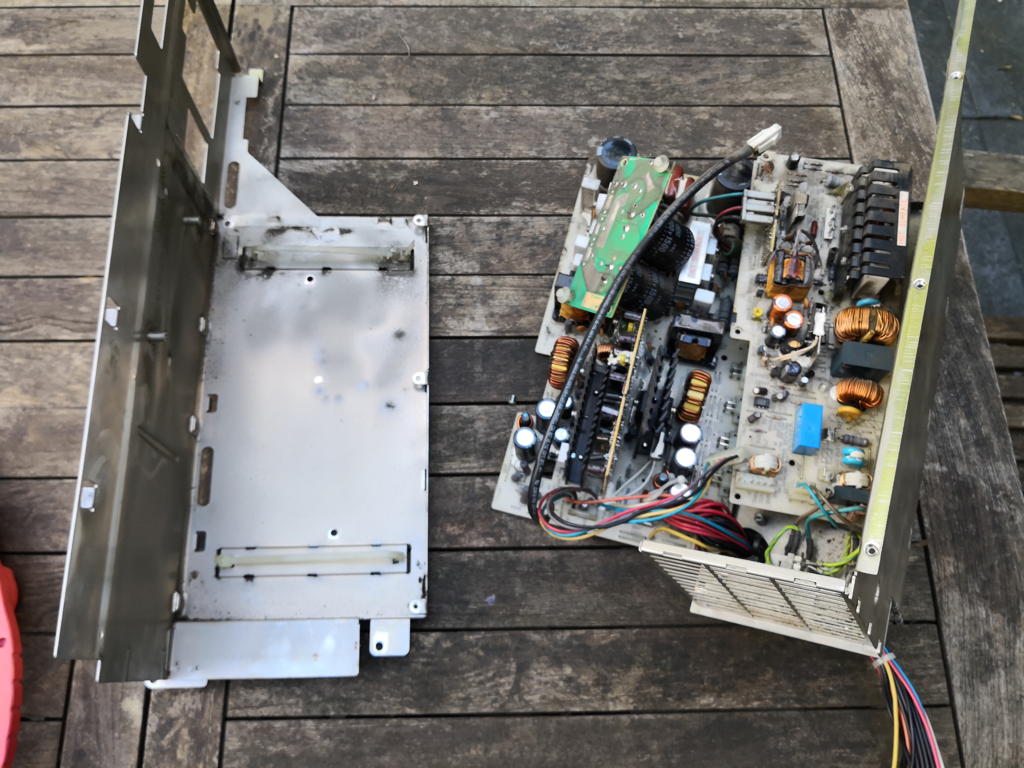
Opening Supplyzilla is another thing. About 10 screws, a cut in my finger and 30 mins of cursing later I found the reason why I wasn’t able to get the two case-parts apart: Don’t forget to unplug the fan cable :-/
After this you can fold-open the case and have a good view onto huge capacitors, lots of dirt and 1990s tech…

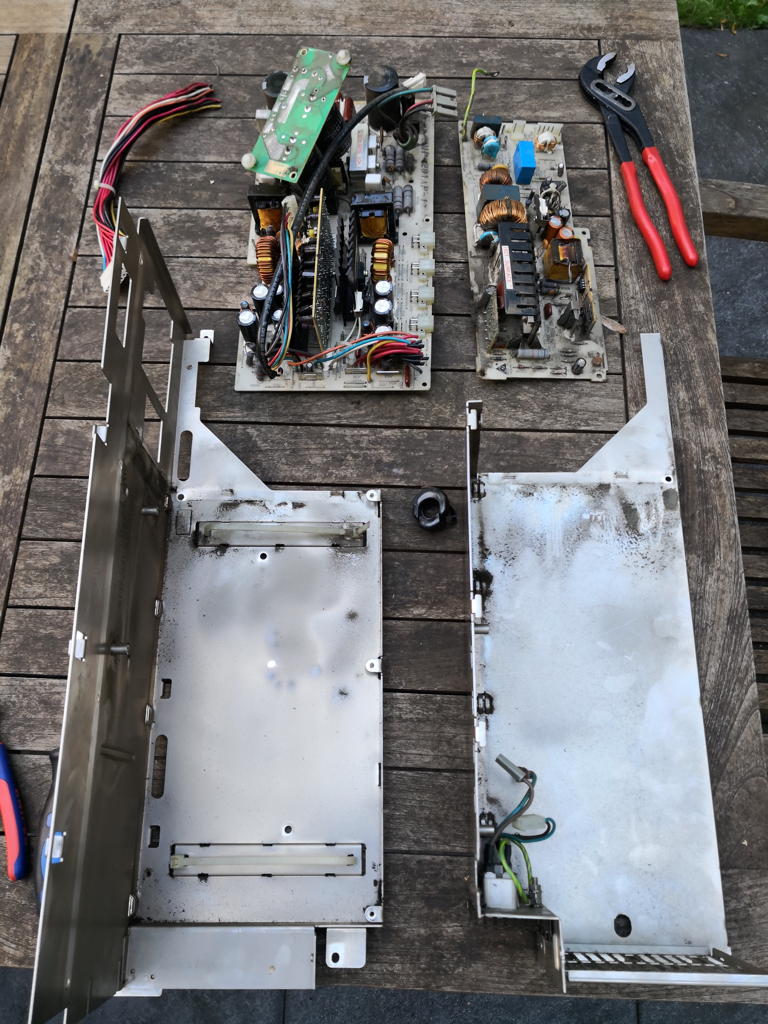
There are two PCBs each mounted to a side of the case. Unscrew and separate them – because mine was dead anyhow (and I wasn’t planning to repair it) separation was easy. Snip!
I wasn’t able to get the external cable-harness leading out of the case. So this was a 2nd snip-snap… I planned to use the original PC cables anyhow. You can reuse the original plug or use the one from the ATX PSU (if it’s a 24pin one).

Here they are… rest in pieces 😛

Fitting room

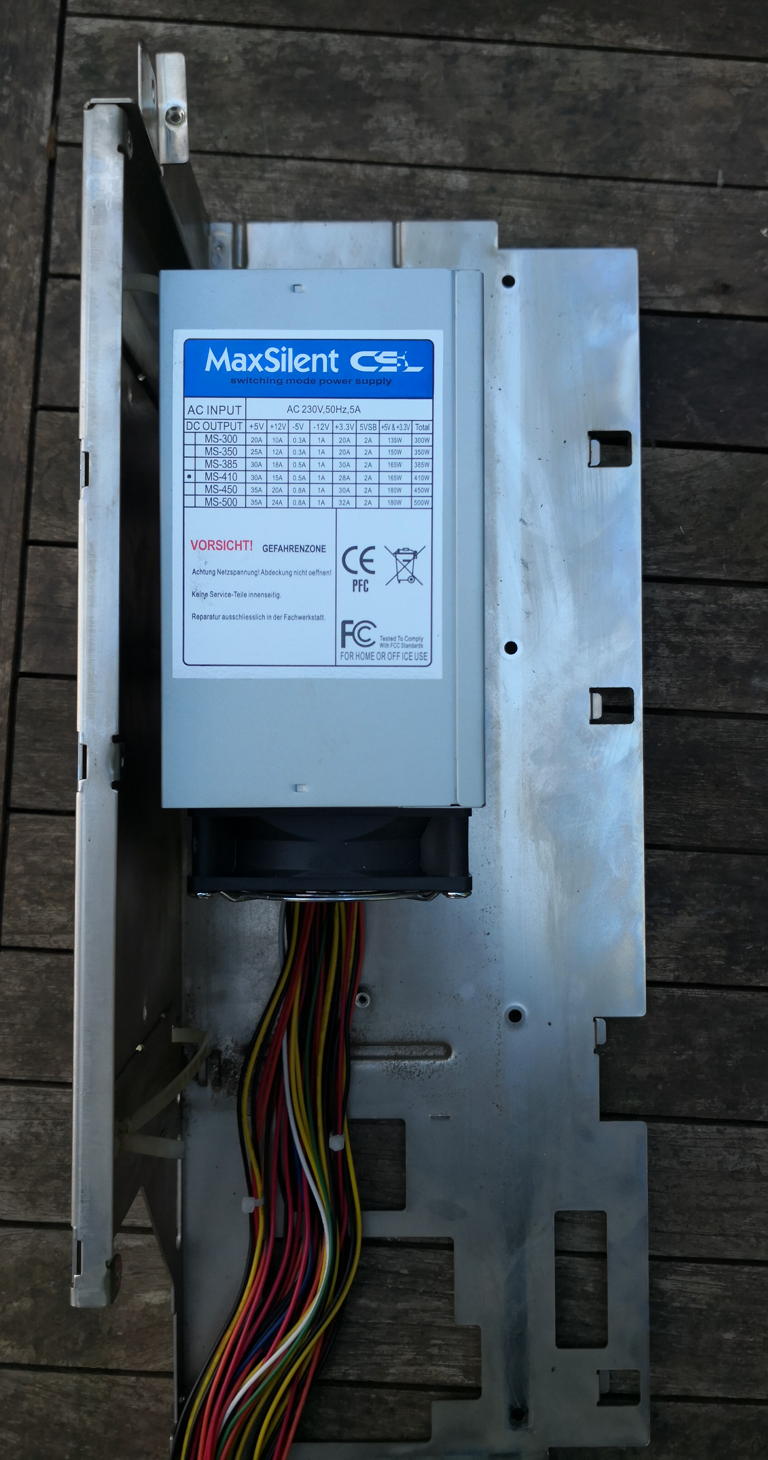
Next up: The first fitting… even still in its enclosure it would nearly fit two times.
BTW: I like the sticker saying in German “VORSICHT! GEFAHRENZONE!” (Caution, danger-zone!) That’s soooo 80’s Top-Gun 😀

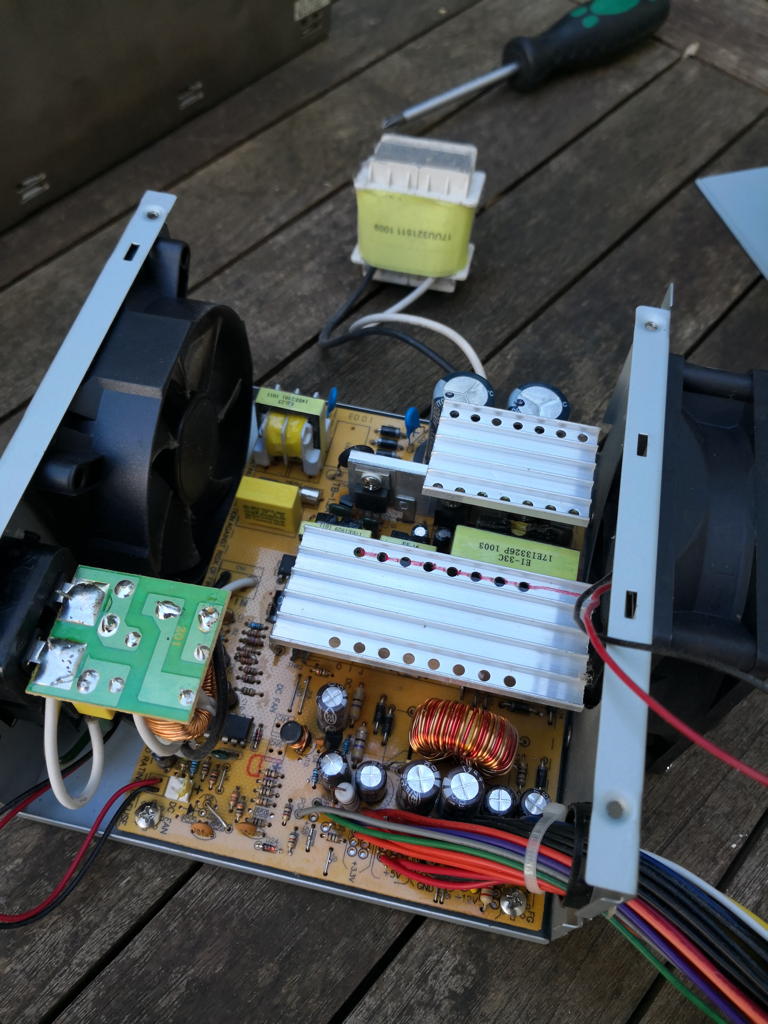
Because we have to modify the ATX PSU, it had to be stripped down, too. Compared to Supplyzilla it’s pretty deserted in there…
Yes, it’s a cheapo one looking at the passive PFC and could have be designed much better, but for the 1st try it’s OK.

2nd fitting making sure all heatsinks are well placed into the airflow, cables close to outlets (the fan will be replaced by a big one, of course).

You will be assimilated…

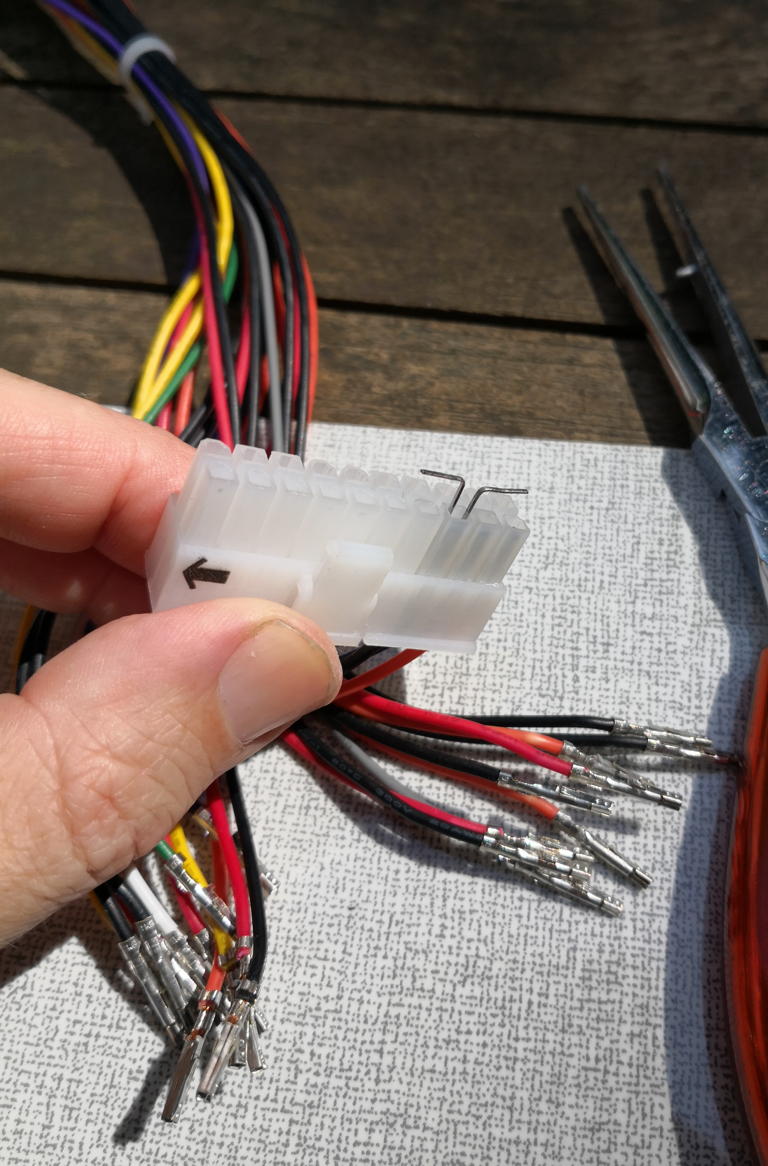
Next step was a meditational one. Loosening all 24 pins clamped into the ATX plug. I used the “cut staple method”. One to the left, one to the right, push them in, pull the cable… repeat.
Configuration of the Q950 plug will be described further down. I suggest to do this as one of the last steps. For now just tape all loosened pins together to save them from bending.

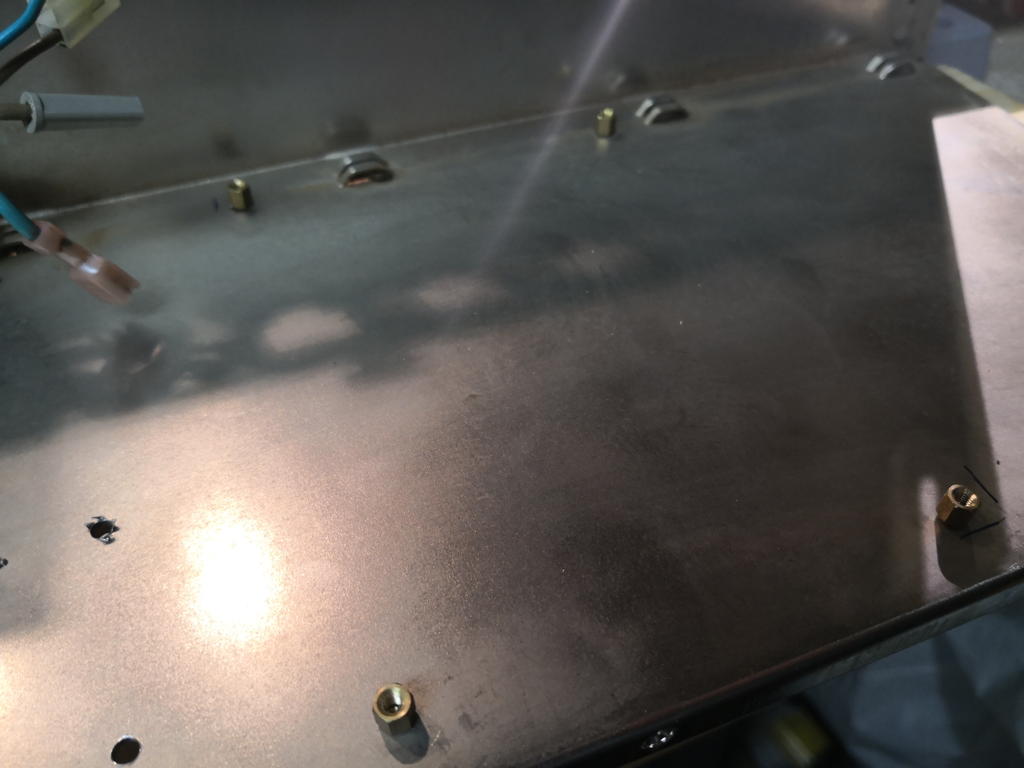
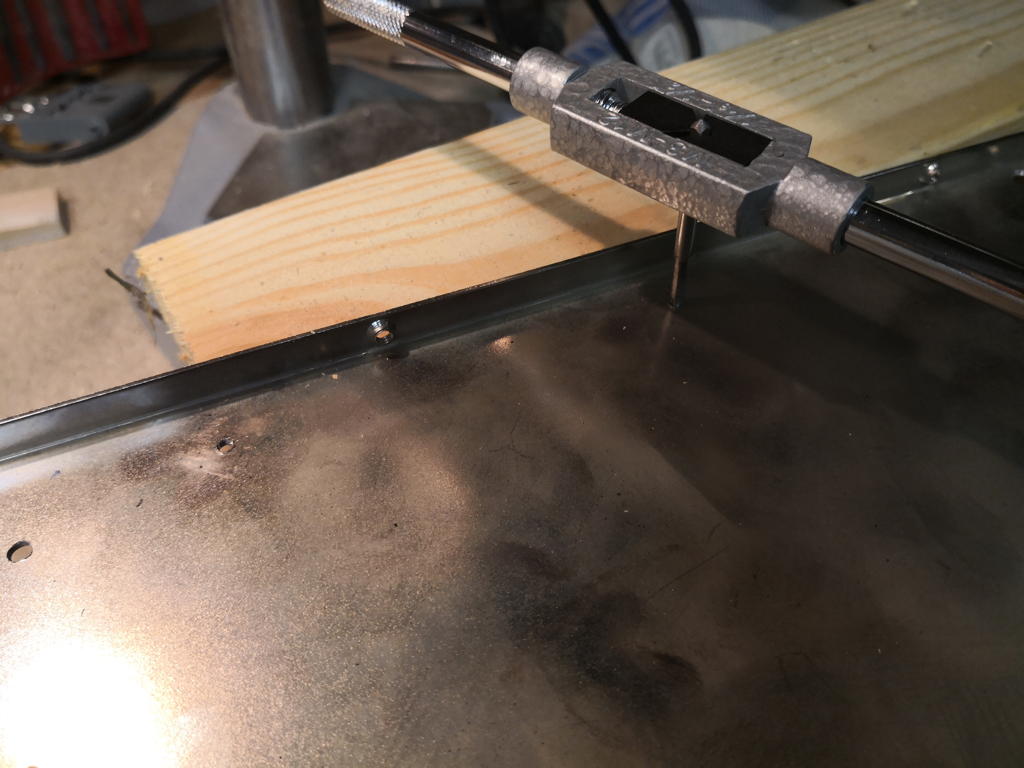
Having the preparations done, it was on to the workshop drilling some holes and cutting screw threads (optional but nicer than holes and nuts)…

…to have a proper seating for the stand-offs. We don’t want the PCB touch the case, don’t we?

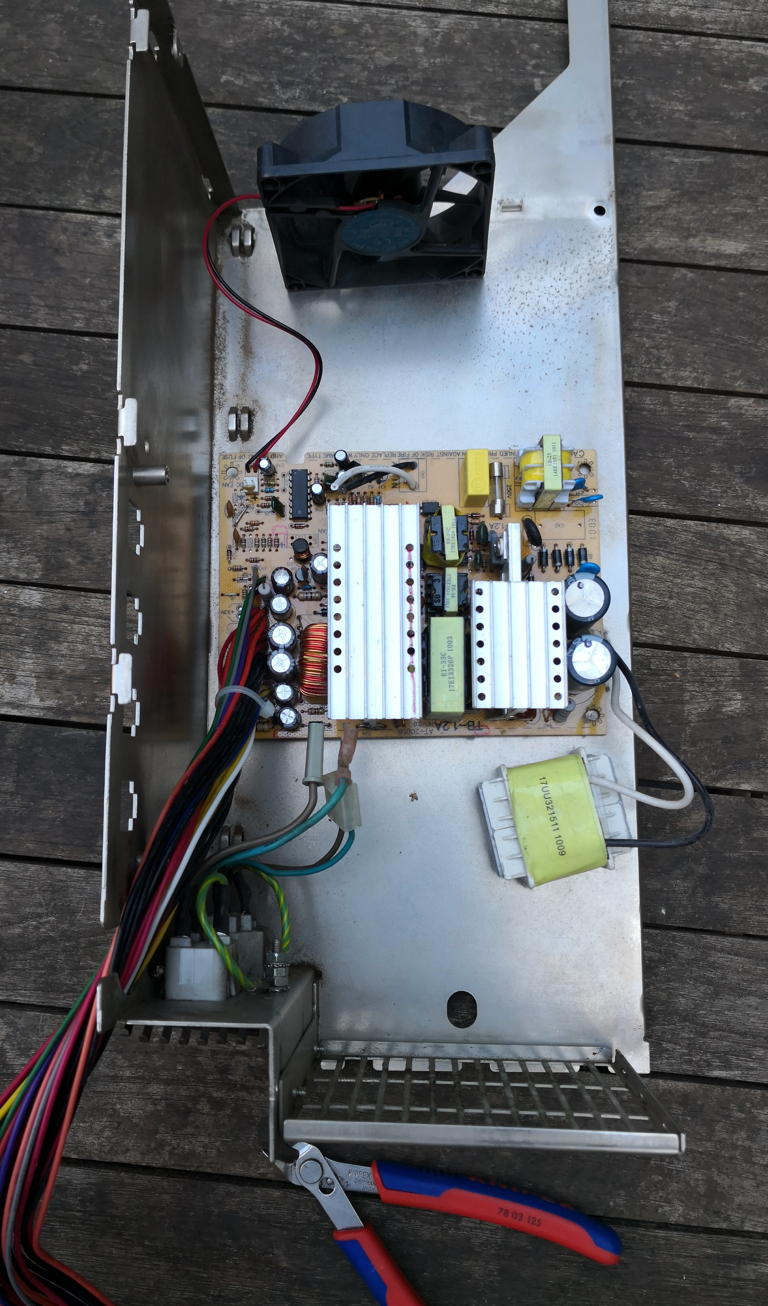
All fits nicely. The PFC screwed to the case like in its original habitat – ugly, but will do for now.

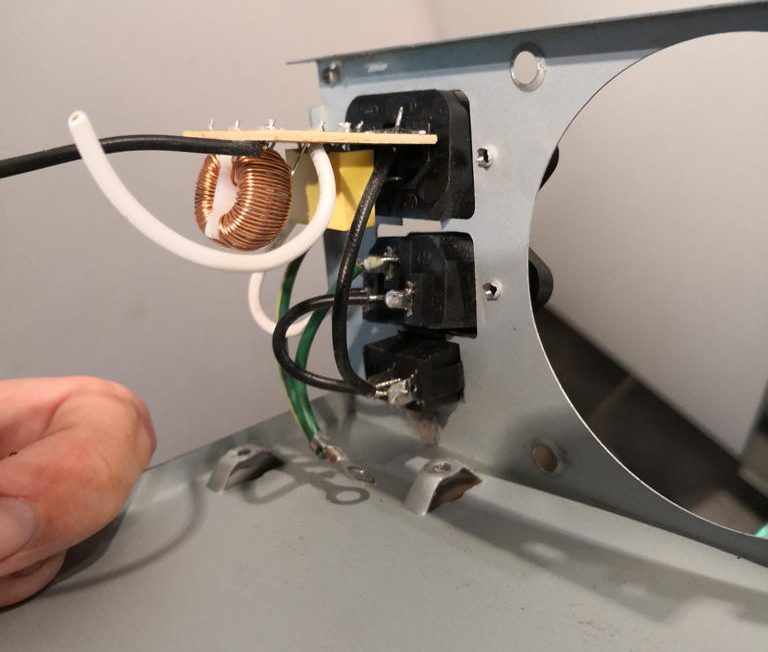
The noise filter was directly soldered to the power-out plug. Again ugly, unprofessional but OK for a try.

So the filter went into the case and unneeded cables like 3V, were shortended and kept inside the power-supply.

Connecting the dots

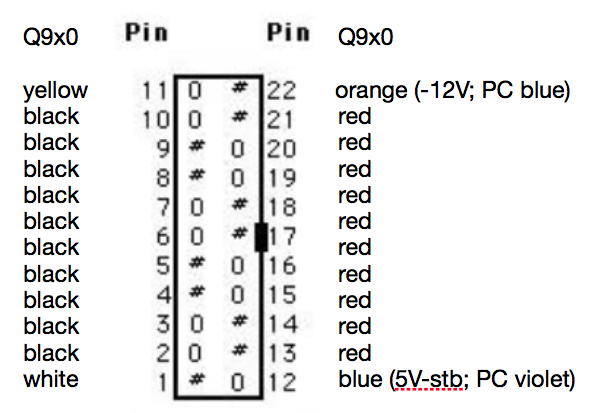
Now for the plug-configuration. All documentation I’ve found on the web were wrong – dead-wrong, even leading to drama
So this is the correct pinout for Quadra 900/950’s:

Having this, the mapping from the “Mac-plug” to your ATX-PSUs cables is pretty straightforward:

  • Red (5 volts) stays red
  • Black (Ground) stays black
  • Yellow (+12V) also stays that way, too
  • Orange (-12) is blue in your ATX-PSU
  • Blue (5V standby) is the violet cable in ATX-PSUs
  • White is mostly unused on ATX-PSUs – we will recycle that cable for PFW…

As for 5V/GND wires don’t worry if your ATX PSU doesn’t offer enough of them (10 each). Mine just had five 5V wires, so I populated every 2nd slot in the plug.

Killing me softly

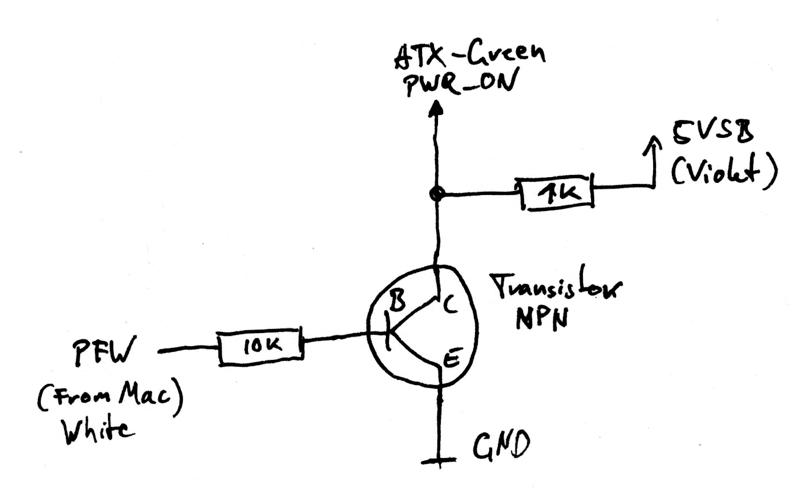
Finally the ‘circuit’ for using the Quadras soft-power feature had to be implemented – a simple rocker-switch connecting the green (Pwr_on) wire to GND would do, but this is just so below the mighty Quadras grandeur.
I opted for the very simple, more reasonable solution using a NPN-resistor… even a 74LS04 is an overkill in this case. Just my 2ct, though.

This is the schematic, nothing spectacular:

Yeah, the symbols for the resistors are European, that’s because… well, I am European 😉 As for the transistor use any NPN you can get easily. E.g. BC547 or BC549 (again, European numbering scheme, you’ll have to figure out JEDEC names if needed).

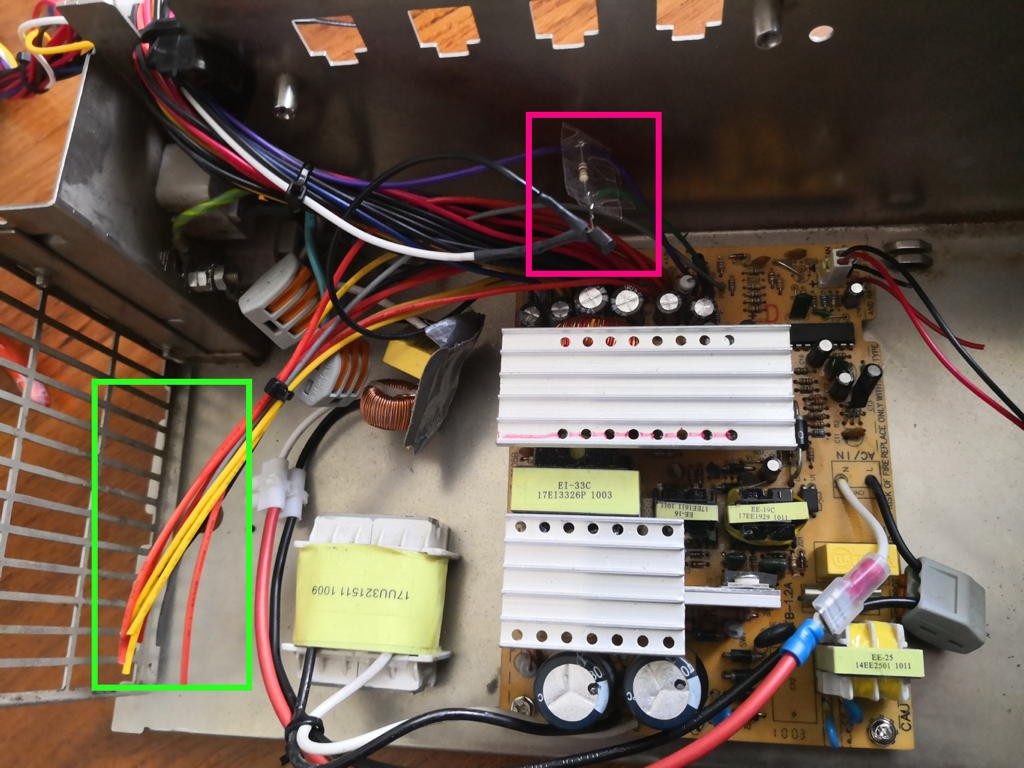
And here’s the PSU before its going to be closed and put back into my Q950.
Pink box: The soft-power ‘circuit’ (yeah, I was too lazy to create a PCB for a transistor and two resistors).
Green box: Unneeded cables been cut (3V, extra 12V, pwr_good).

Everything else was routed outside (All 5V/GND, +12V, -12V, 5V_tickle and the white cable was cut and reused for PFW.

Hints: DON’T use the GND from fan-connectors! They might be modulated to control the fan speed and other wired things. Better use one of the e.g. unused 12V cable-pairs.
Check everything before closing the case – Again CAUTION!!! High voltage. You touch, you die!!

Woo-hoo! Lady Quadra works again!

Outlook

That was a cheap fix… about $5 in parts if you have to buy a used ATX PSU. To make things easier and look more professional I plan to design a small PCB which fits right where one of the original PSU PCBs sat, providing the 4 drive connectors (4-pin) so that you can keep using the original drive power-cables. Also I plan to add:

  • the soft-power circuit
  • a temperature fan speed controller
  • (optional) internal 5¼” power-connectors for solder-free connection to the external 4pin connectors.

My new MacBook Pro from… Redmond!

F*ck me! I would never-neverever thought that this might happen… but last week was the time I switched to the dark side  😯

Say hello to my new “MacBook Pro”:

Whaaaat? Yeah, I know… but wait a sec before you pull your light-saber.

My Macs are both officially obsolete since macOS Sierra was released. A mighty 2008 Mac Pro as well as my 2010 MacBook Pro. Boy, believe me – did I anxiously wait for the presentation of the new MacBook Pro! That was in 2015… and ’16.. and then the big moment came. And went. I was, mhh, not impressed.
Many Mac users of the “first hour” complained about, well, everything. I have to say, I am a Macintosh user since 1984 – I moaned about the loading times of System 6 on a 128k Mac, I jubilated about the 1MB and SCSI in the “Plus”,  drooled over the IIfx, even admired  the doomed AV’s, ran A/UX, owned the first PowerMac etc.etc.etc… but this time, they just lost me.   😕

Missing ports aside (and I really need USB-A) the main reason for loosing me was the price they slapped onto the 15″ Pro… 2699€ – holy bat-wallet! That’s nearly $2900US$… $400 more than in the US. I was speechless. Angry. Flabbergasted.

So, after squinting into the Surface Book corner for some months already, I gave it a closer look (I quit using Windoze seriously when VIsta popped up) and had to admit that it helped Microsoft having been pushed into 2nd row. They at least got some things right and there’s always a VM with Linux at hand.
So I did it. Found an i5/8GB/256GB for a whopping 1000€ less and must admit: I like it a lot up to now. A speedy, stylish, well designed laptop, a big tablet and it natively runs all the FPGA IDEs, my logic analyser tool from china and Cygwin gives me an instant bash and GNU.

Never thought it would happen…. let’s see how it works out in the long run.

P.S: Apple Mail, I do miss you, though.

Did you drop your Macbook Pro dream, too? Think different? Post a comment!

Newton Secrets – Secret Newtons

This is my very first (presentable) Webpage from 1995. To keep the original style and navigation, I’ve put it into an iframe…[which might not work if you’re surfing this page using https].

Because it was “optimized” for 640×480 back then, that’s what it looks like now 😉 And because I had a total of 1MB (yes, one megabyte) webspace in those days, everything was squeezed down to the minimum, which explains the small and grainy images. Still, in the hey-days of Newton “Newton Secrets – Secret Newtons” got quite an amount of traffic.
I just found the original photos -on paper, you know- and will scan them again in a better resolution… if I find the extra time.

A bit of historical background

In about 1994 I totally fell for the Apple Newton. Yeah, one of those early adopter moments… again. After drooling over an Newton 100 at CeBit for two days I bought my 120 the very next year and proudly carried the nearly 500 grams with me every day.
I dived into the NTK (Newton Tool Kit) and learned Newton Script to write my own Programs (“App” wasn’t a proper word yet).

Fate stroke, when I went to San Francisco in 1997 for a year taking the chance to work as an intern at a Web/PM-Agency. The 2nd day I figured out that my bosses , Tony Espinoza and James Joaquin were  original Newton Team members, been in charge for the Dev tools etc. Because they just left Apple (the were in deep s**t back then) I was probably the only Apple/Newton fan between hard-core PalmPilot users 😉
Still I got a signed copy of “Defying Gravity”  and a quick look into his closet full of prototypes 😮 This is where the pictures on my page came from.
We also visited #1 Infinite Loop (Mind the old [soon new again] logo) now and then…


and the booming campus of Netscape. Erm, who? 😉

netscaoe