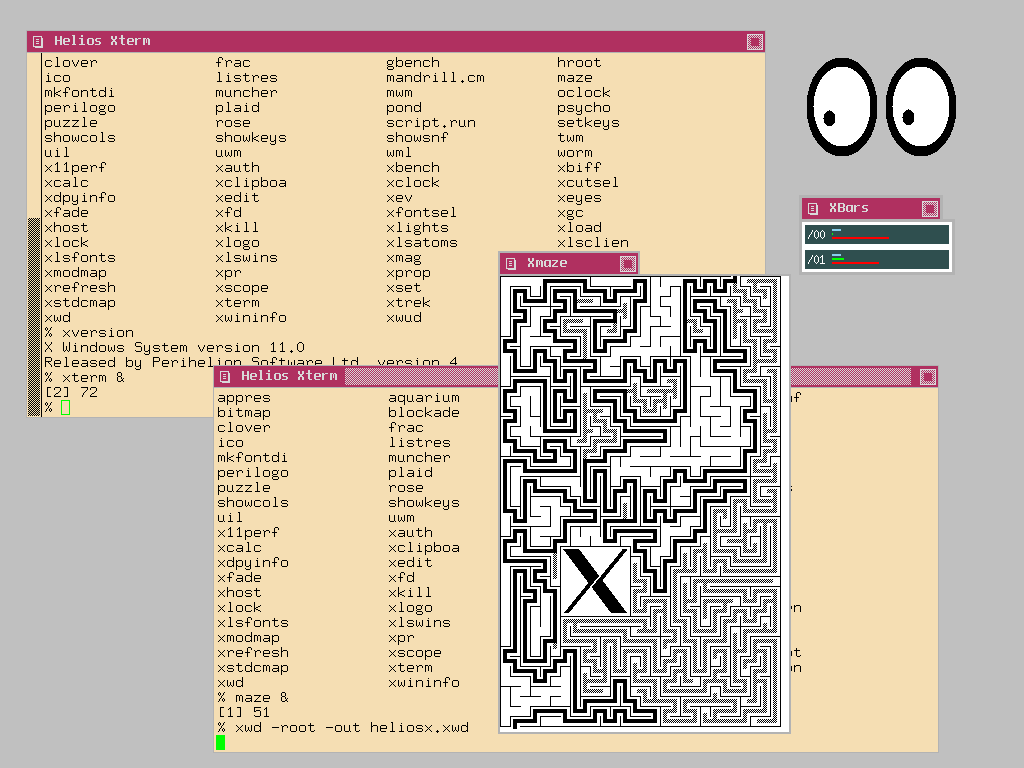
This is probably the pinacle of what you can do with Helios… literally, as there are probably just a handfull of people left having the needed hardware.
This is because the Helios X Window System only features drivers for two “graphic cards”: The INMOS IMSB020 ISA card or the IMSB419 (or similiar) TRAM. Both sporting the INMOS G3xx framebuffer chip.
Low-level stuff
The G3xx controls the displaying device in a very low-level manner – back in those days these devices were classic cathode ray monitors and high refresh intervals guaranteed a stable, non-flickering picture (>70Hz up to 100Hz an more). Today a TFT/LCD display is the common display and those are quite picky about the refresh interval being fed into them (60-70Hz).
It might be difficult to find a TFT display which is able to “catch” the G3xx signal. But thanks (again) to Michael Brüstle, there’s a super-great tool to calculate the correct values needed to configure the G3xx to match your display… or get close to it.
You’ll need certain values for your display later in this chapter, here’s a list of them – actually that’s my setting:
screen_width = 1024
screen_height = 768
video_clock = 65 #MHz
line_time = 336
half_sync = 17
back_porch = 40
v_sync = 12
v_blank = 52
v_pre_equalise = 6
v_post_equalise = 6
transfer_delay = 21
Also, a mouse is very much needed to use X Window (surprise!). So make sure your host OS (e.g. DOS) is actually running a driver for that – I recomment CuteMouse, very small, very complete.
Because it is essential that the X server runs on the same TRAM the framebuffer/graphic controller is located. This has some influence on how to configure the system.
Using an IMSB020 aka “BOZO”
Without any TRAM installed on your BOZO, make sure to run single_user! (check /etc/nsrc)
If you’re planning to run in multiuser mode the onboard CPU must not be the root processor!
So change the links using the on-board “Linkswitch” like this:
c:\>debug.exe
o 16C 3 (i.e. set bit 0 and 1 on port 0x16C)
q
This makes the TRAM in slot 0 root processor running the network server (/00) and the onboard T805 becomes /01
Files to edit
Edit “startx” in the Helios root directory. In line 22 it reads:
remote -d 00 run xhelios
change this to
run -d xhelios
Now read on at “General Setup”
Using a “remote” display TRAM (like IMSB419/437/438)
Like the comment in the startx file says “If you have a multi-transputer network you must make sure that the X server is started on the processor that has the grahpics hardware.”
Files to edit
Edit “startx” in the Helios root directory. In line 22 it reads:
remote -d 00 run xhelios
modify this to match your TRAM setup, eg. if your IMSB419 is connected to link 3 of your current (working) Transputer, it should read
remote -d 03 run xhelios
General Setup
Check your host.con file. Around line 41 you’ll find this section:
Xsupport
mouse_resolution = 2
mouse_divisor = 2
Make sure Xsupport is uncommented. The mouse settings seemed to be fine with all my tests – you milage may vary, so play around if needed.
Copy the file
newxrc from /local/xsrc/devices to /etc
and
twmrc and/or “mwmrc” from the root folder to your home (/users/root)
Now edit newxrc to match your display values as described in the beginning of this chapter. Also check the display hardware entry in line 293 (newg332.d).
If you’re using a IMSB020, you can enable native keyboard support in line 301.
Below that are keyboard layouts (US/GB/D) and number of mouse buttons. I’m not really sure if the “processor” and “progname” values are really used – I think they’re ignored.
Feel free to edit twmrc if you like more applications to start automatically etc.
Finally, if you are running a TCP/IP network stack (i.e. tcpip and inetd are sucessfully running) you don’t have to do anything further.
If you don’t run TCP/IP you have to append “notcp” in your startx line 22, eg:
run -d xhelios notcp
You’re Done. Now start X11 calling startx from the root directory.

